How to Add a World Border in Minecraft Server
Unlike Bedrock Edition servers, you don't need plugins to set the world border feature in your Minecraft Java Edition server. It is a simple yet powerful way to optimize your server for performance by limiting chunk loading. It helps guide player exploration, reduces lag, keeps adventures focused, and gives a new gameplay experience. Limiting how far players can travel can create a more manageable Minecraft world.
In this guide, we'll show you how to add a world border in Minecraft server and help you manage your world boundaries effectively.
Don't already host with us? 10,000+ server owners trust Sparked Host for lag-free Minecraft worlds. Claim your server savings to get higher performance at less $ per month.
Method 1: Using Commands
To add a world border in a Minecraft server, use the following commands:
Open your Apollo Panel
- Type
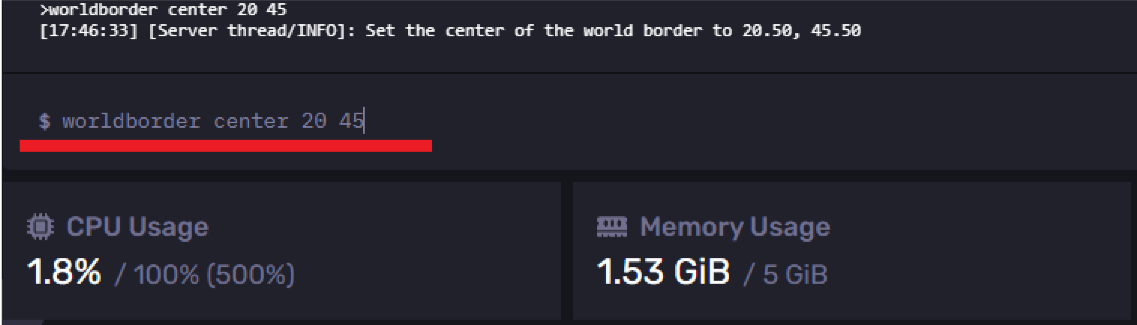
worldborder center <X> <Z>, which will set the world border's center
Example of setting the X and Z as 20 and 45: worldborder center 20 45
- Type
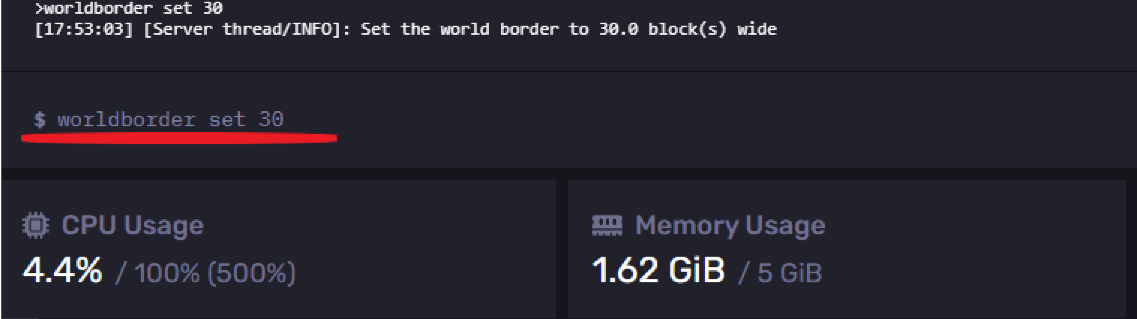
worldborder <set>, which will set the world border size
Example of setting the number of blocks to 30: worldborder set 30
Advanced World Border Commands
- /worldborder damage amount <value>
Causes players to take damage when they are near the border.
Example: /worldborder damage amount 5 (players in the worldborder take 5 damage per tick)
- /worldborder damage buffer <distance>
Sets the buffer distance within which players won’t take damage.
Example: /worldborder damage buffer 10 (players 10 blocks inside the border will not take damage)
- /worldborder warning distance <distance>
Sets the world border warning distance from the border where players are notified.
Example: /worldborder warning distance 50 (warns players within 50 blocks)
/worldborder warning time /worldborder warning time /worldborder warning time /worldborder warning time <seconds></s>
Sets the world border warning time when near the border.
Example: /worldborder warning time 10 (warning lasts 10 seconds)
- /worldborder add
<radius>[time]
Expands the world border to a new radius over a specified time.
Example: /worldborder add 2000 300 (expands to 2000 blocks in 5 minutes)
Method 2: Using WorldBorder Plugin
In this method, we use the WorldBorder plugin and make sure to use the compatible server version, Spigot/Bukkit. To add plugins to your Minecraft server, click here.
NOTE: If you are using multiple worlds, type your world's name after the /wb <worldname> set <values> while using the commands.- To set the world border type
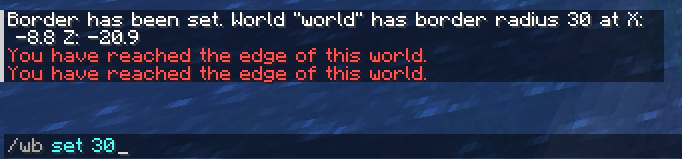
/wb set <value>
Example of setting the world border to 30: /wb set 30
Now, when you walk 30 blocks from where you set the world border, you'll get this warning
- To set the raduis type `wb set <X> <Z>

- To clear the world border created, type
/wb clear

- To change the border's shape to elliptic/round or square/rectangle type
/wb shape <shape>

- To fill the world up to the world border, this will generate all the chunks around, which could help increase the performance if done before the server is launched. Type
/wb fillthen to confirm/wb fill confirm
- To trim the world that is outside the world border, type
/wb trimthen to confirm/wb trim confirm
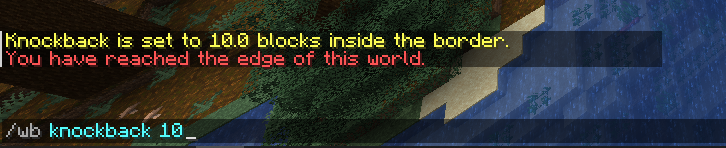
- To change the knockback done due to the world border, type
/wb knockback <value>
Example of setting the knockback to 10 blocks away from the border
To change the warning message type /wb setmsg <warning>
Method 3: Using World Border Mod
NOTE: To use the world border mod, you must also add the Collective mod to your mods folder.
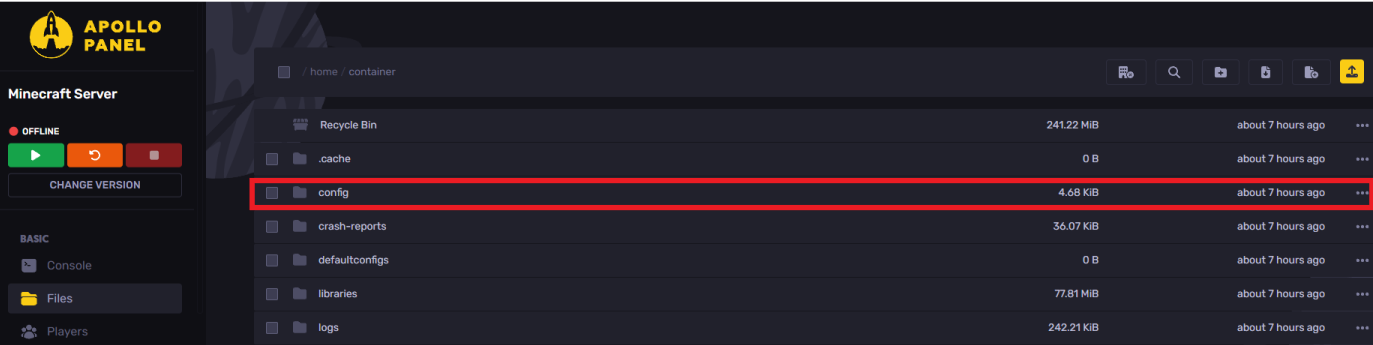
- Open your Files tab and locate the config folder
- Now, open the folder named worldborder.json5

You can now configure and edit all the mod settings with the following configurations
- enableCustomOverworldBorder (default: true): Enables the custom border in the Overworld.
- enableCustomNetherBorder (default: false): Enables the custom border in the Nether.
- overworldBorderCoords (default: [(-5000, -5000), (5000, 5000)]): Sets the Overworld border coordinates.
- netherBorderCoords (default: [(-625, -625), (625, 625)]): Sets the Nether border coordinates.
- loopAroundBorder (default: false): When enabled, players hitting the border are teleported to the opposite side, creating a looping world effect
Still have some questions about setting the world border?
If you want answers to your questions, you can file a ticket here
By: Ali A.
Updated on: 03/11/2025
Thank you!