How to Add Another World to Your Minecraft Server (Multiverse Plugin)
Ready to turn your Minecraft server into a multi-world adventure hub? The Multiverse plugin—specifically, the Multiverse-Core plugin and Multiverse-Portals—is a feature-packed world management solution plugin that lets you create Multiverse portals, manage custom world aliases, and support world scaling, making it easy to explore multiple worlds.
Want a survival world, a creative build zone, or a “Why hello, Creeper World” challenge map? You can launch users into custom worlds, link areas with MV portals, custom portals, and other portals. Even load existing worlds or custom generators—all in-game. Whether you need to break Multiverse or build your own world management plugin, this guide is happy to show you how to use Multiverse plugin Minecraft to manage everything from world share data to fixing issues like Multiverse missing.
Don't already host with us? 10,000+ server owners trust Sparked Host for lag-free Minecraft worlds. Claim your server savings to get higher performance at less $ per month.
Key Features of Multiverse Plugin
- Manage nether and end worlds separately
- Create specific portals to a specified Multiverse world
- Set per-world modifications and spawn points
- Have separated player stats and customizable permissions for different worlds
- Full world management plugin suite to restrict users and
Downloading The Multiverse Plugin
To download the Multiverse Plugin:
- Download Multiverse-Core here
- Open your Apollo Panel and head over to the "Files" tab
- Upload the plugin jar file into the “plugins” folder

Generating a World With Multiverse
Once you have the Multiverse plugin installed, you can start generating new worlds.
To generate a new world with the Multiverse plugin:
- We can create a new world by using the
/mv createcommand. You can type/mv createto view the /mv create command list.

If you want to create a normal survival world, you can do so by typing:
/mv create [World Name] normal. The term "normal" refers to a normal survival world.
Same as the Nether World and The End World. Replace "normal" with "nether" or "end" to create the Nether World or The End World.
Importing An Already Created World Into Multiverse
If you already have a world you'd like to add, you'll need to import it.
To import a Minecraft world to use with the Multiverse plugin:
- Before we start importing the world with the plugin, we will need to convert the world folder into .zip file.
- After zipping the folder, navigate to your server’s “File Manager”
- After that, drag and drop or upload the zip file to the home directory.

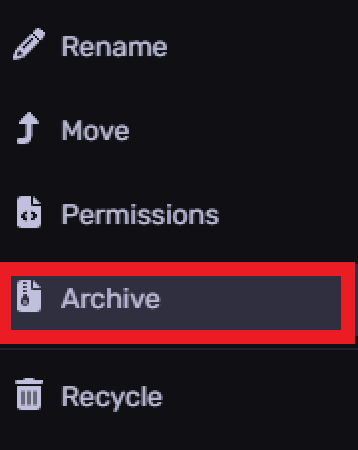
- Now, we need to unarchive the zip file into the folder. To do so, you have to click on the “three dots” icon beside the upload date/time.

- Hit the “Unarchive” button.
- After it is unarchived, proceed to the console and type the following command
/mv import [Folder Name] [Type]. If your world is created in a normal survival world, simply replace the type as “normal”, same as a nether world or an end world.
How To Use Multiverse Plugin
Below is a list of useful in game commands you can use for the Multiverse plugin:
World Management
- /mv create <name> <env> – Create a new world (normal, nether, or end)
- /mv import <folder> <env> – Import an existing world into the server
- /mv remove <name> – Remove a world from the Multiverse configuration
- /mv unload <name> – Unload a world without deleting it
Teleportation
- /mv tp <player> <world> – Teleport a player to a specified world
- /mv spawn <world> – Go to the spawn point of a specific world
World Settings
- /mv modify set <property> <value> – Modify settings like difficulty, game mode, or alias
- /mv gamerule <world> <rule> <value> – Set gamerules for individual worlds
Information & Utilities
- /mv list – Display all loaded worlds
- /mv info <world> – View properties and settings for a world
- /mv who – List players in each world
- /mv version – Show the current Multiverse-Core version installed
Still have some questions about using the Multiverse plugin?
If you require any further help, please create a ticket here.
By: Ali A.
Updated on: 03/11/2025
Thank you!