How To Allocate More RAM To Minecraft
Learning how to allocate more RAM to Minecraft is key to improving performance, reducing lag, and preventing crashes—especially when using mods or hosting a Minecraft server. The default Minecraft launcher doesn’t allocate much memory, which can slow down your system.
By allocating more RAM, you enable the game to utilize additional resources, resulting in smoother gameplay and faster loading times. Just be careful not to assign too much RAM, as your PC’s total memory also needs to support other programs.
Finding the right balance keeps Minecraft running smoothly and efficiently. If you’re still experiencing the same problem, allocating more RAM often helps fix it.
Don't already host with us? 10,000+ server owners trust Sparked Host for lag-free Minecraft worlds. Claim your server savings to get higher performance at less $ per month.
Figuring Out How Much RAM You're Currently Using
The way you allocate RAM can vary depending on which launcher you’re using, as each has its own settings, file layout, and adjustment options. Some launchers display a slider or box for memory, while others require manual editing of configuration values. Always check your installed version and verify that the changes were saved correctly before you run the game. In the sections below, we’ll show the methods for several popular Minecraft launchers so you can easily adjust your RAM allocation.
In The Minecraft Launcher
- Open the Minecraft launcher.
- Head over to the Installations tab.

- Select the used Minecraft version.
- Click More Options
- Allocate more RAM to the
-Xms
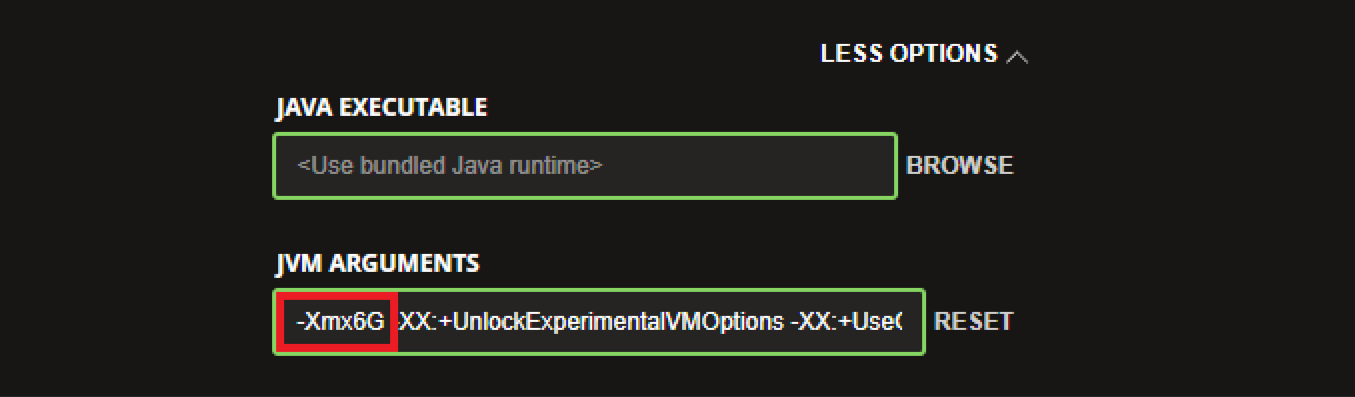
- Hit Save. You can now start and play Minecraft with more RAM allocated.
In Curseforge App
- Open the Curseforge Launcher.
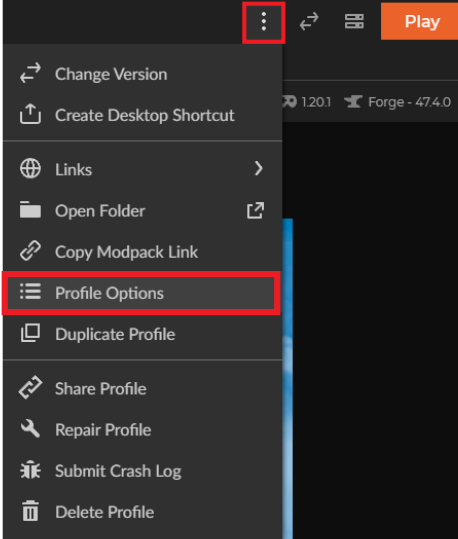
- Select the used modpack.
- Click on the three dots.
- Choose Profile Options
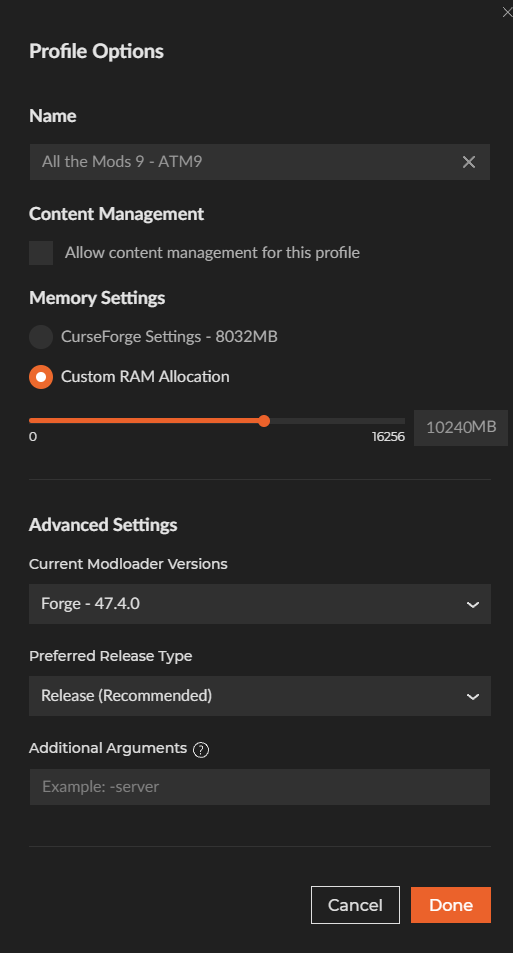
- Select Custom RAM allocation
- Add RAM as desired and hit Done
In FTB App
- Open the FTB Launcher.
- Select the desired modpack.
- Click Settings
- Now, allocate the desired RAM

In Technic Launcher
- Open the Technic Launcher.
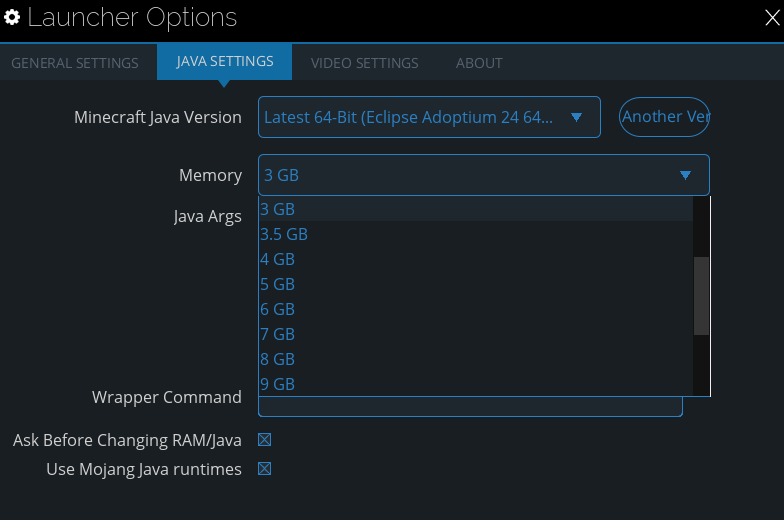
- Head over to the Launcher Options.
- Select Java Settings.
- Choose the RAM you'd like allocated for the Launcher.
In MultiMC
- Open the MultiMC Launcher.
- Select the version used.
- Click on Edit Instance
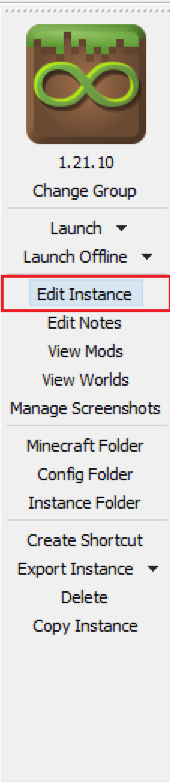
- Head over to the Settings tab.
- Inside the Java options, check the Memory setting.
- Continue by editing the memory allocation.

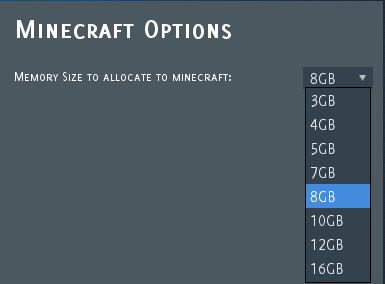
In VoidLauncher
- Open the VoidLauncher App.
- Press on Options in the top right corner.
- Edit the allocated RAM under the Minecraft Options.
Still have some questions about allocating more RAM to Minecraft?
If you need any further instructions, you can log in and file a ticket here.
Updated on: 03/11/2025
Thank you!