How To Connect Discord To Minecraft Server Using DiscordSRV
Connecting Discord to your Minecraft server creates a seamless bridge between in-game activity and your community chat. With the right setup, you can sync messages, send alerts, and even run commands across platforms.
One of the best tools for this job is DiscordSRV—a powerful plugin that connects your Minecraft server directly to a Discord channel. It supports chat relay, voice activity tracking, and can be customized for nearly any use case. Let’s walk through how to install and configure DiscordSRV for your server.
In this guide, we'll show you how to connect Discord to Minecraft server.
Don't already host with us? 10,000+ server owners trust Sparked Host for lag-free Minecraft worlds. Claim your server savings to get higher performance at less $ per month.
Creating a Discord Bot
First, you will need to create a Discord bot for your Minecraft server:
- Click on "New Application" here

- Open the "Installation" tab, and disable
User Installand setInstall Linkto "None" and save the changes

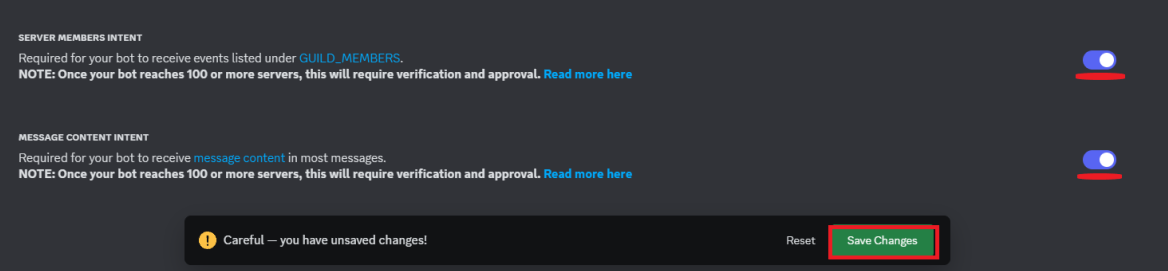
- In the "Bots" tab, enable
SERVER MEMBERS INTENTandMESSAGE CONTENT INTENTand save the changes
You've now created the Discord bot. Now, install the DiscordSRV plugin and start configuring your bot with the plugin as shown below.
Installing DiscordSRV
Make sure to use the compatible server version with the plugin. To check out how to change your server version, click here.
You can install the DiscordSRV plugin using our "Plugins" tab.
To manually install DiscordSRV:
- Install DiscordSRV
- Open your Apollo Panel
- Open the Files tab and navigate to the "plugins" folder
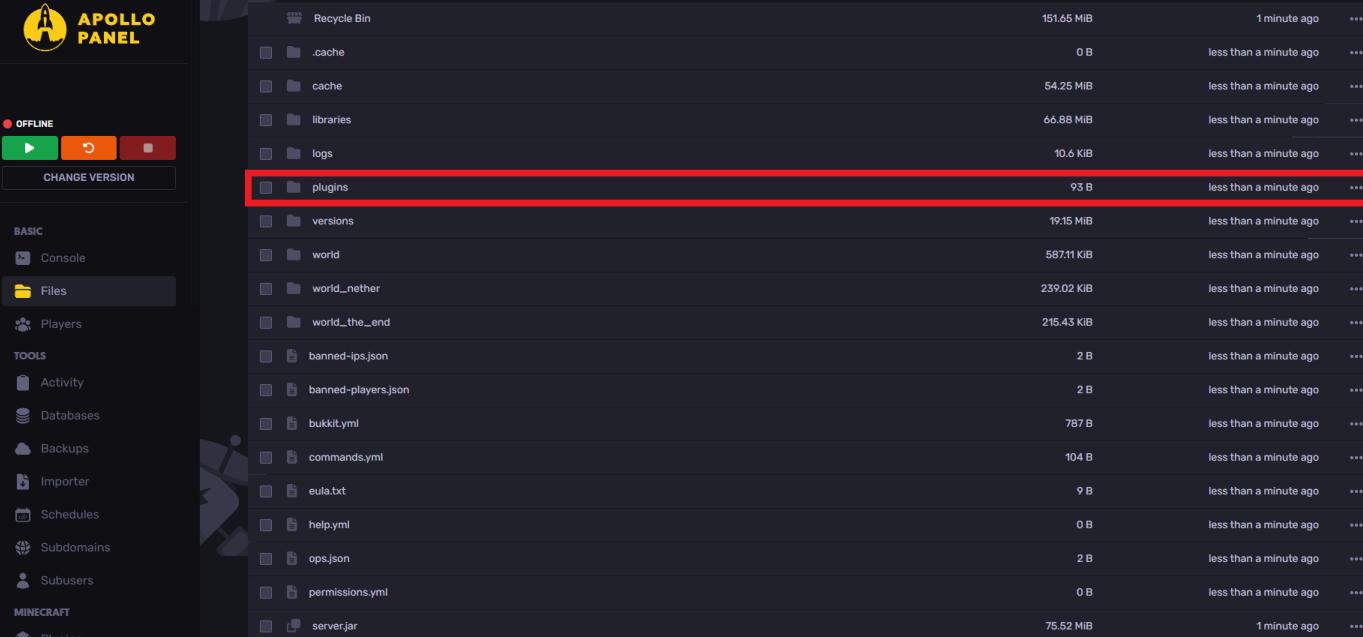
- Upload the installed plugin to the plugins folder

Once done, you've now installed the DiscordSRV plugin. Start your server and have fun!
Configuring DiscordSRV
To configure the DiscordSRV and make it work using Discord channels do the following:
- In the "Bots" tab, scroll up and click on "Reset token" and copy the bot token generated

- In your "plugins" open "DiscordSRV" then open the "config.yml" folder
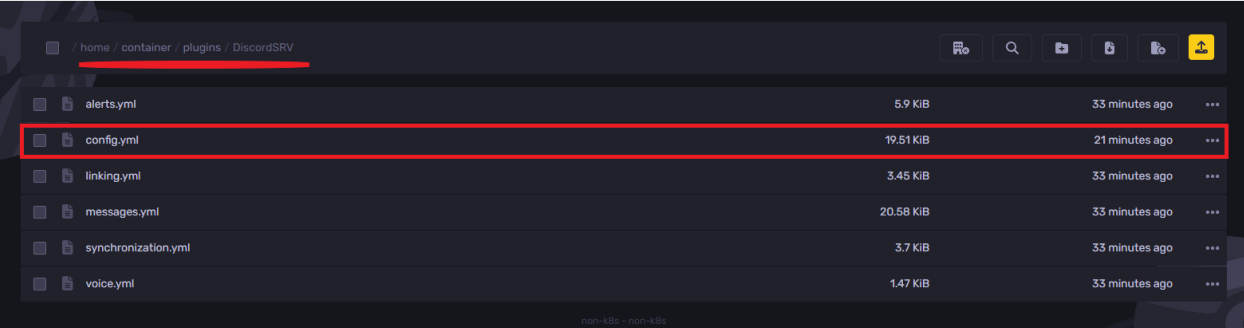
- Find the line
BotToken: "BOTTOKEN"and add the token copied as shown in the example below and save the changes

- Now, back in your Application, open the "General Information" tab and copy the "Application ID"
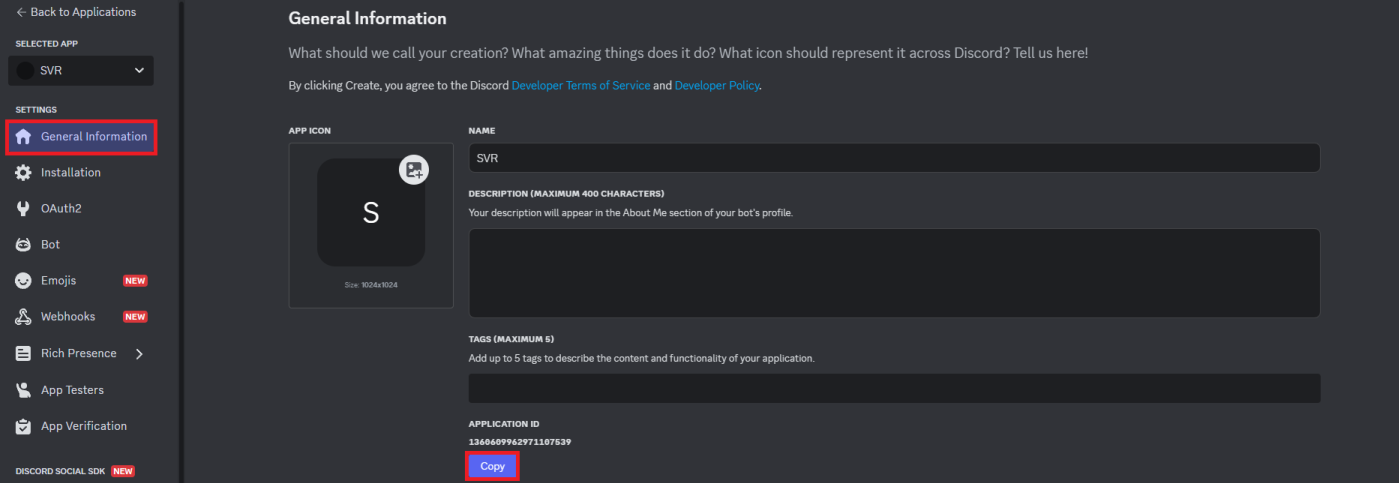
- Head over to this link and paste the ID copied
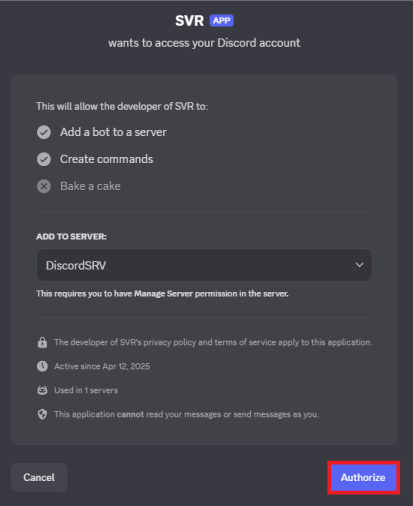
- Click on "Authorize" for the bot to access your Discord account and join the Discord server
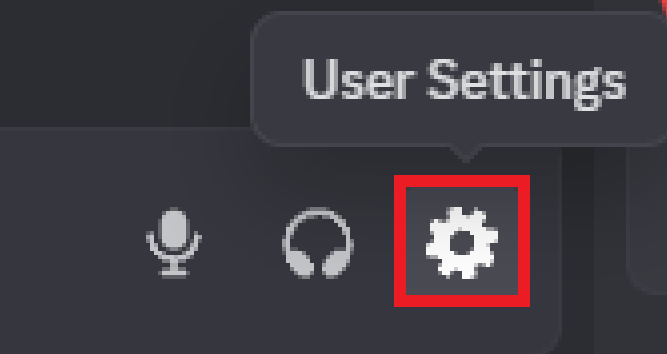
- Make sure to enable developer mode for this step. To do so, do the following:
1- Open the Discord user settings
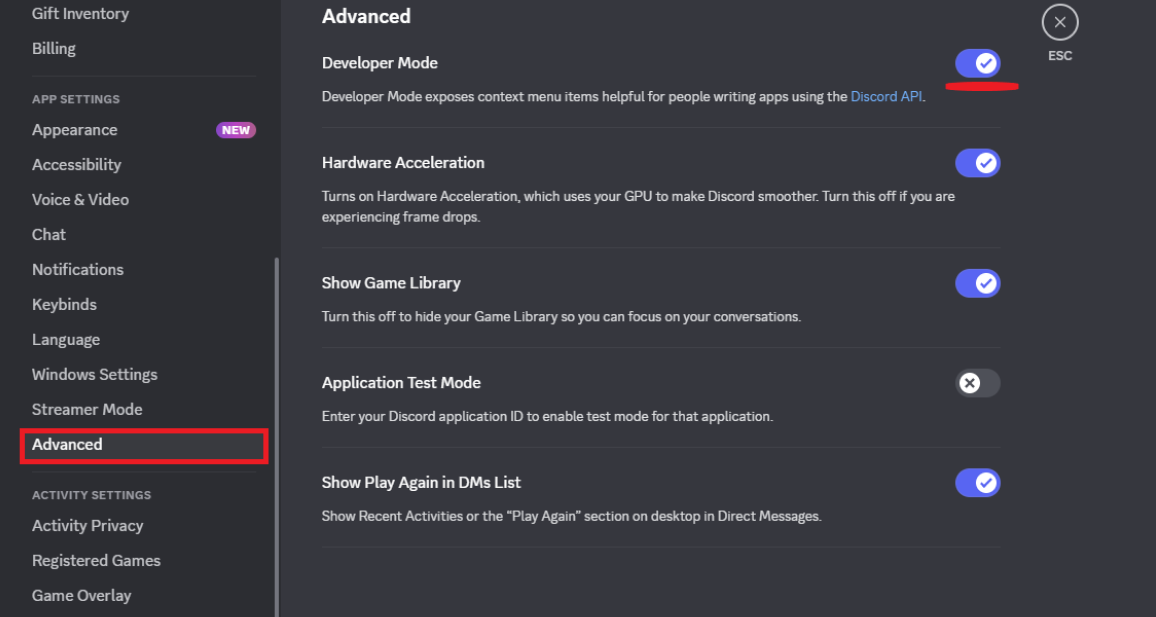
2- Navigate to the "Advanced" tab and enable developer mode
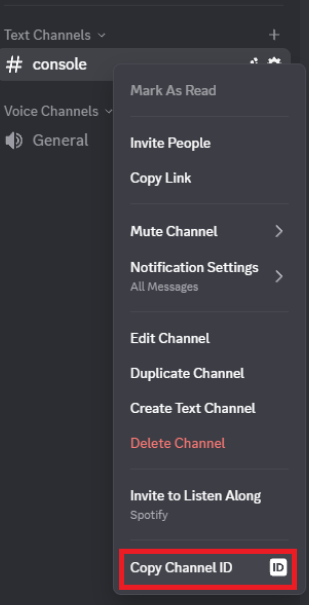
- Once enabled, go to the text channel you'd like to use and right-click and click on "Copy Channel ID" to copy the channel's server ID
- Now, back to the "config.yml" file, find the line
Channels: {"global": "000000000000000000"}and replace the "000000000000000000" with the channel ID copied as shown in the example below

- Make sure to create an admin role for the bot to work. To create an admin role, do the following:
1- Open the server settings and head over to the "Roles" tab
2—Click on "Create Role" and go to the "Permissions" tab. Scroll down to enable "Administrator" and click on save.
3- Assign the Bot to the role created
Once assigned, you can run your server, and the bot should work if the steps are followed carefully. You'll get the Minecraft chat and console in the desired server channel on Discord.
You can now log into your Minecraft account and send anything in the chat, and you'll see the chat through the Discord channel created.
Still have some questions about using DiscordSRV for your Minecraft server?
If you need any further help, open a ticket with our support ticket system here
By: Ali A.
Updated on: 03/11/2025
Thank you!