How To Create A VPS On A Dedicated Server
Looking to get more out of your dedicated server? Creating a VPS (Virtual Private Server) is a powerful way to divide and manage resources efficiently—perfect for hosting websites, applications, game servers, or private environments. This setup gives you greater control without the overhead of multiple physical machines. In this guide, you'll learn how to turn your dedicated server into multiple isolated VPS instances using virtualization tools like Proxmox.
Key steps include:
- Installing a hypervisor on your dedicated server
- Creating and configuring virtual machines
- Allocating resources like CPU, RAM, and storage
- Securing and managing each VPS environment
Let’s dive in.
VPS vs. Dedicated Server: What's The Difference?
What Is A VPS?
A VPS (Virtual Private Server) is a software-defined virtual server that runs on a physical server using virtualization technology. It functions like a standalone server with its own Operating System, storage, and dedicated resources, making it ideal for VPS Hosting, Website Deployment, or Application Testing.
What Is A Dedicated Server?
A dedicated server is an entire physical machine allocated to one client or organization. Unlike shared hosting, it offers complete control, full processing power, and full storage space, making it the preferred choice for high-performance needs like server administration, large-scale applications, or resource-intensive online projects.
What's The Difference?
While both serve hosting needs, a dedicated server offers full access to the entire physical server, whereas a VPS splits that machine into multiple VPS servers. VPS hosting is more cost-effective and scalable, but dedicated hosting delivers maximum performance and isolation.
Can any dedicated server be split into VPS nodes?
Yes, as long as your dedicated server supports virtualization technology, you can create multiple VPS instances on the same physical server. Tools like Proxmox VE make this possible, provided your hardware supports virtualization in the BIOS or UEFI settings.
Step 1: Installing A Hypervisor On Your Dedicated Server
To begin, you’ll need to install virtualization software. We’ll be using Proxmox VE, a free and open-source virtualization platform based on Debian Linux. If you don't have Proxmox VE installed, here's how to do so:
- In DCIM, under the Reinstallation Tab, select the version of Proxmox VE you want to install. For this guide, we will be installing "Proxmox VE 8".
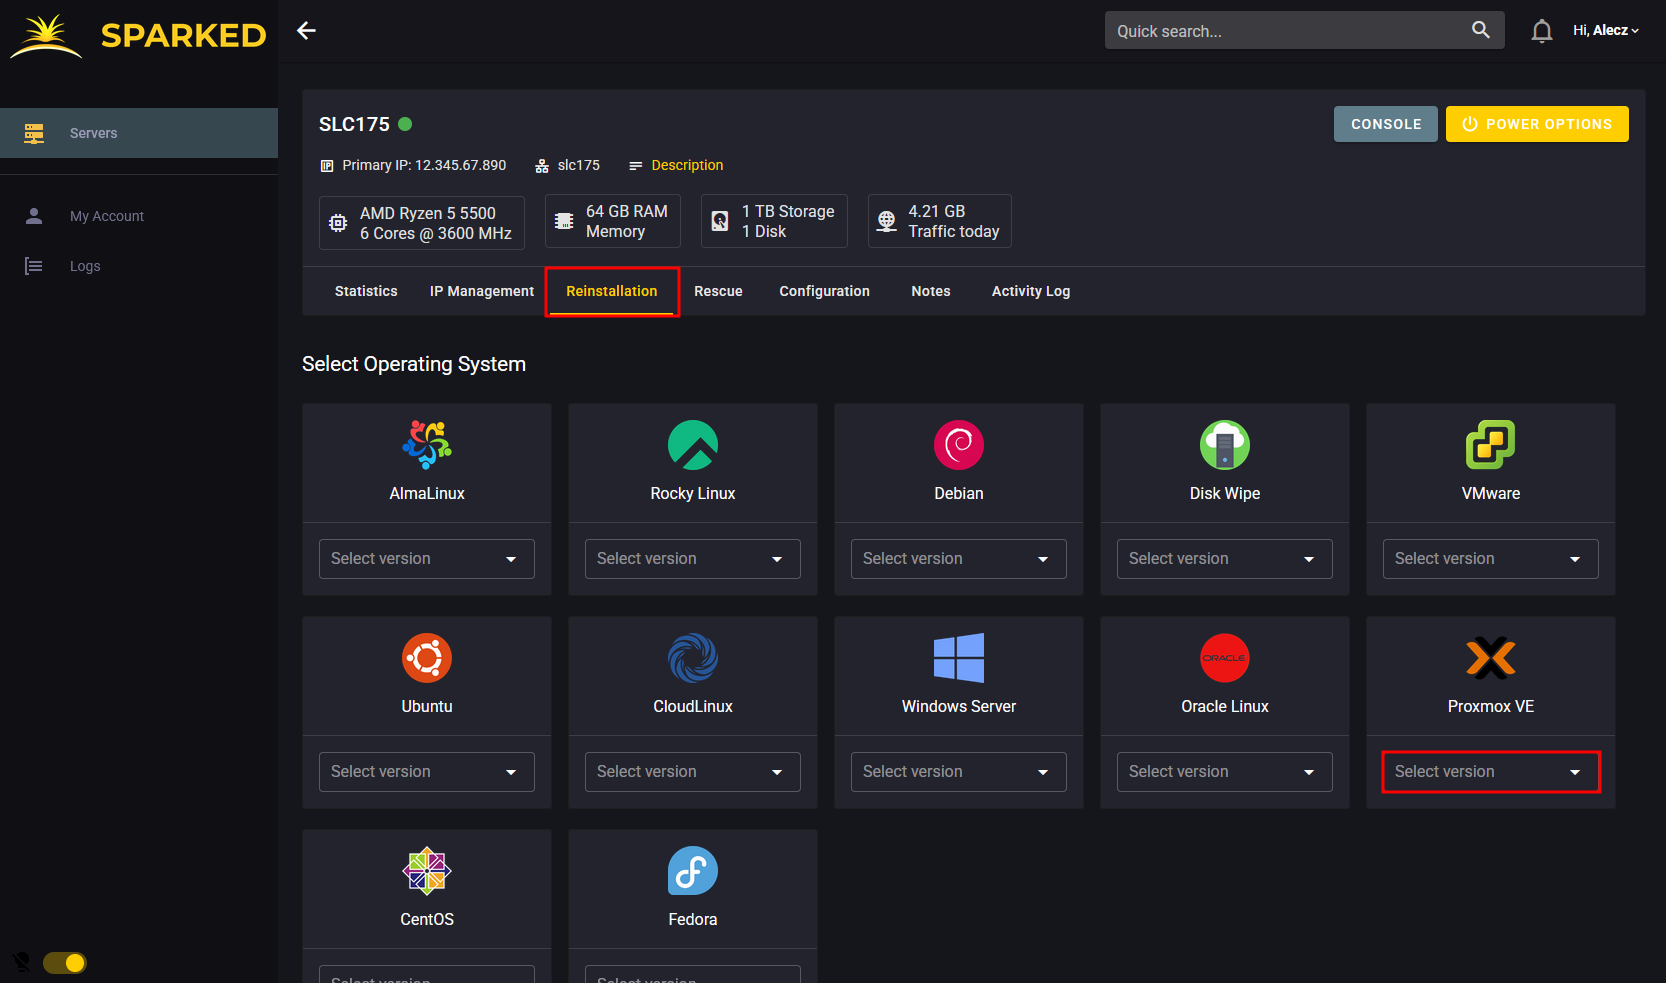
- After selecting the Operating System, set a unique root password and take note of it, as we will use this to access the Proxmox VE Web GUI.
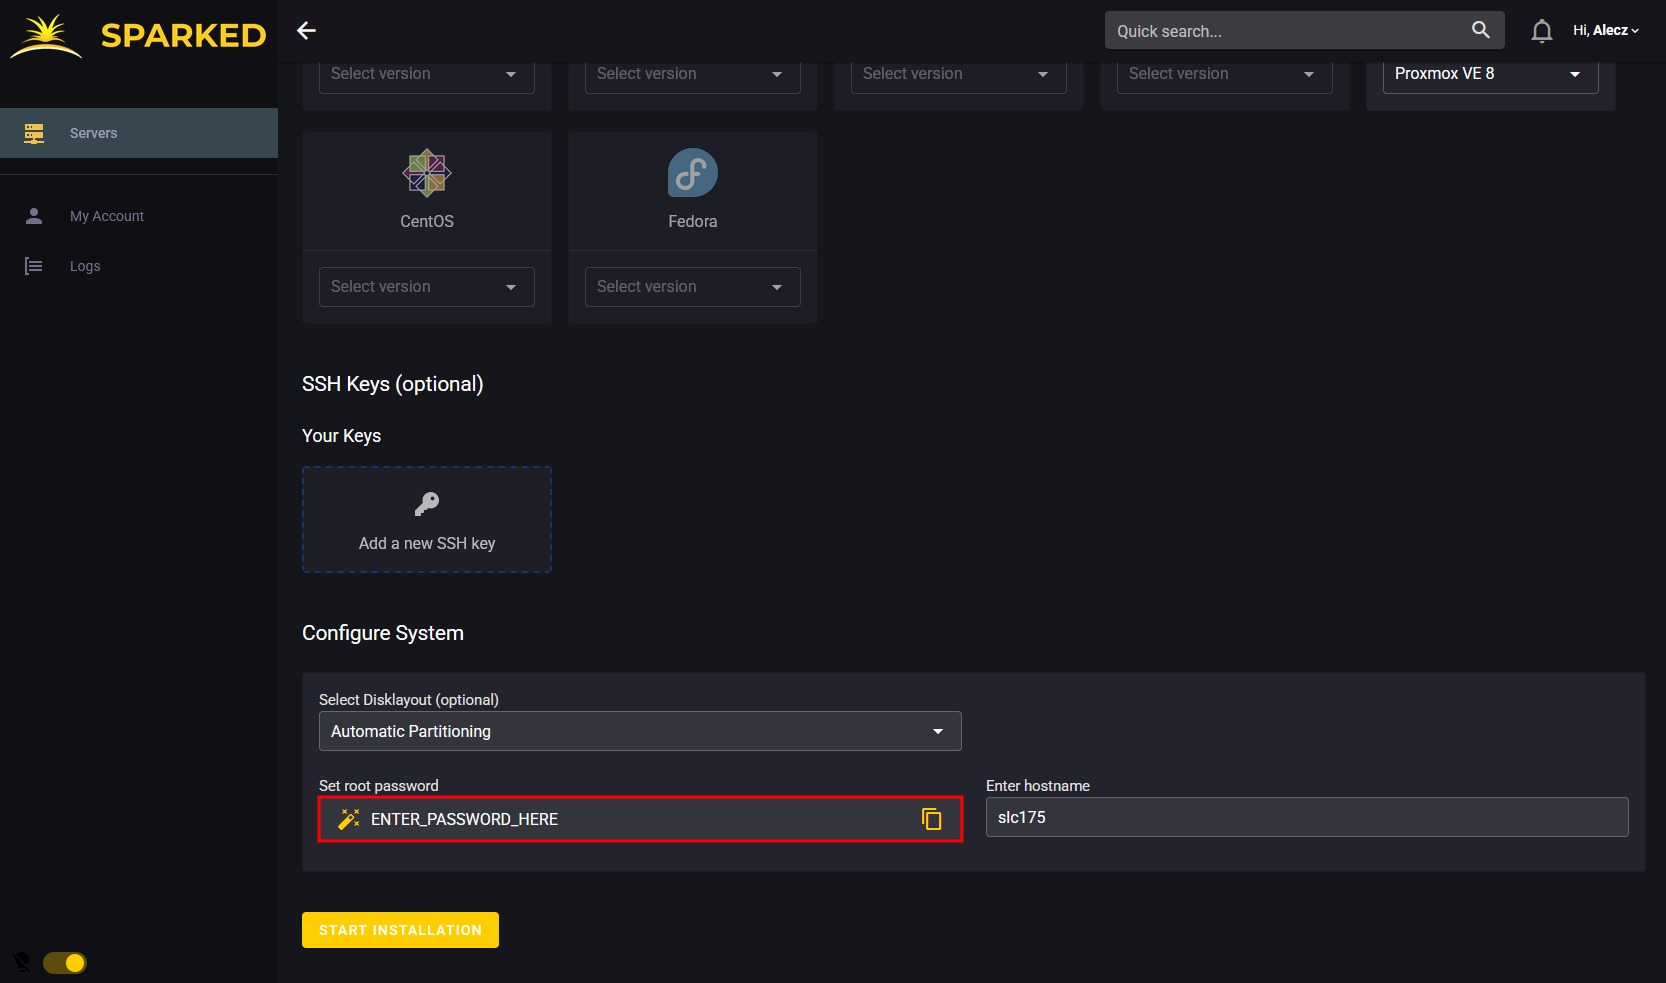
- Once you've set your Root Password, click "Start Installation", and the panel will handle installing Proxmox VE. After it is installed, you can now proceed to the next step.
Step 2: Upload the OS ISO to Proxmox
Before you create an LXC Container (which will act like a VPS), you’ll need to upload the installation ISO to your Proxmox storage so it can be selected during VPS setup.
- Log in to the Proxmox VE Web GUI, using "root" as the username, and your root password as the password on Proxmox (to access it, connect to https://12.345.67.890:8006, but replace "12.345.67.890" with your Dedicated Server's Main IP Address).
- In the left navigation, click on the node name (for this guide, it is "slc175"), then under that, select your storage (for this guide, it has the label "local").
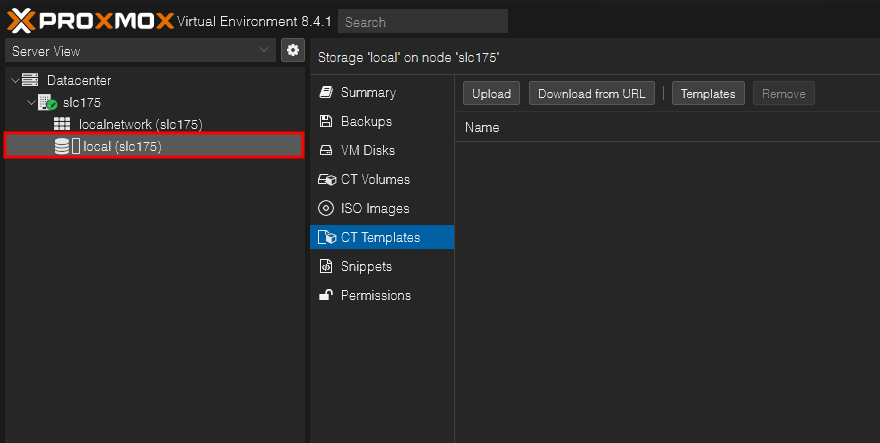
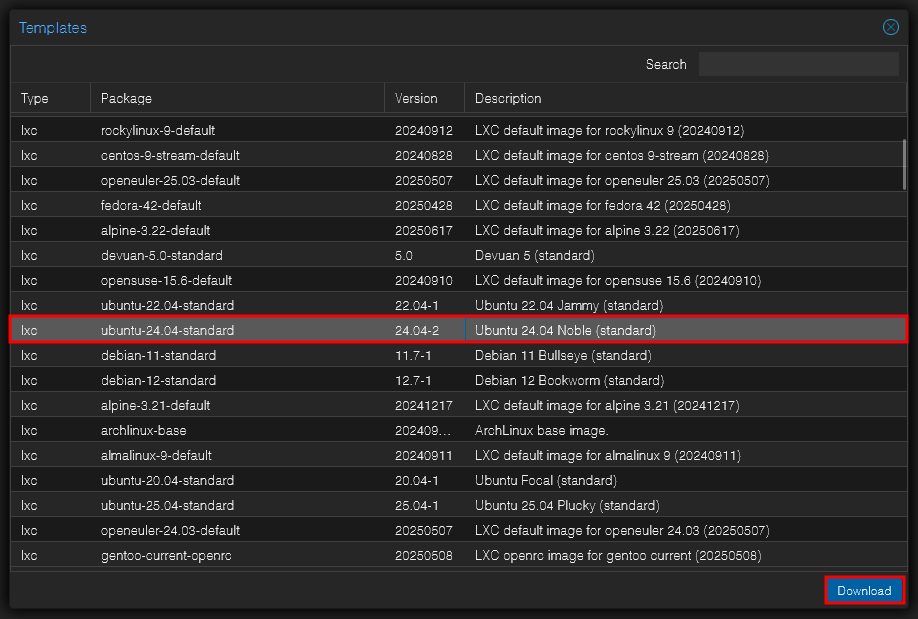
- Choose the "CT Templates" tab.
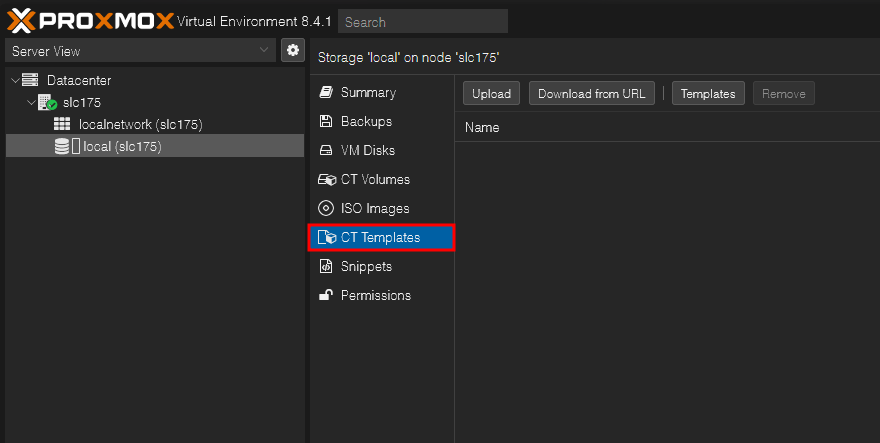
- Now, click "Templates" and choose any of the packages available. For this guide, we will install the "ubuntu-24.04-standard" template. Once you have selected a template, click on the "Download" button.
Step 3: Configuring LXC Containers
After uploading the ISO file for the LXC Container's Operating System, you’re ready to create LXC Containers that will act as your VPS servers.
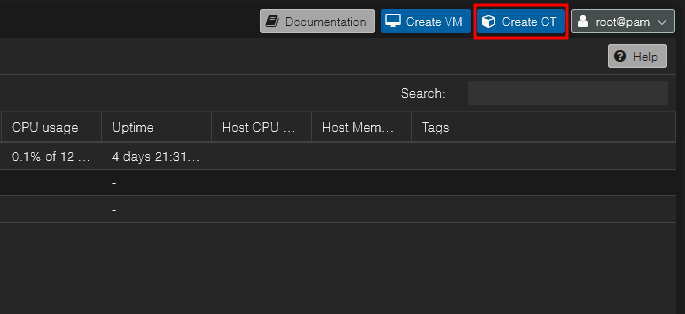
- In the Proxmox GUI, click "Create CT".
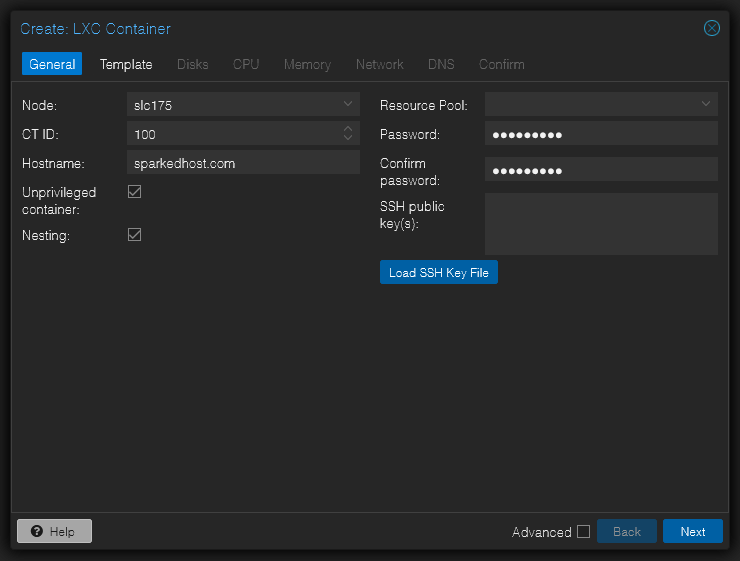
- Set the hostname and the password of the LXC Container. Afterwards, click on "Next".
- Next, select the template that we downloaded earlier by clicking on the "Template" field, then proceed to the next step by clicking "Next".

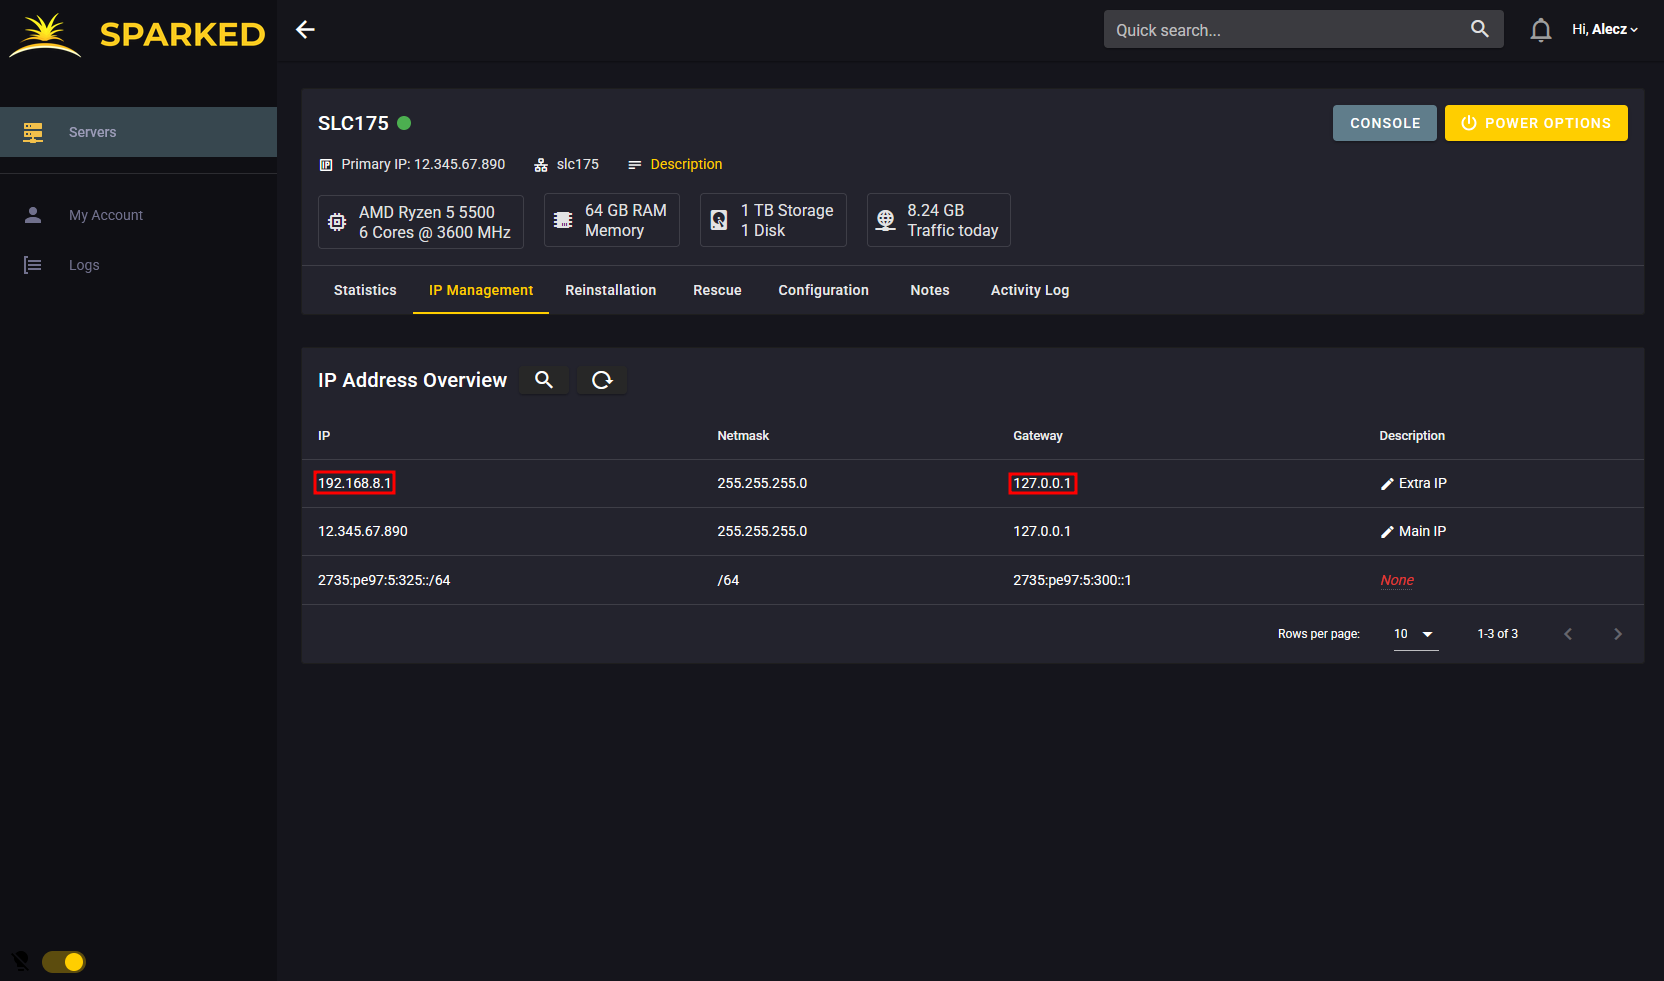
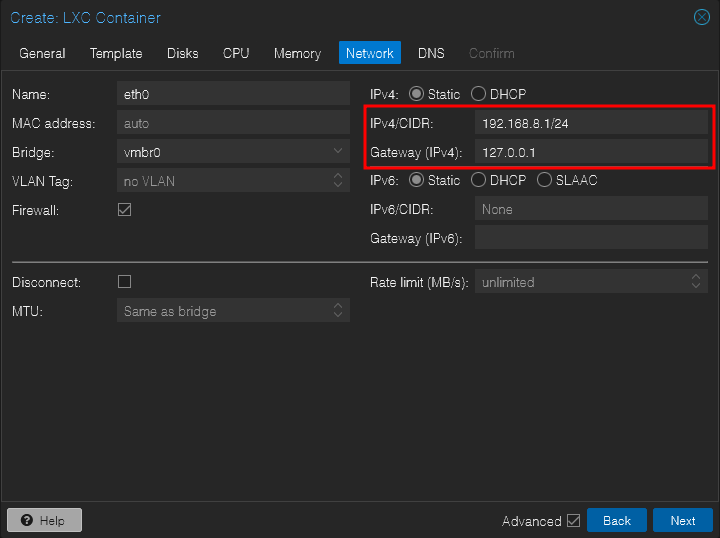
- Now, you get to configure the other settings for the VM, such as the Disk space, CPU power, and Memory Limits. When you get to configure the Network Settings, make sure you copy the IP Address you will use for the VPS and its Gateway, and enter it in the IPv4 section(make sure you add "/24" at the end of the VPS IP Address.
- After configuring the container, click on "Finish" to create the LXC Container.
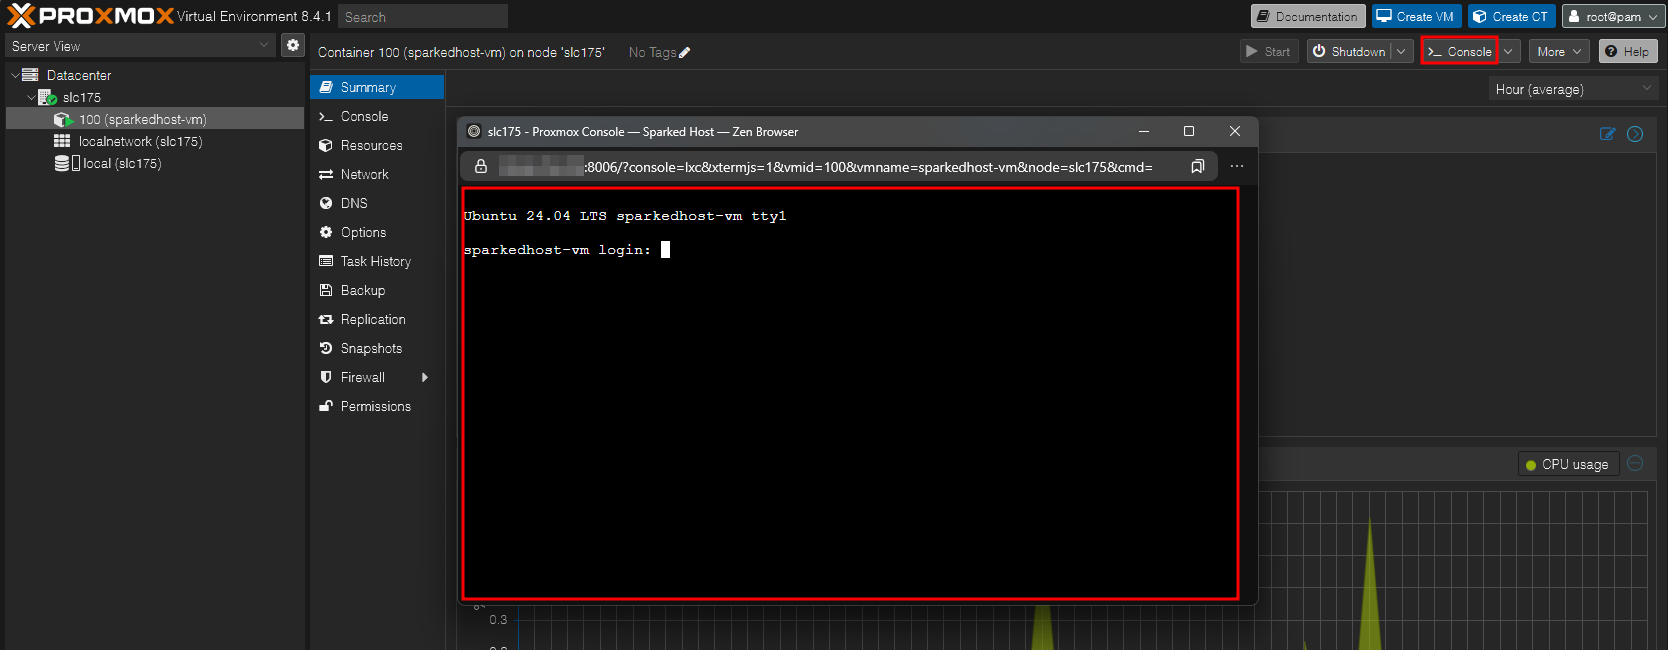
- Now, we can go to the LXC Container using the left sidebar and click on "Start" to boot up the VPS.

- Once you have started the container, click on the "Console" button and log in using "root" as the username and the password that you have set earlier when creating the LXC Container.
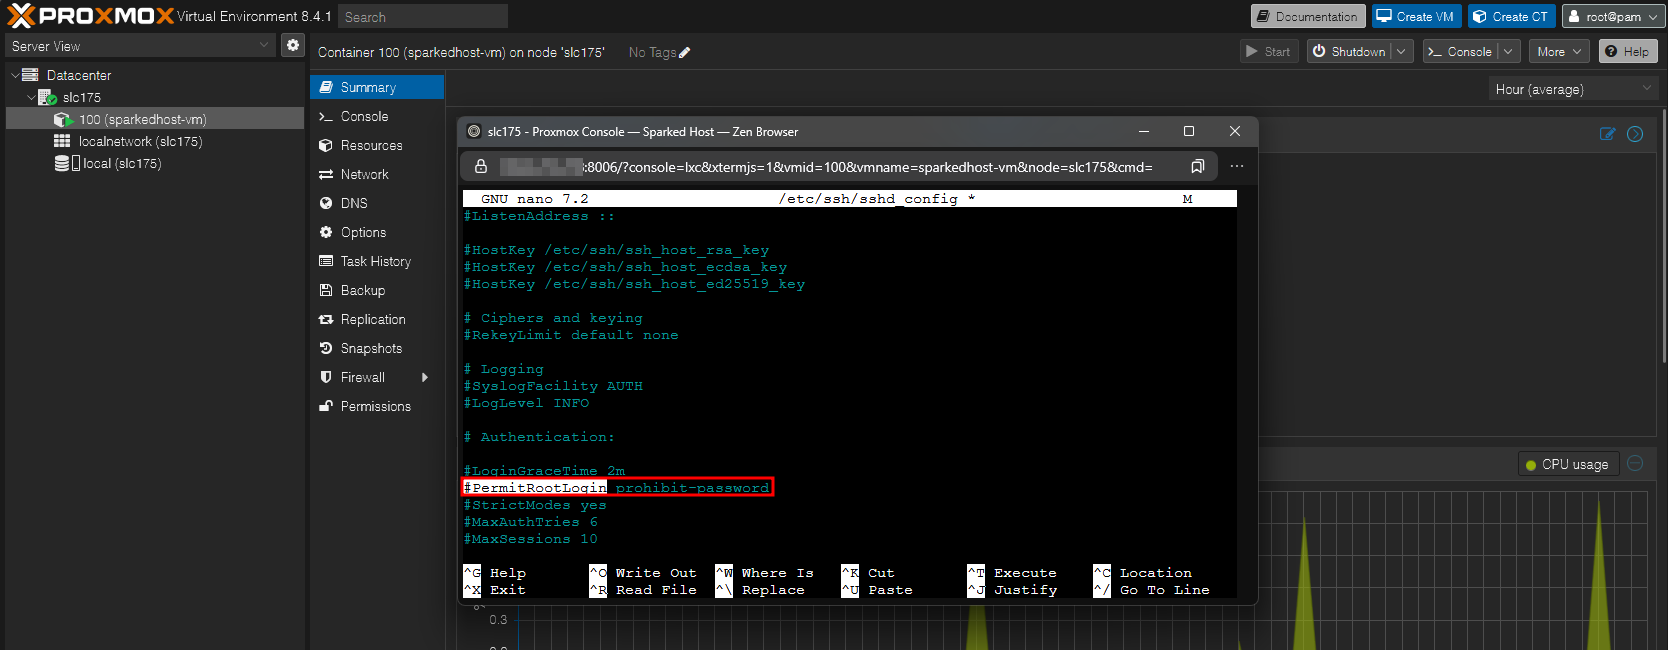
- Enter the command "nano /etc/ssh/sshd_config" to edit the SSH config. Then look for the line that starts with "#PermitRootLogin".
- Modify the line to "PermitRootLogin yes", then save the file by doing "Ctrl + X", then "Y", and then "Enter".
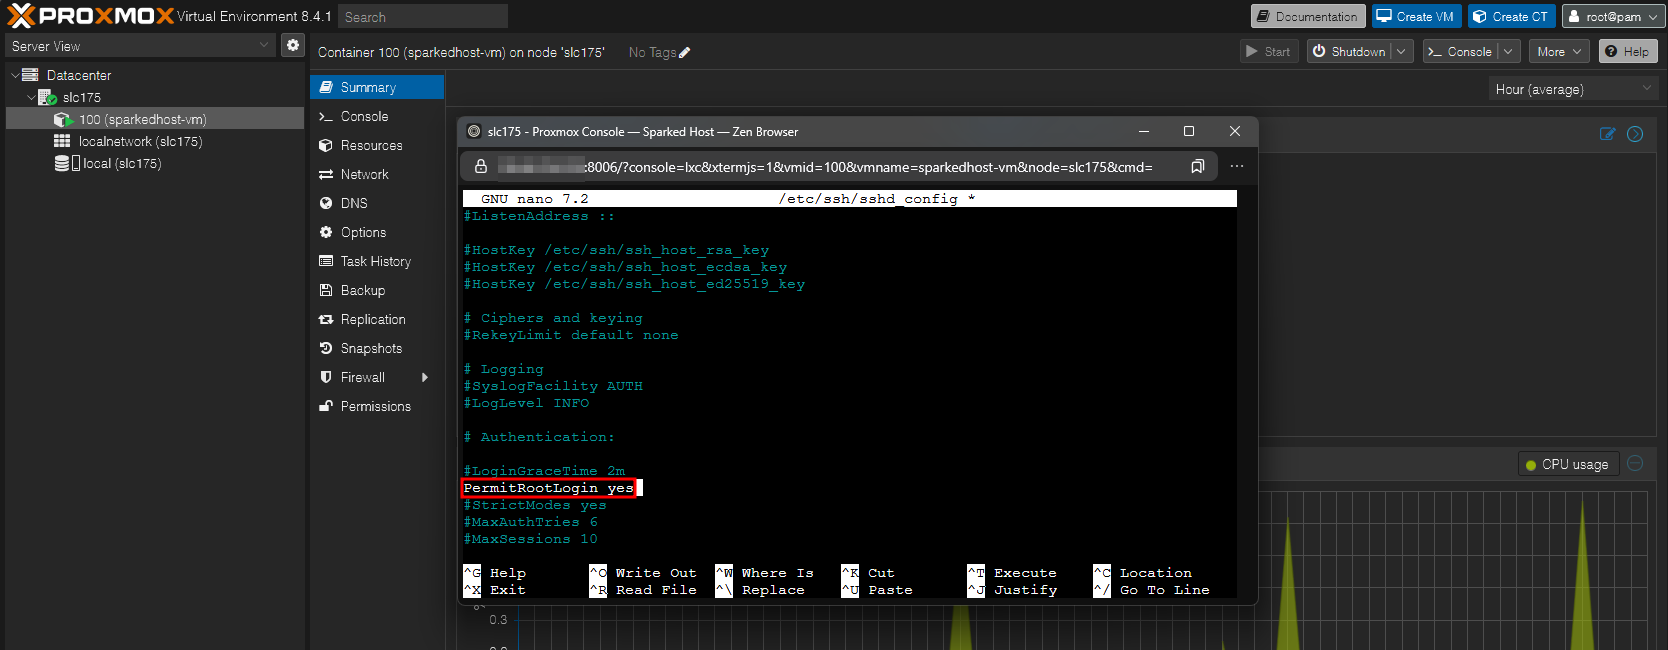
- Apply the new config by running the command "service ssh restart", then you will now be able to SSH into your VPS externally using the SSH command or an SSH Client.
Still have some questions about making a VPS on a dedicated server?
Feel free to open a ticket with our support team, we're available 24/7 to assist!
By: Alecz R.
Updated on: 15/07/2025
Thank you!