How To Disable Easy Anti Cheat - 7 Days To Die
Disabling Easy Anti-Cheat (EAC) in 7 Days to Die can help with mod compatibility or private server setups, especially if you're encountering connection issues or running custom scripts. EAC is enabled by default, but you can turn it off directly through the game launcher.
This won’t affect your single-player experience or private servers that also have EAC disabled. However, keep in mind that you won’t be able to join official or EAC-protected servers while it’s turned off. Once disabled, the game will launch in a mode that skips EAC verification, allowing more flexibility for modded play.
Don't already host with us? 10,000+ server owners trust Sparked Host for servers on games like 7 Days To Die. Claim your server savings to get higher performance at less $ per month.
How To Disable Easy Anti Cheat (EAC) On Your Computer For 7D2T
To disable Easy Anti Cheat for 7 Days To Die on your computer:
- Open Steam Library:
- Launch the Steam client and go to your Library.
- Locate 7 Days To Die:
- Find "7 Days To Die" in your game list.

- Click "Play" and Choose Launch Option:
- Click the green "Play" button.
- A small pop-up window will appear, giving you different launch options:
- "Run 7 Days To Die": This is the default and will launch the game with EAC enabled.
- "Run 7 Days To Die (AntiCheat disabled)": This option will launch the game with EAC disabled.
- Select the "AntiCheat disabled" option:
- Choose "Run 7 Days To Die (AntiCheat disabled)" and click "Play."
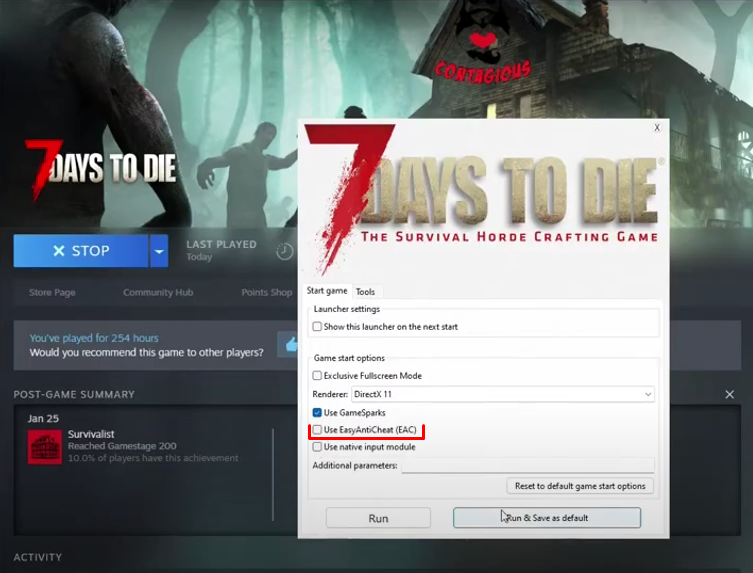
- Your game client will now launch without EAC, allowing you to connect to servers where EAC is also disabled.
- Matching Settings are Key: Remember, the server's EACEnabled setting and your client's launch option must match.
- EAC Server true + EAC Client true = CONNECT
- EAC Server false + EAC Client false = CONNECT
- EAC Server true + EAC Client false = CANNOT CONNECT
- EAC Server false + EAC Client true = CANNOT CONNECT
How To Disable Easy Anti Cheat (EAC) On Your Server For 7D2T
Disabling EAC on your server involves editing a specific setting in your serverconfig.xml file.
To disable Easy Anti Cheat for 7 Days To Die on your server:
- Stop Your 7 Days To Die Server:
- Access your server's control panel or console and ensure the server is completely shut down.
- Go to the file manager.
- Locate and Open serverconfig.xml:
- In the main directory of your 7 Days To Die server, find the file named serverconfig.xml.
- Open this file.
- Find the EACEnabled Property:
- Use the text editor's search function (Ctrl+F) to find EACEnabled.
- You'll typically find a line that looks like this:
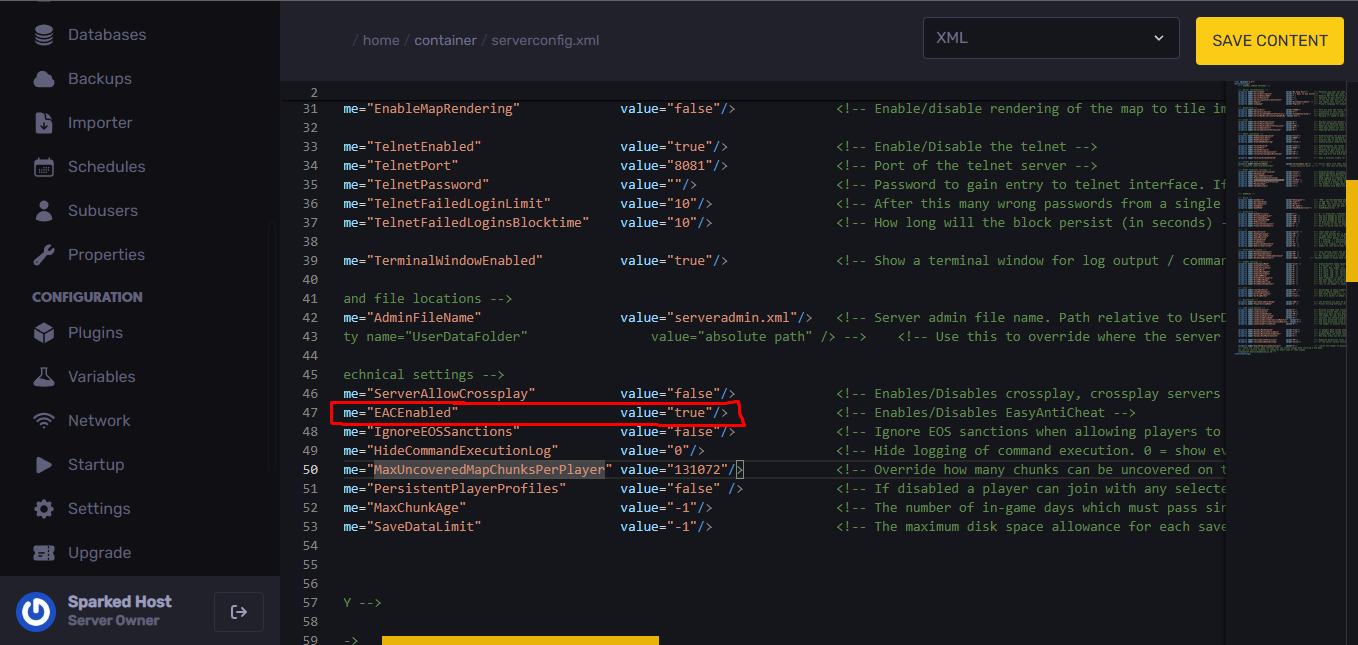
- Change the Value to false:
- Edit the value attribute from "true" to "false".
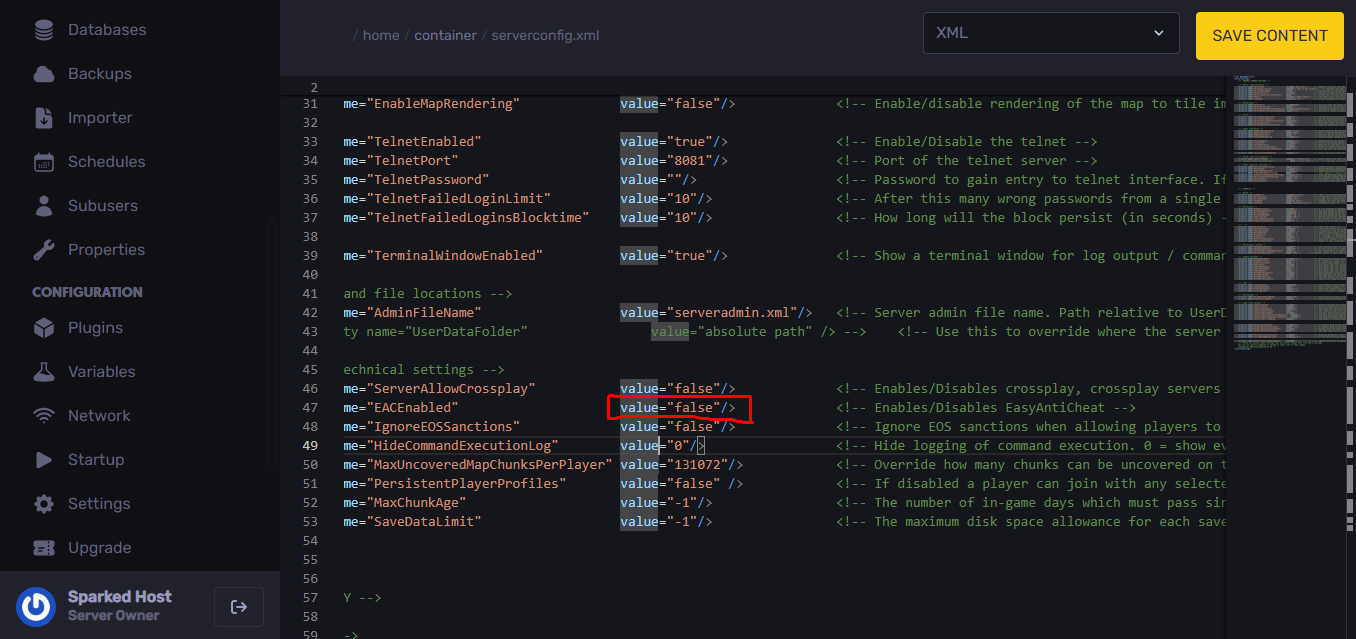
- Save the serverconfig.xml file: Make sure to save your changes after editing the file.
- Restart Your 7 Days To Die Server: For the changes to take effect, you must stop and then start your server. Monitor the server console during startup for any errors
- Remember, the server's EACEnabled setting and your 7 Days To Die computer client's launch options must match.
- EAC Server true + EAC Client true = CONNECT
- EAC Server false + EAC Client false = CONNECT
- EAC Server true + EAC Client false = CANNOT CONNECT
- EAC Server false + EAC Client true = CANNOT CONNECT
Still have questions about disabling anti cheat in 7 Days To Die?
Don't hesitate to reach out to our support team! We're available 24/7 to assist!
By: Exequiel P
Updated on: 12/11/2025
Thank you!