How to Disable Nether in Minecraft Server
If you’re looking to disable the Nether in your Minecraft server, you’re in the right place. By completing this guide will show you how to disable nether in Minecraft server by editing the server.Properties file without affecting the end dimension and still allowing end in your Minecraft server.
We’ll walk you through stopping the server, making the change, and restarting it to apply the new settings.
Don't already host with us? 10,000+ server owners trust Sparked Host for lag-free Minecraft worlds. Claim your server savings to get higher performance at less $ per month.
Key Takeaways
- To disable the Nether dimension on a Minecraft server, change the ‘allow-nether’ setting in the server properties file to false, then restart the server to apply changes.
- For Bukkit, Spigot, and Paper servers, the process is similar to Vanilla, but you may need to edit additional configuration files to effectively disable the Nether.
- After disabling the Nether, verify success by checking server logs and testing Nether portals to ensure they do not activate.
Disabling The Nether on Minecraft
By completing the steps below, you will disable the nether dimension in your Minecraft server
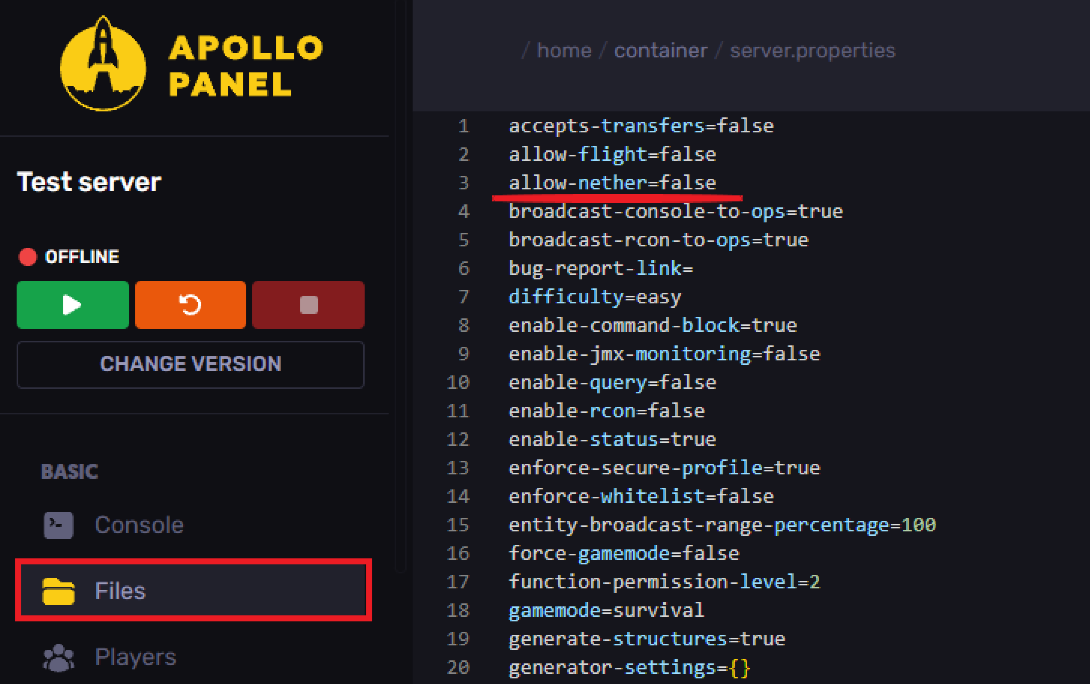
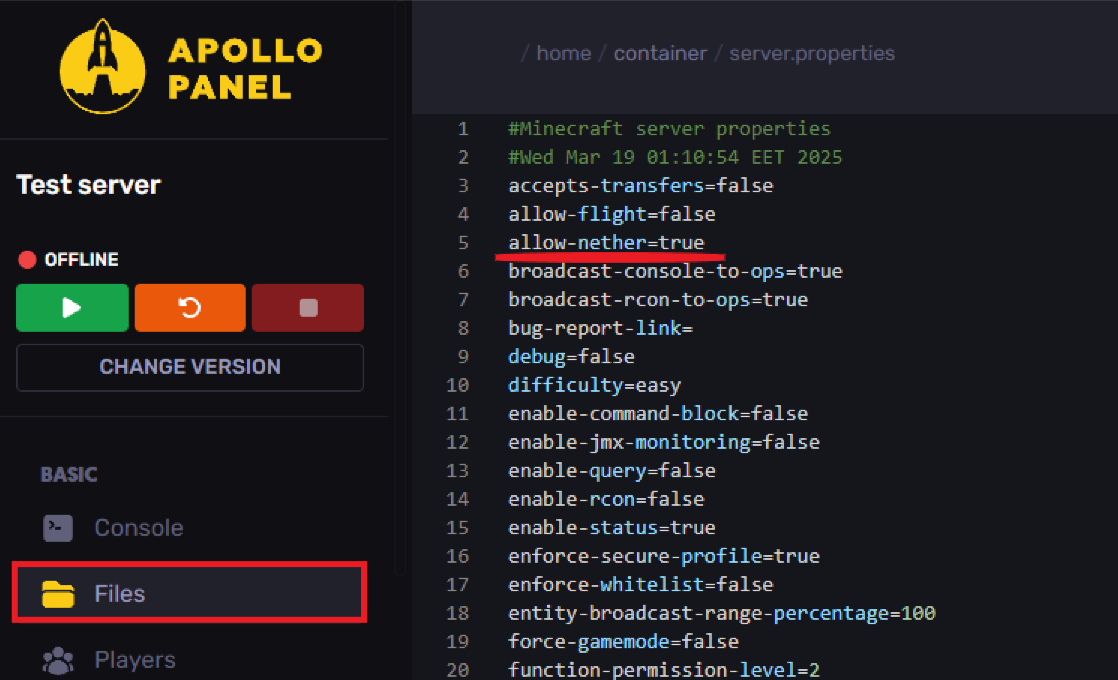
- Open your Apollo Panel
- Open your Files Manager and locate the server.properties folder
- Find the line
allow-nether=trueand change it toallow-nether=false
- To re-enable the nether, change it back from
allow-flight=falsetoallow-flight=true
Still have some questions about disabling the Nether?
If you need any further instructions, you can file a ticket here
Updated on: 12/02/2026
Thank you!