How to Use LuckPerms - Minecraft
What is LuckPerms?
LuckPerms gives you powerful control over player permissions, roles, and server access. It’s one of the most trusted permission plugins, offering a flexible and user-friendly way to manage ranks and commands. Whether you're running a small friends-only server or a large public hub, LuckPerms helps keep everything organized and secure.
In this guide, we'll show you how to use LuckPerms Minecraft in its latest version with simple steps.
With LuckPerms, you can:
- Create and manage custom ranks
- Set detailed permission nodes for each group
- Assign temporary or timed permissions
- Use an in-game editor or web interface
Let’s break down how to install, configure, and get the most out of LuckPerms on your server instead of just playing on a default server.
Installing LuckPerms
Make sure to use the compatible server version with the LuckPerms plugin. Check out our guide on how to change your server's version for more information.
To install LuckPerms on a Minecraft server:
- Download the LuckPerms Plugin onto your computer.
- Open the File Manager and open the plugins folder
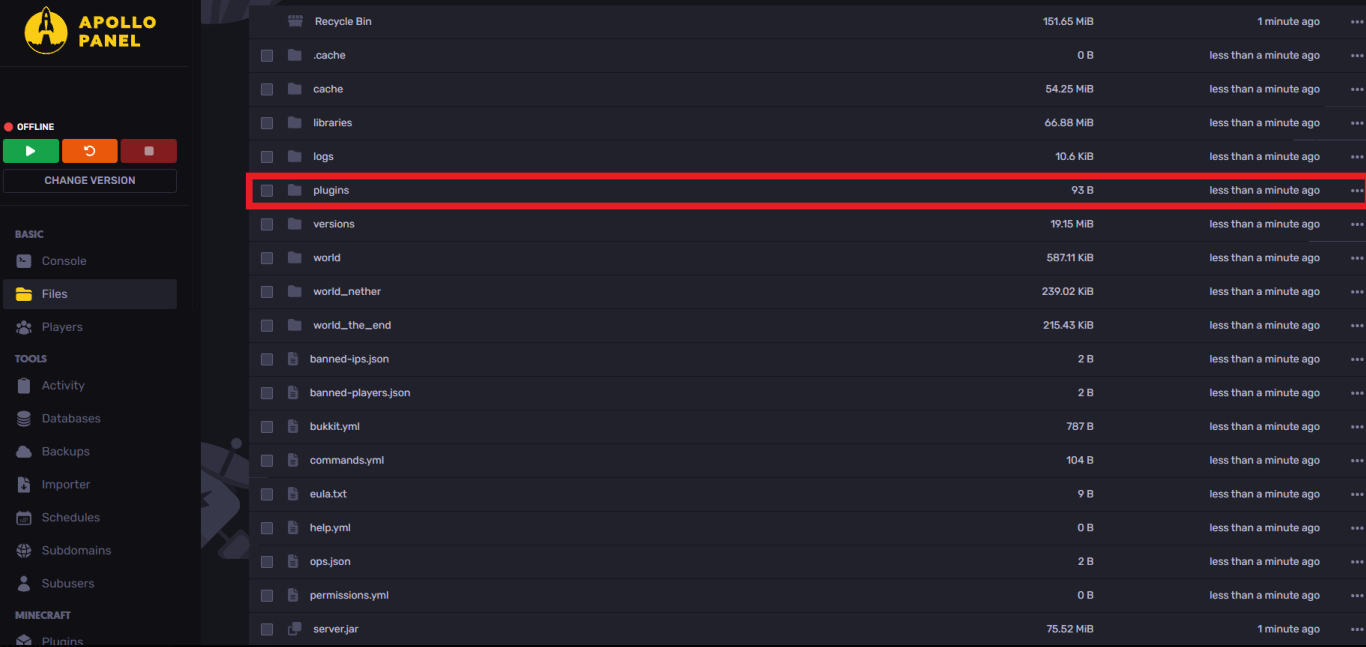
- Upload the LuckPerms plugin into your plugins folder

Now, start or restart your server for the plugin to work.
Connecting MySQL Database (Optional Step)
If you are handling a large amount of data, we recommend setting up a database for this plugin.
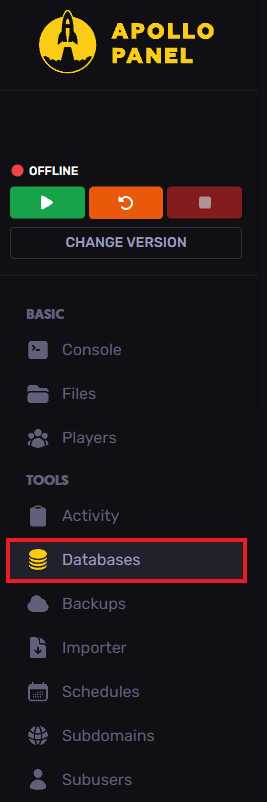
To create a database, click “Databases” on the left-hand side of the Apollo panel.
Click “New Database” on the top right-hand side corner.
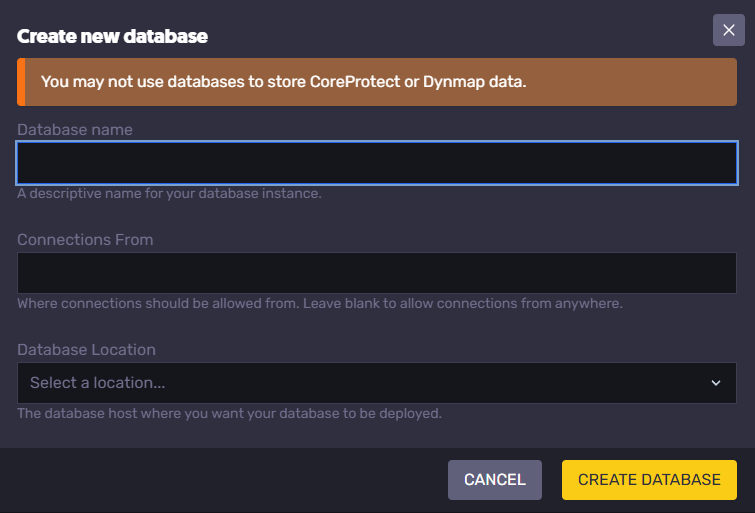
Fill out the required database info on-screen, which includes the following:
- Database Name
- Allowed Connections (Where the connections come from)
- Database Location
Once created, copy the database name.

To view the database details, right-click and click on "Details" to view the database details
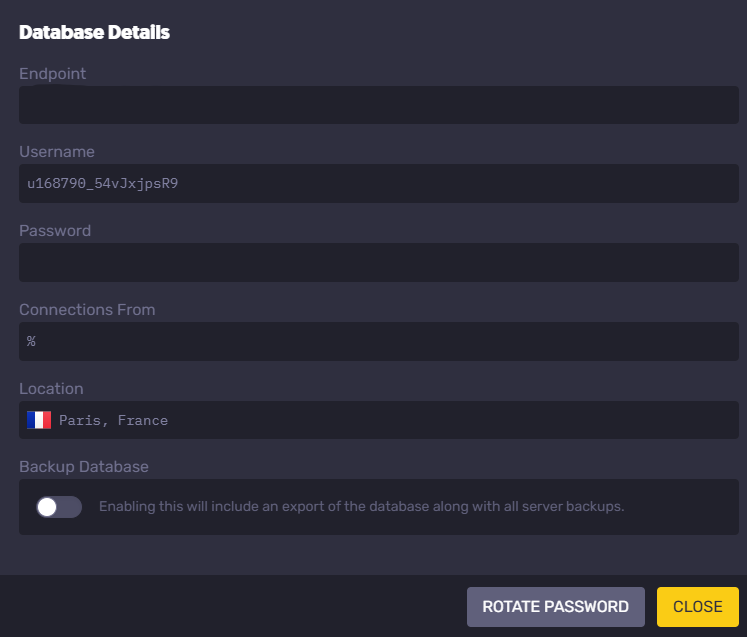
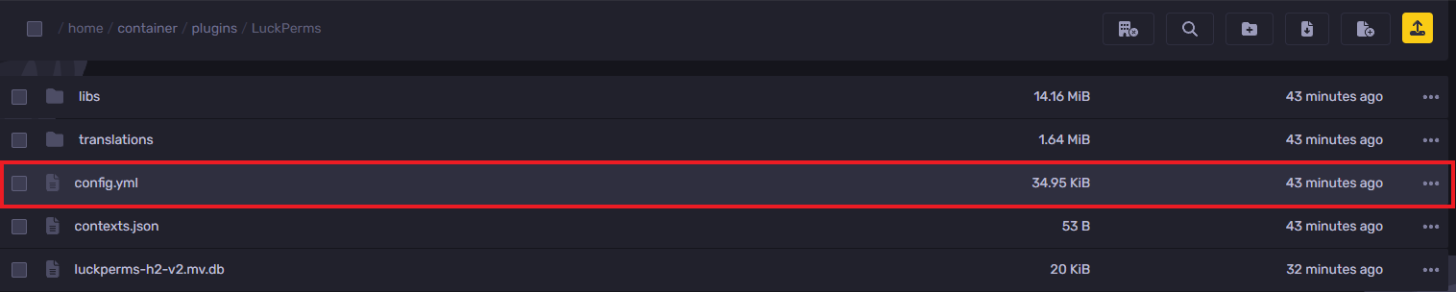
Head over to the LuckPerms folder and find the config.yml file in the file manager.
Edit the following and replace the values with your values. Remember to change the storage method from h2 to mysql`
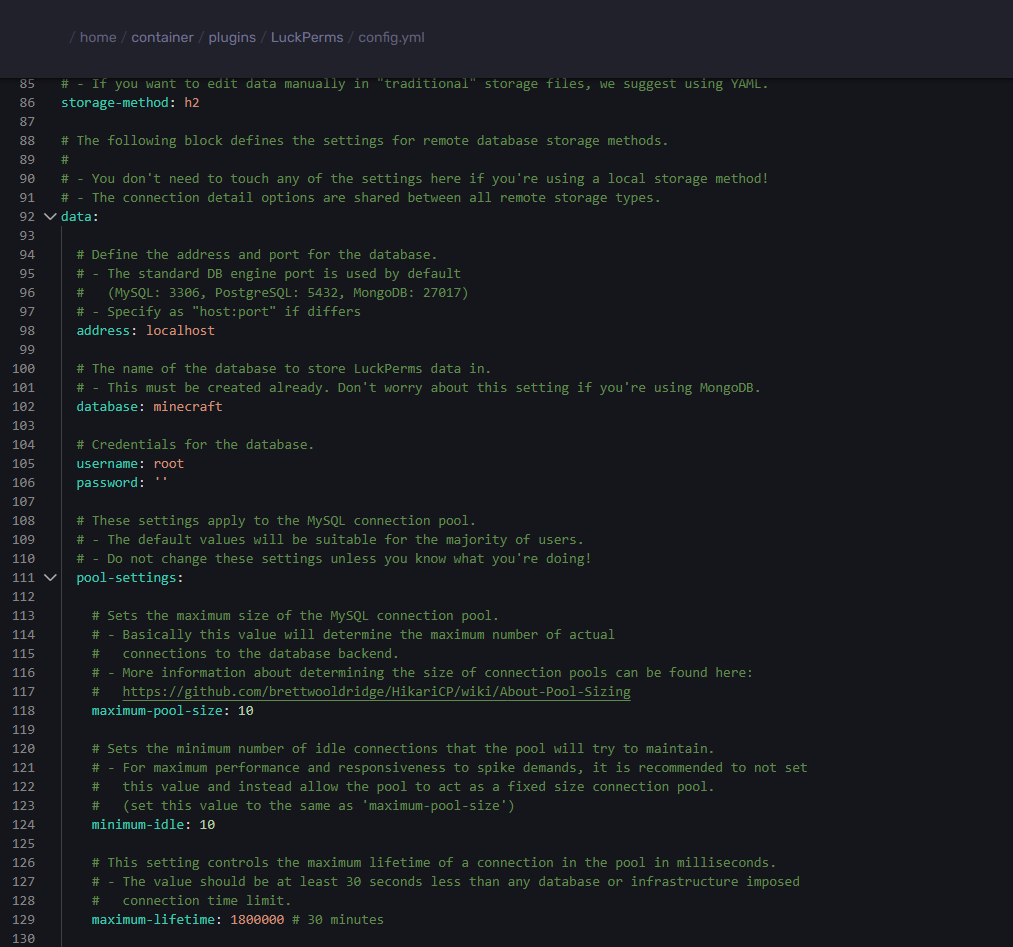
In this instance, It would look like this:

Configuring LuckPerms
To configure LuckPerms on your Minecraft server:
In the server console, do the following command. Replace <username> with the administrator username of choice, which will allow server admins to control what features players can use.
lp user <username> permission set luckperms.*
Example Usage: lp user justgreg permission set luckperms.*
This will assign permissions to the user

- To create groups, you can do the following command in-game or on the console. Replace <Group Name> with the name of the group
lp creategroup <Group Name>
Example Usage: lp creategroup admin

- To add a user to a group, you are able to do the following command in-game or on the console. Replace <username> with the username of choice and <Group Name> with the name of the group
lp user <username> parent set <Group Name>
Example Usage: lp user justgreg parent set admin

- To add permissions to a group, you are able to do the following command in-game or on the console. Replace <Group Name> with the name of the group and <Permission> with the permission value
lp group <Group Name> permission set <Permission> true
Example Usage: lp group admin permission set essentials.ban true

- To add a prefix to a group, you are able to do the following command in-game or on the console. Replace <Group Name> with the name of the group, <Weight> with the weight, and <Prefix> with the name of the prefix.
lp group <Group Name> meta addprefix <Weight> “<Prefix>”
Example usage: lp group admin meta addprefix 100 “&c[Admin]”
Make sure to include the quotation marks (“) in the prefix! YELLELOW BOX

- To edit a prefix to a group, you can do the following command in-game or on the console. Replace <Group Name> with the name of the group and <Weight> with the weight
lp group <Group Name> meta removeprefix <Weight>
Example Usage: lp group admin meta removeprefix 100

Once you have done this, continue to add prefixes to groups as needed.
Still have some questions about setting up LuckPerms?
You can create a ticket here, after creating the ticket, we'll respond right away
Updated on: 03/04/2025
Thank you!