How to Install WorldEdit on a Minecraft Server
WorldEdit is a powerful tool that helps you build and edit your Minecraft world faster. In this guide, we'll show you how to install WorldEdit on your Minecraft server in a few simple steps. You'll learn how to download the plugin, add it to your server, and configure it.
Don't already host with us? 10,000+ server owners trust Sparked Host for lag-free Minecraft worlds. Claim your server savings to get higher performance at less $ per month.
What is WorldEdit?
World edit is an amazing tool used by many Minecraft builders and map creators to enhance their building experience. World Edit does this in a couple of ways:
- Instantly fill a ton of blocks with a simple command
- Tools to form terrain really quickly
- Advanced features that make building complex shapes extremely fast and simple
It's impossible nowadays to find a server that wasn't built with World Edit.
Worldedit cannot be used on: realms, bedrock edition, windows 10 edition (not java), or pocket edition versions.
Should I use the WorldEdit Mod or Plugin?
The plugin is related to the server-side environment.
The mods work client side and server side.
There really isn't that much of a difference other than that.
How to Add WorldEdit to a Minecraft Server
Adding world edit to your server is extremely easy.
WorldEdit can be installed as a mod for Forge and as a plugin for Bukkit-based servers.
WorldEdit as a Mod
World edit as a mod on your server won't require the player to download it because it's a server-side-only mod (so it's compatible for more people).
Method 1: Via. the Mod Manager
A mod loader like a mod loader like NeoForge, Fabric, Spigot, Bukkit, or Sponge is required to install worldedit and run it properly.
If you use Spigot, you need to upload the WorldEdit jar file to the plugins folder and restart the server. However, Spigot might be slow and paper is a recomended.
SparkedHost has a built-in mod manager that makes it extremely easy to add mods. But first, we'll need to make sure our server is a Fabric server.
- Go to your server panel and then go to the
VERSIONStab on the left hand side.
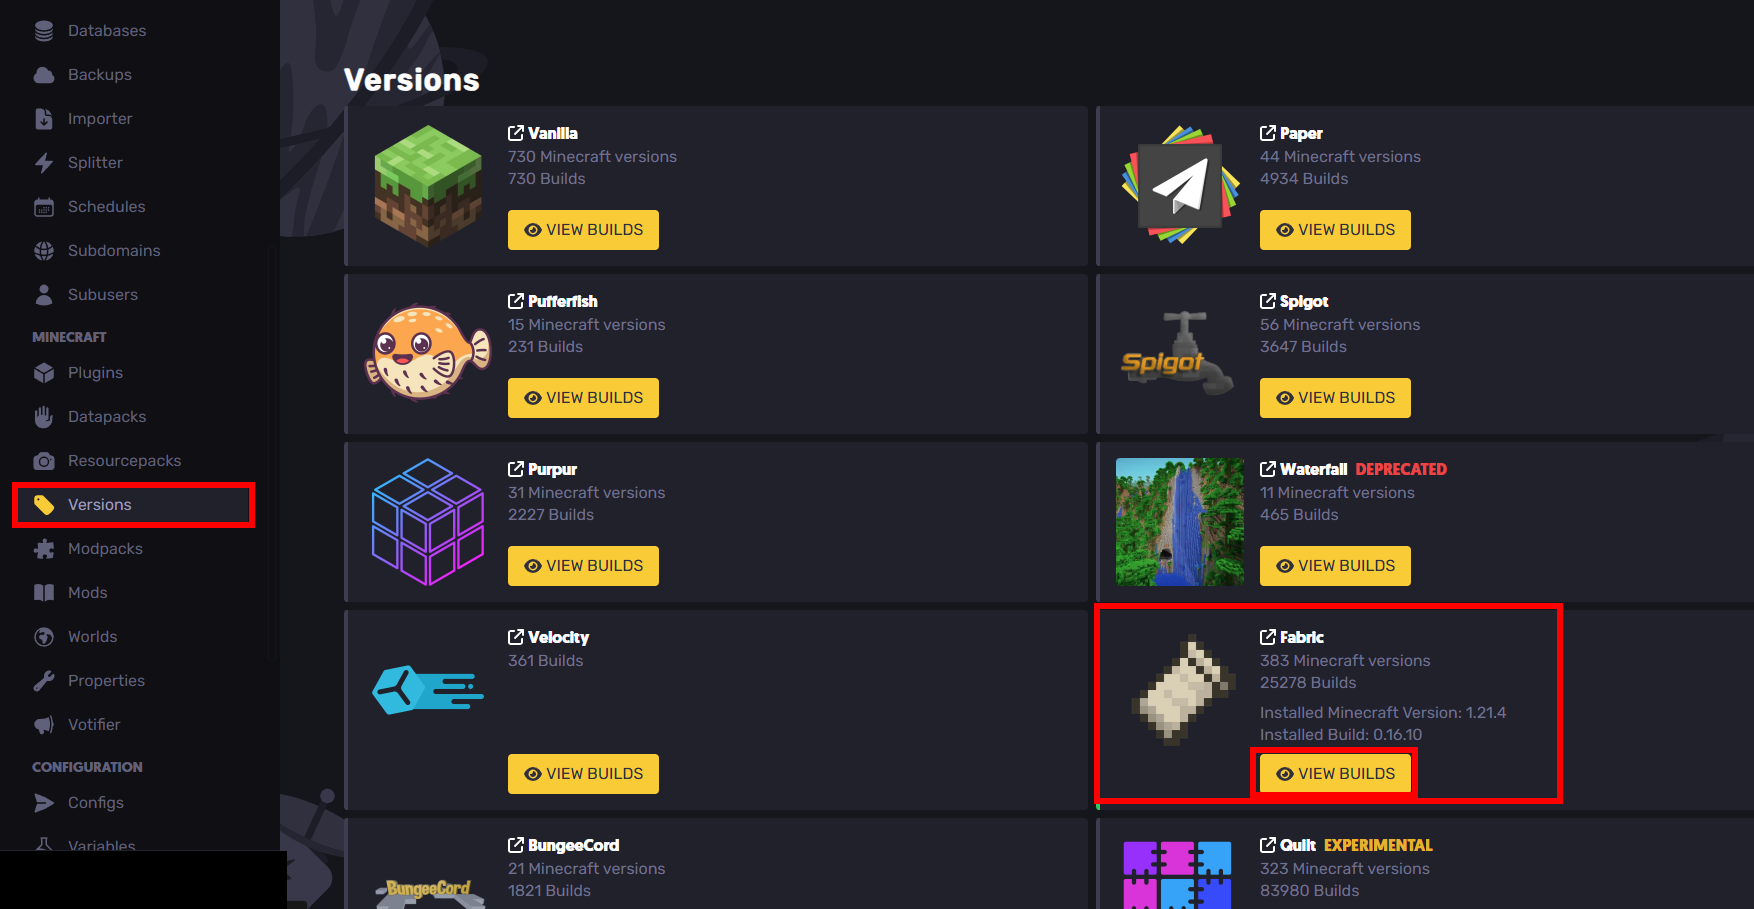
From there, you'll want to install Fabric under "VIEW BUILDS"
- Next, you want to download Worldedit from the build-in mod page on the left-hand side
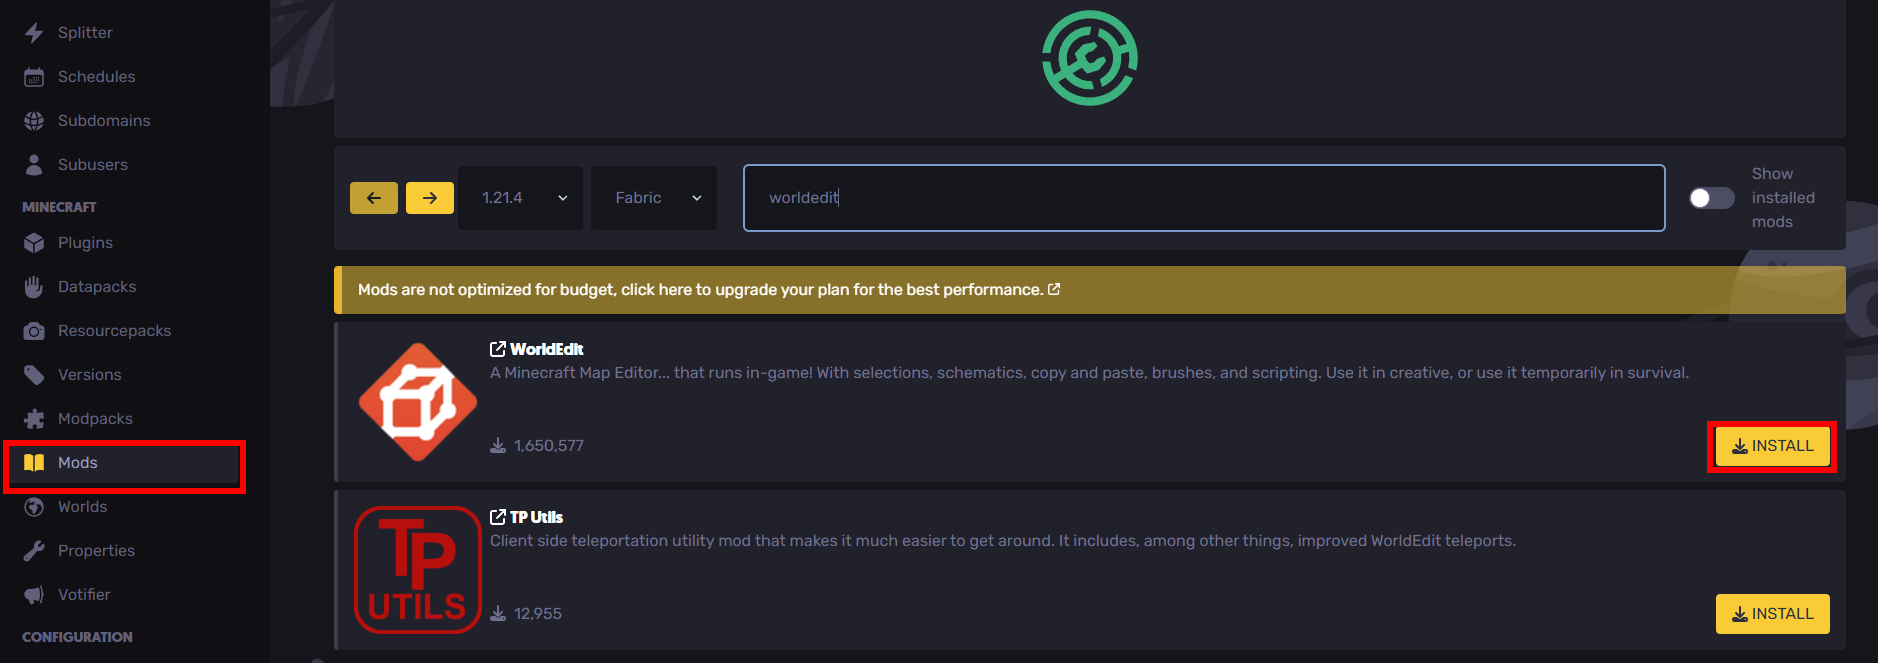
Make sure that the game version is correct and that Fabric is selected.
- Restart the server and connect to see if it's working.
In game, if //wand autocompletes, then the mod is working!!!
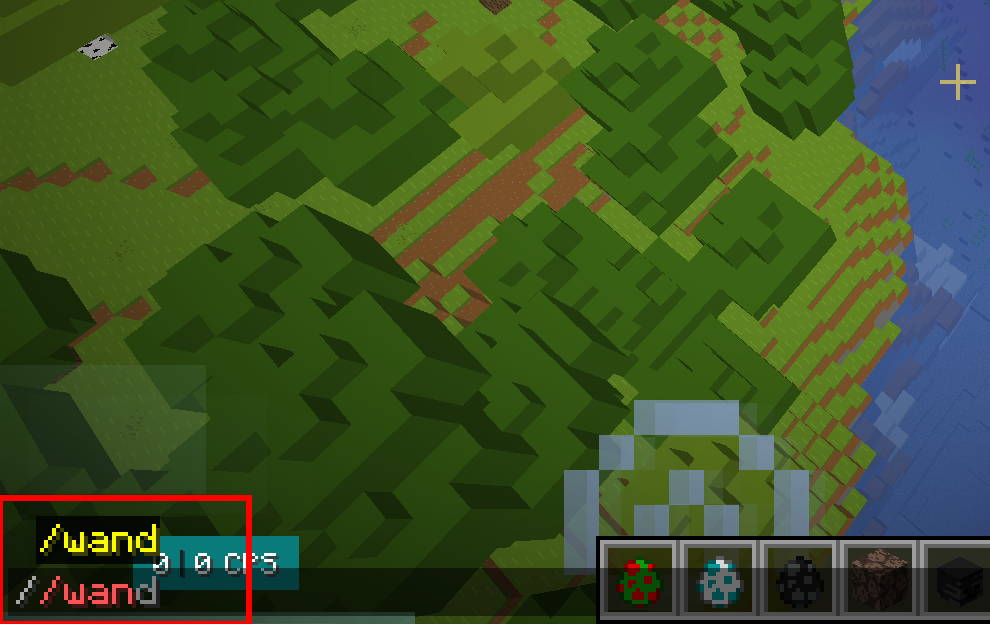
Confirm that you're also OPed as well.
Method 2: Adding it Into a Modpack
You can also use Modpacks as well with SparkedHost's built-in mod loader.
- Go to your server's console
- Make sure that Fabric is installed (earlier in this article)
- Go to the Modpacks page on the left-hand side panel
Method 3: As a plugin
WorldEdit is compatible with Bukkit as a plugin.
- Make sure paper is installed (go to the versions tab on the lefthand side)
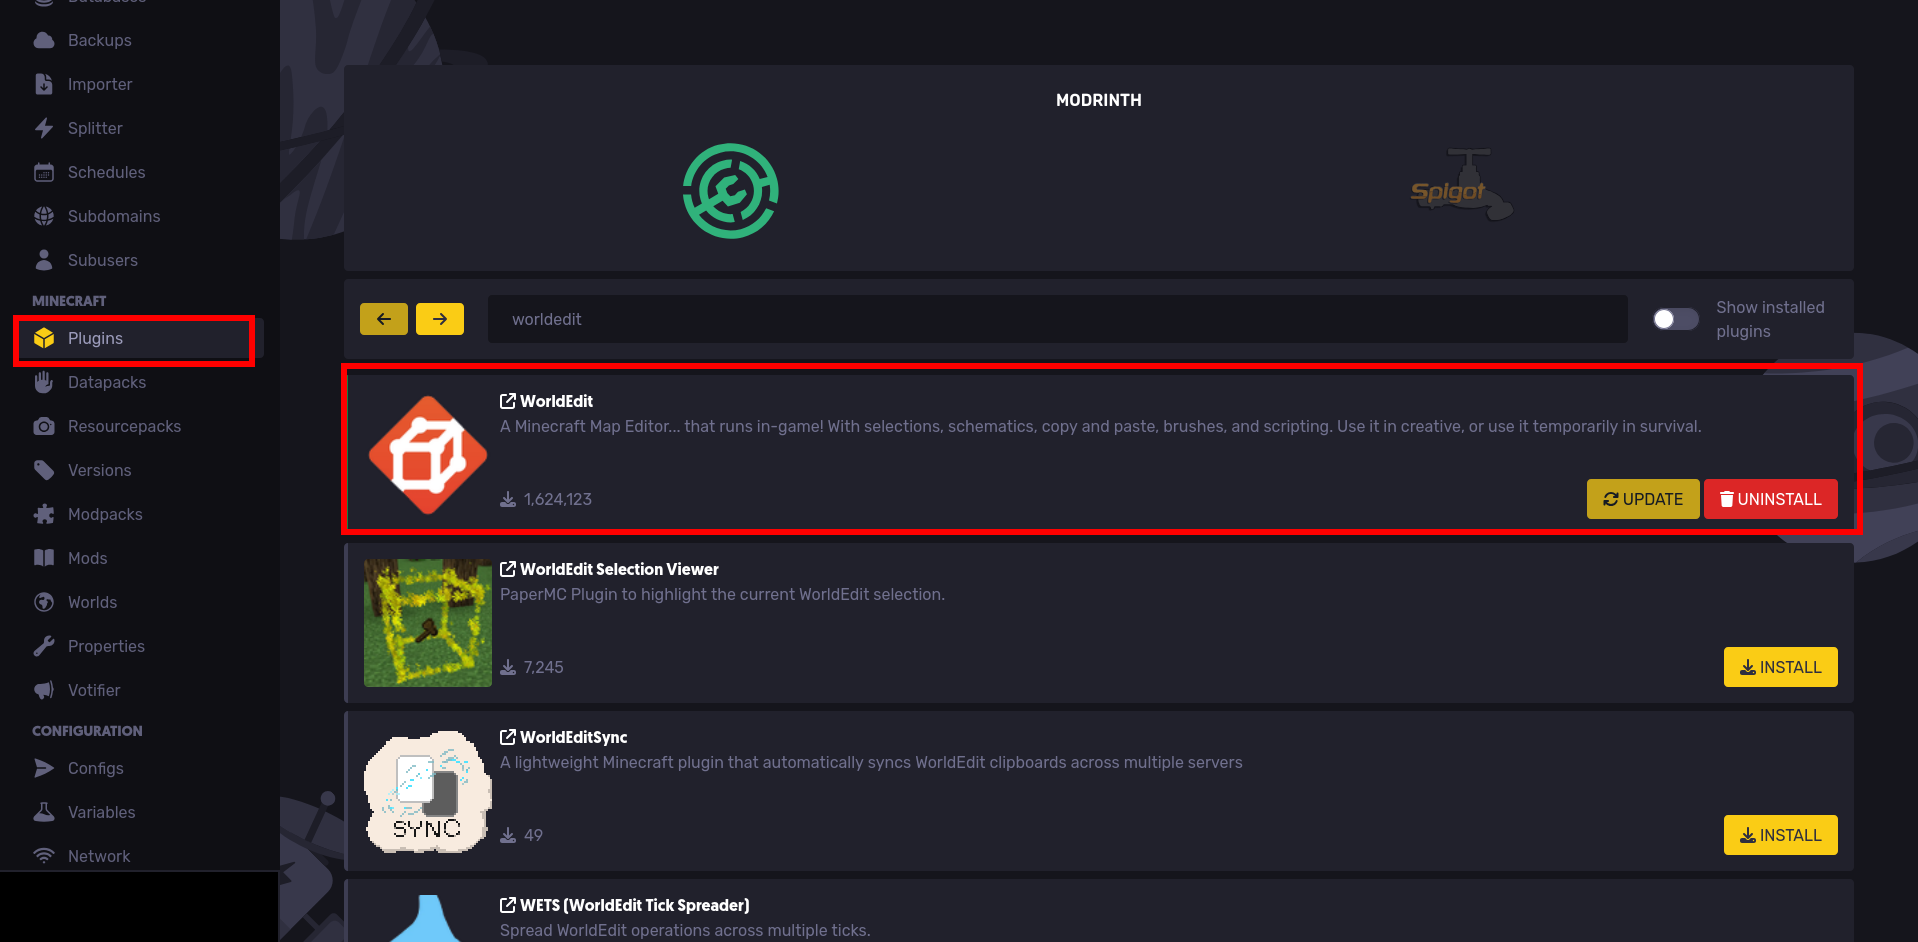
- Go to the plugins tab on the lefthand side
- Search for WorldEdit
- Install WorldEdit:
How to Use WorldEdit on Minecraft Java
Using world Edits on Java edition is extremely easy!
Before you begin, make sure you have the right permissions on the server because WorldEdit commands require you to be OPed. You can give yourself OP by doing: /op [username] in the server panel terminal.
Selections
There are two main ways to select with WorldEdit.
Using the wand
To summon the wand, use
//wandwhich gives you a wand that allows you to set selection points.
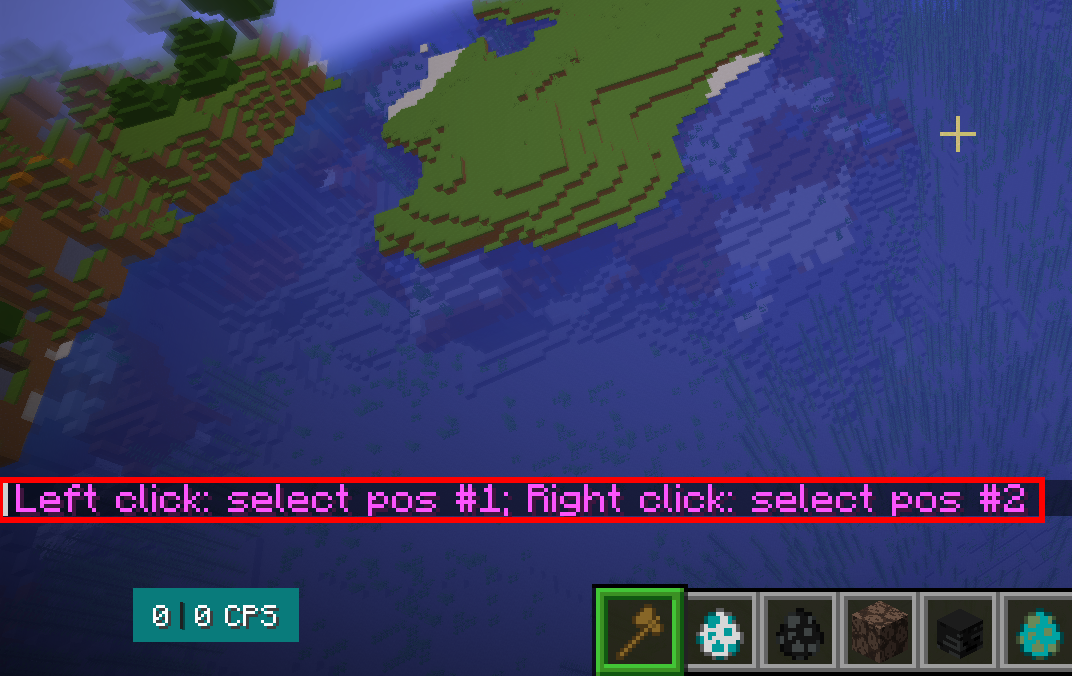
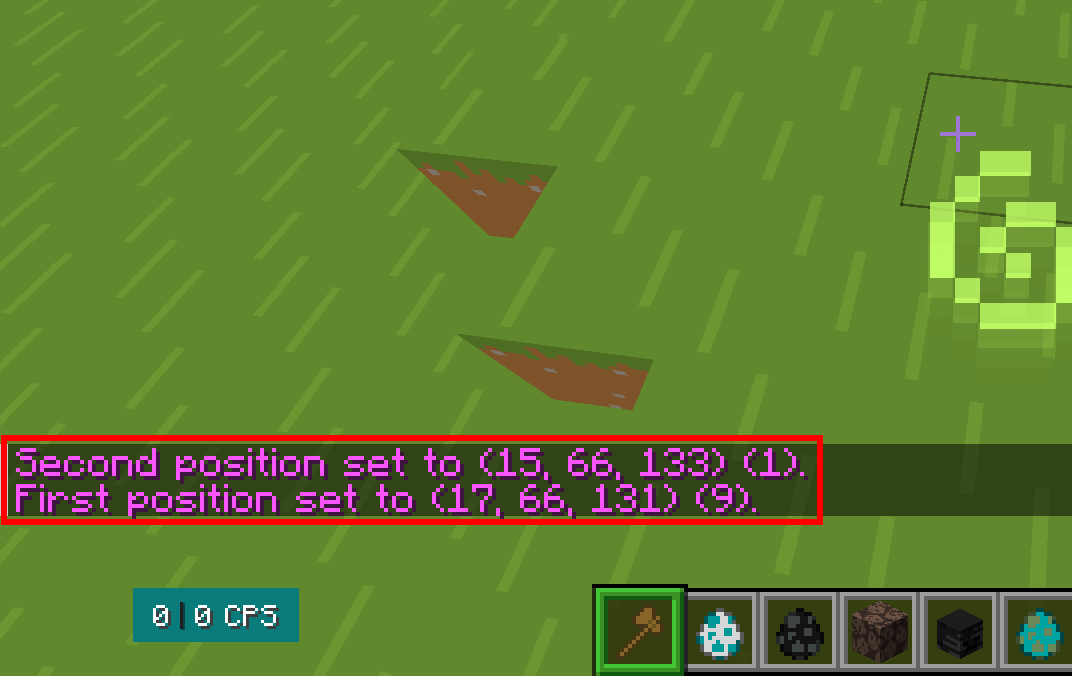
To use the worldedit wand, right-click to set position 1 and left-click to set position 2 to define two corners of the cubiod area.
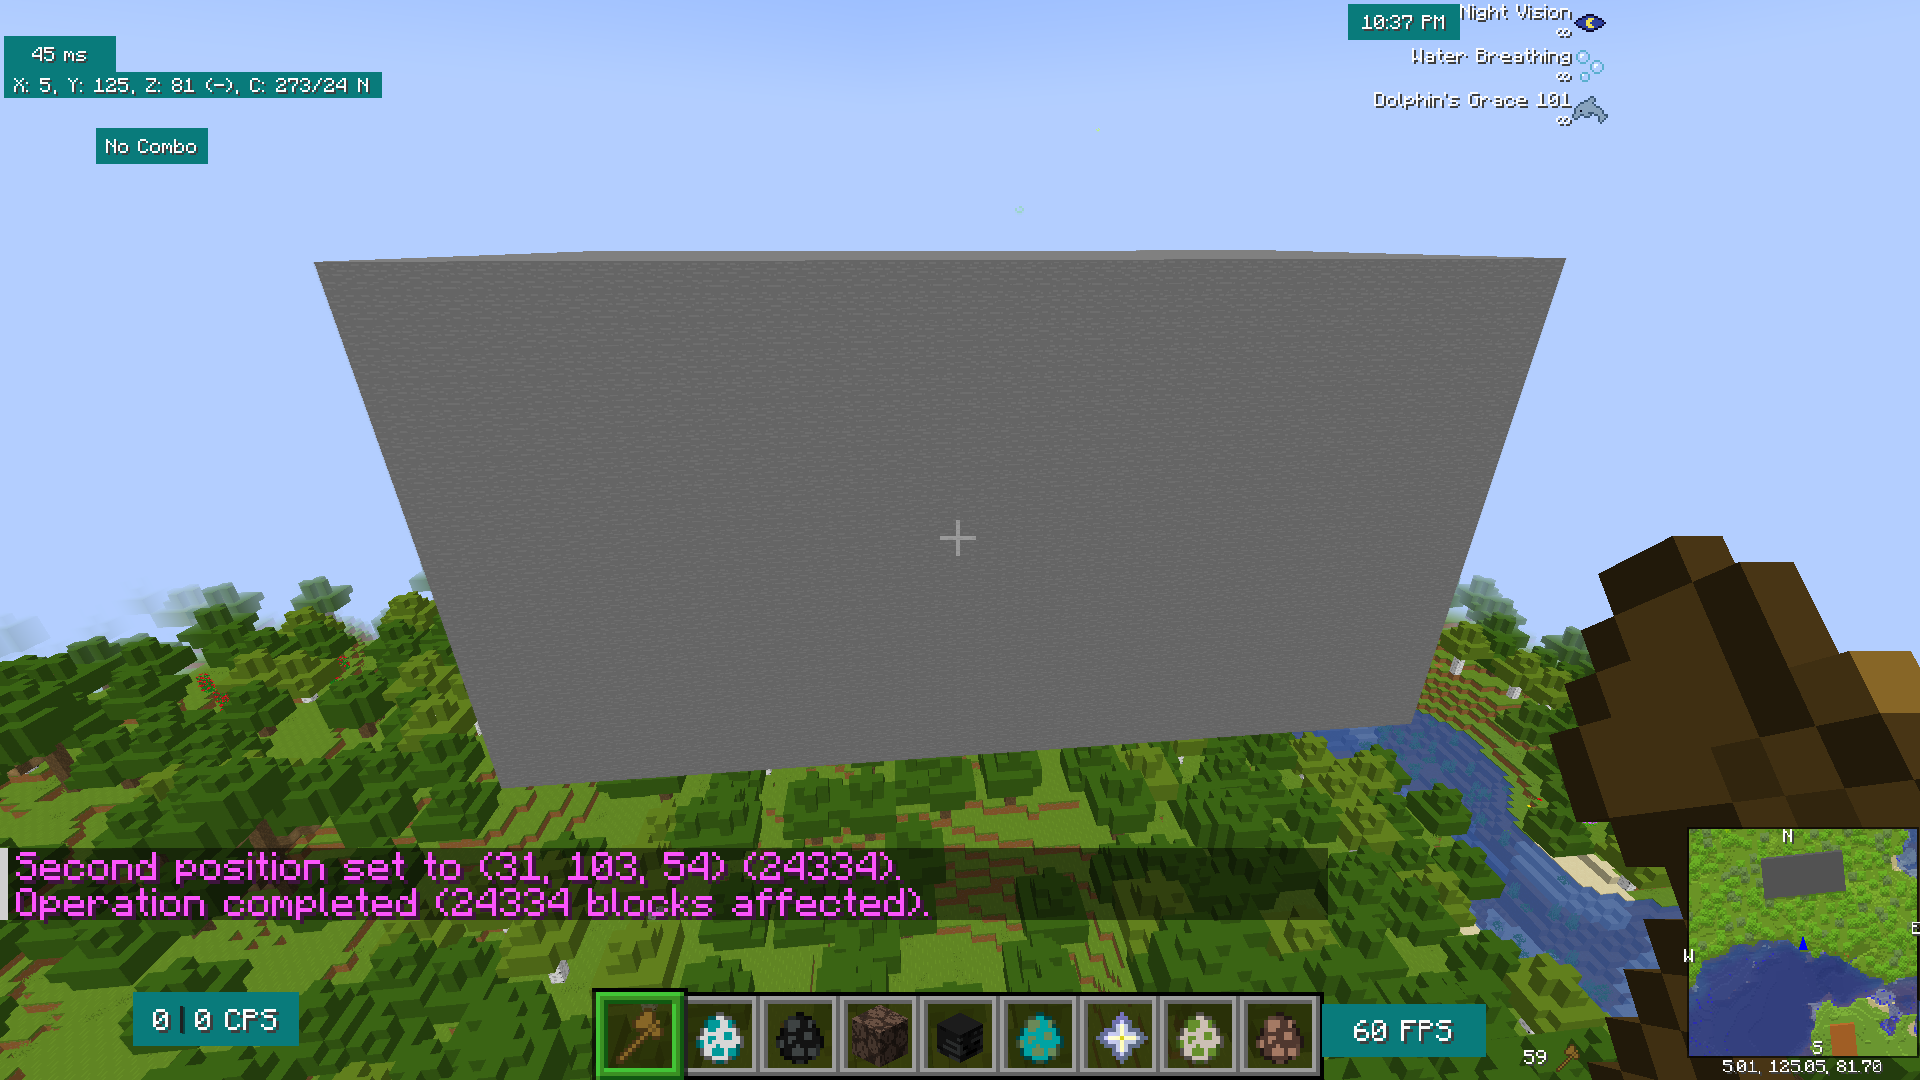
You can now use this selection for a lot of different things such as filling the area with ferns (because why not):
//set fern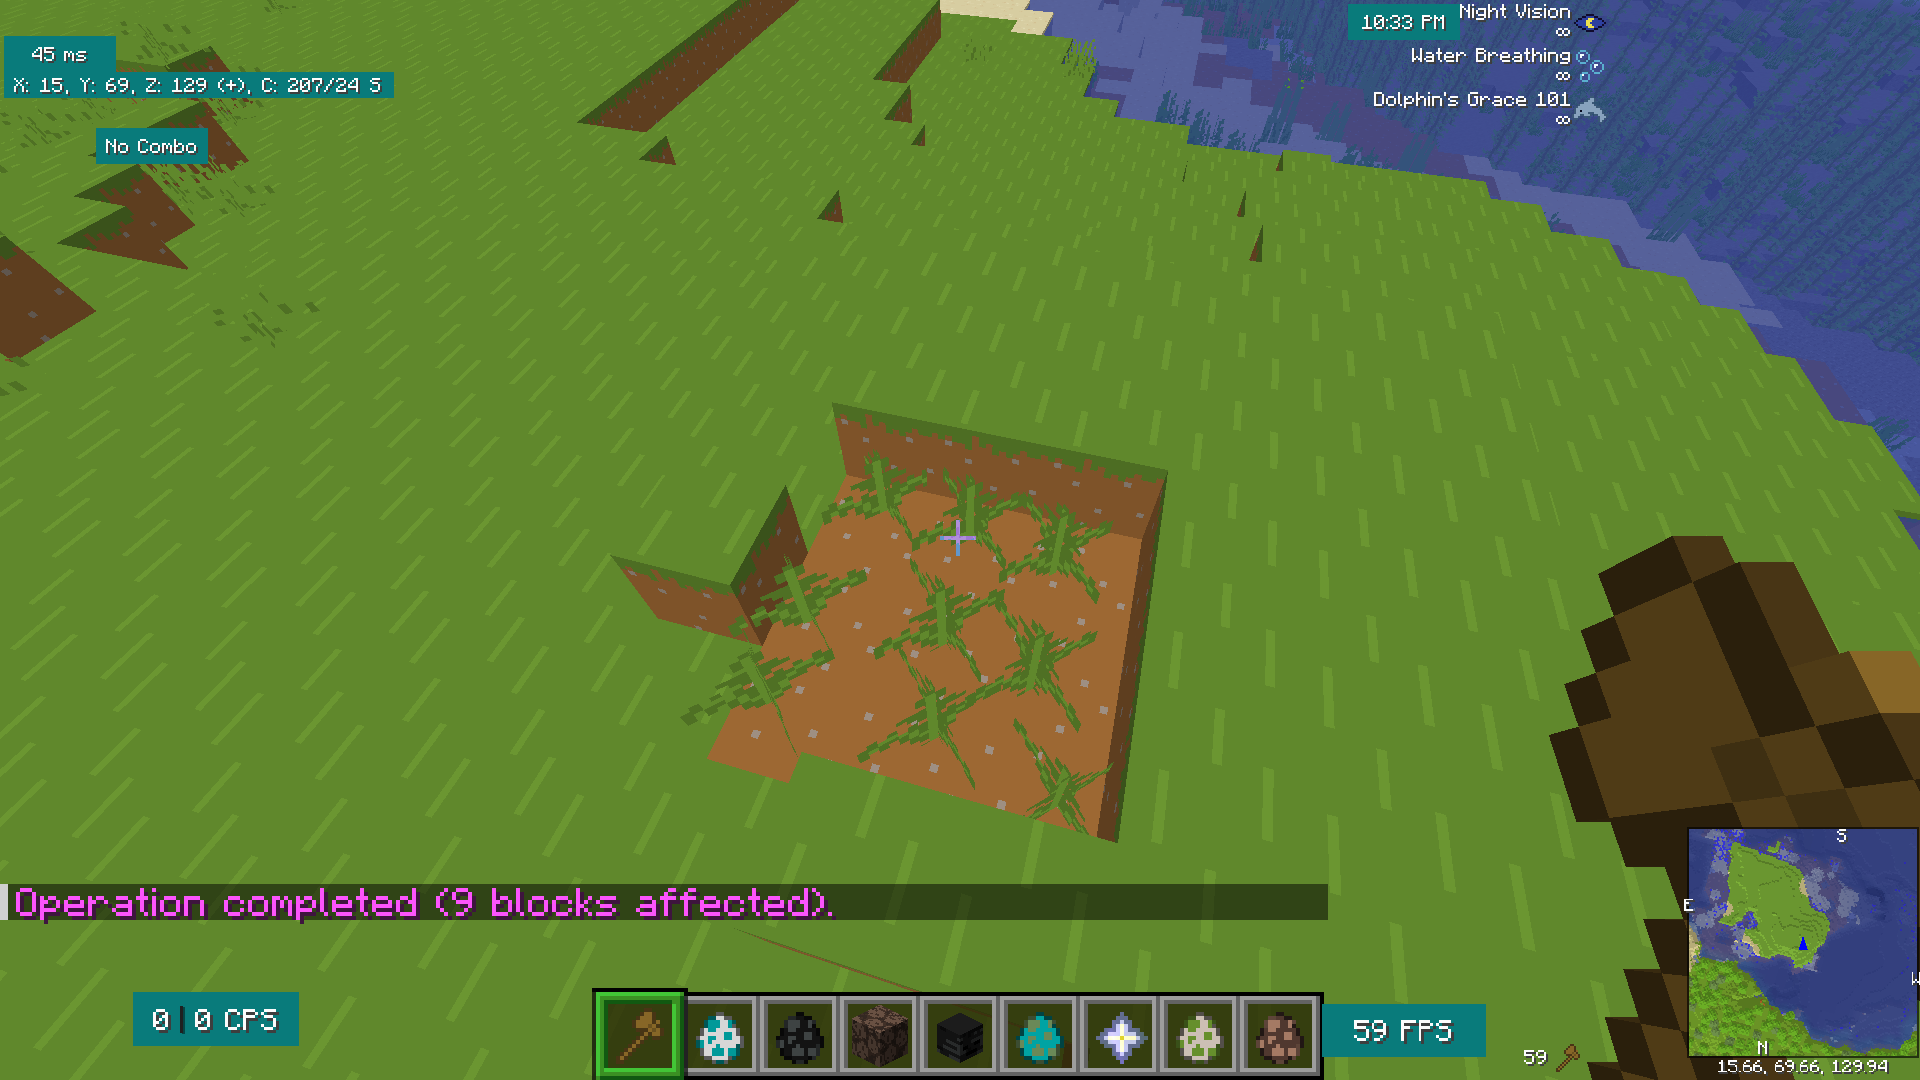
You can use //set [block] to fill a selection area with any kind of block.
Using //pos
Use //pos1 to set the first position for where your player is (or add coordinates with //pos1 [coordinates].
//pos1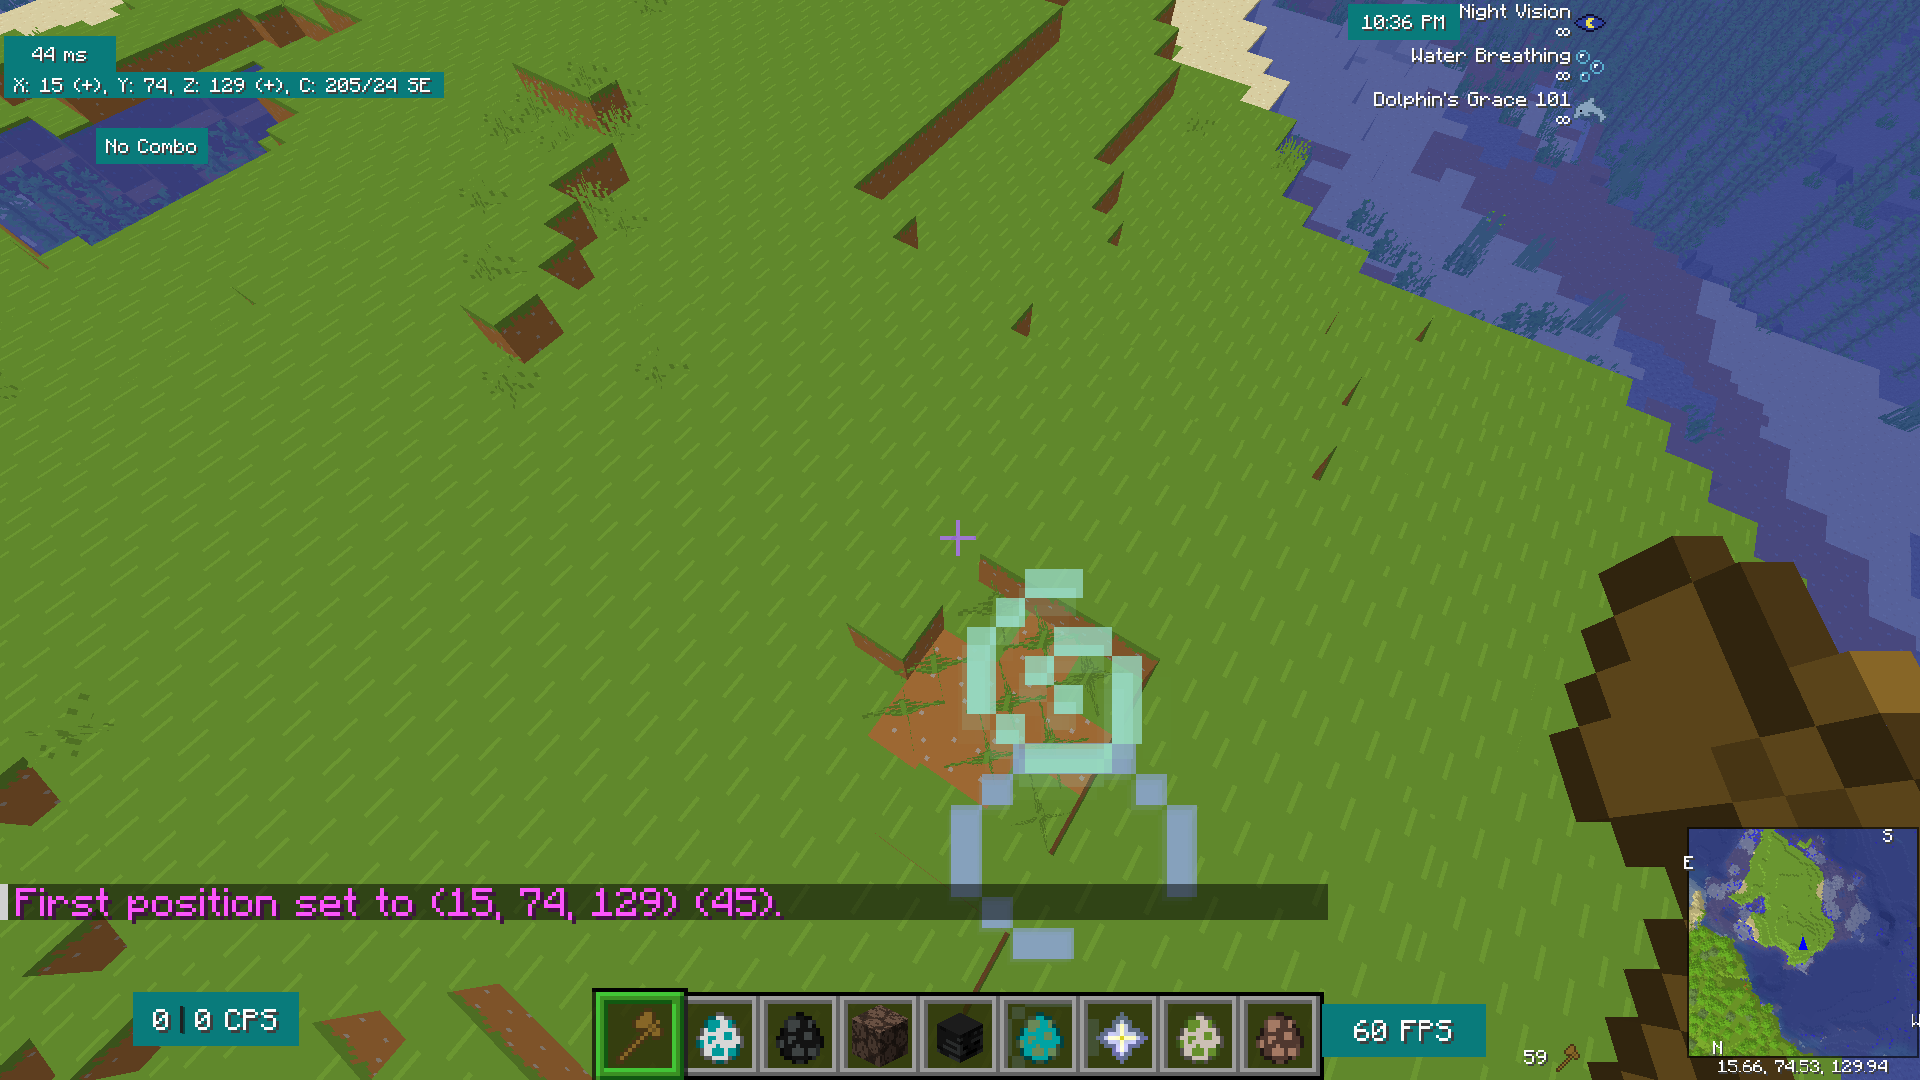
This can be useful if you want to set a bunch of blocks in the air where you don't have any block to axe with the wand (and you're too lazy to fill a block with a command).
You can also use //hpos1 and //hpos2 to add the block that you're aiming at.
Brushes
To create a brush, take any tool (axe, shovel, etc.) and run any of the commands below!
See the documentation here: https://worldedit.enginehub.org/en/latest/commands/#brush-commands
Forest Brush
//br forest <shape> [radius] [density] <type>Creates a forest!
For example
//br forest sphere 3 3 oakAfter your brush has been set on the tool, you can right-click to brush.
Butcher
Butcher kills mobs within a radius.
//br butcher [radius]Paint
Paint... paints.
//br paint <shape> [radius] [density]For example,
//br paint sphere set acacia_leavesPaints with acacia leaves wherever you point your mouse
WorldEdit Schematics
You can find the full blog from the creator of WorldEdit here: https://madelinemiller.dev/blog/use-schematics-worldedit/
Schematics are particularly useful if you want to load structures without having to create a new world on your server. You can also share completed builds with your friends without having to share a bulky world file.
All schematics are loaded in the worldedit/schematics folder. If it's on a bukkit server (plugin side), it'll be stored server side.
You can find some awesome schematics here: https://www.minecraft-schematics.com/
Saving a Schematic in SparkedHost
- First, download a schematic file to your local computer
- Go to your SparkedHost panel at https://control.sparkedhost.us
- Go to the files tab on the left hand side
- Navigate to the schematics folder by going to `config -> worldedit -> schematics
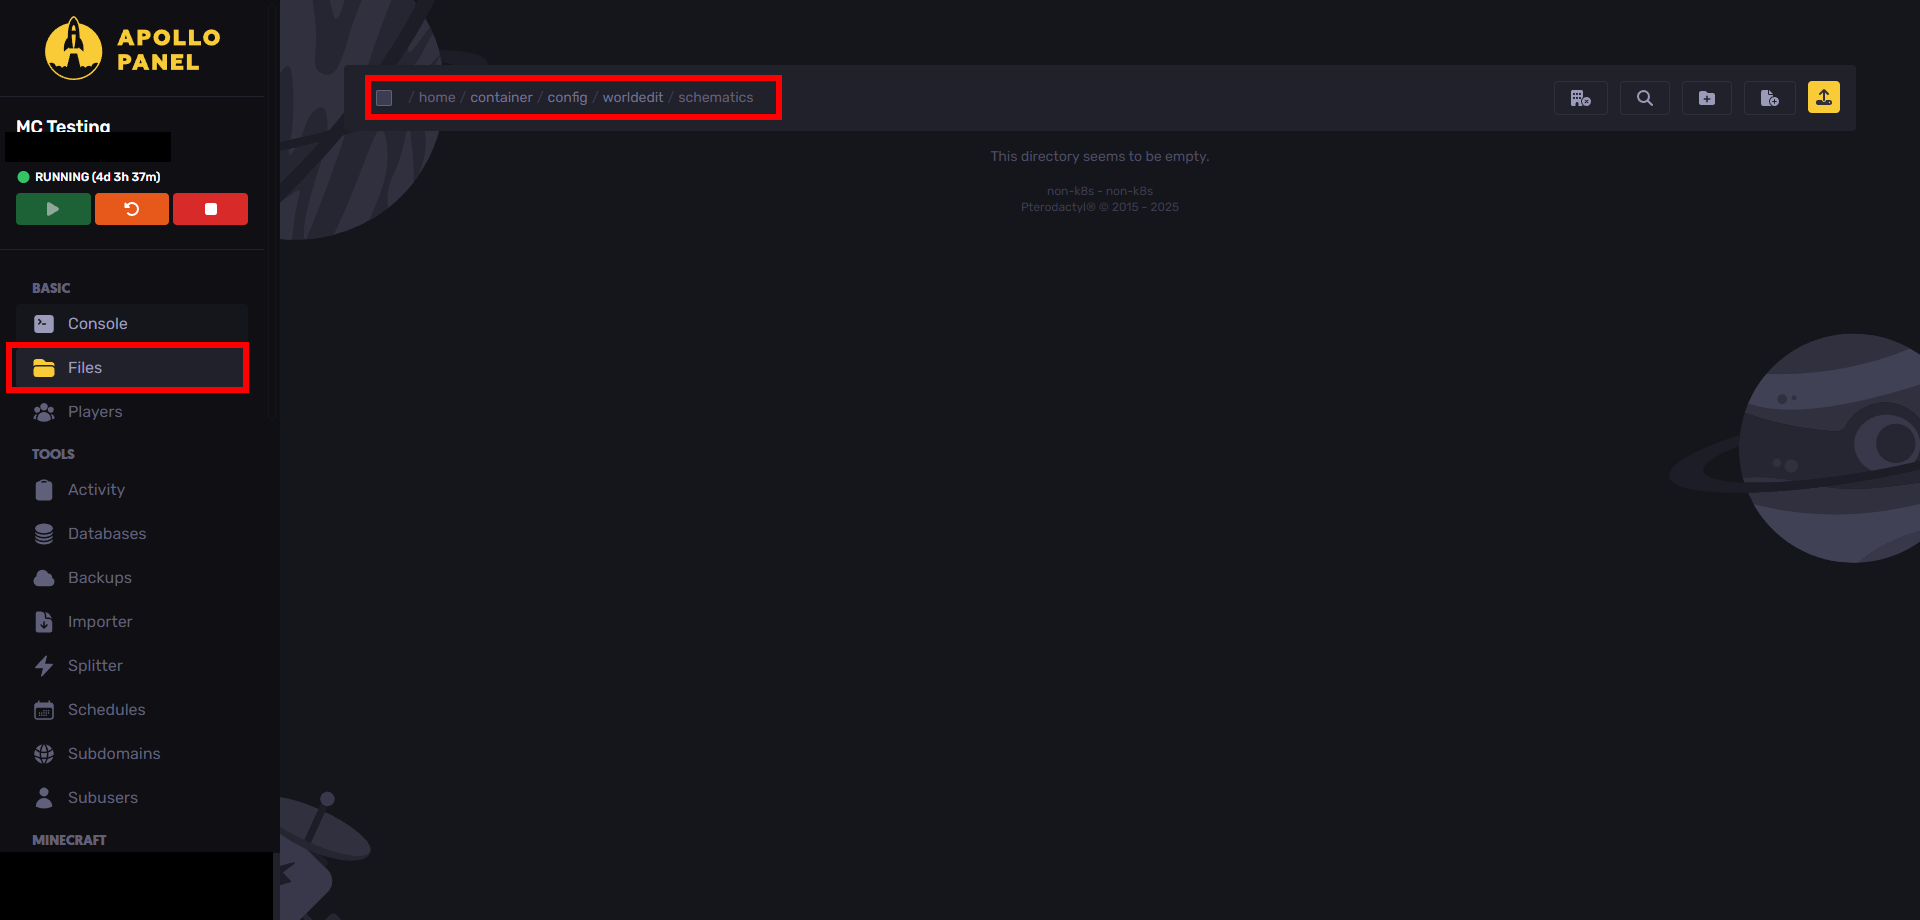
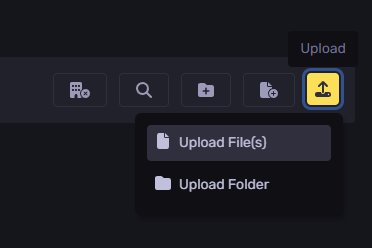
- Upload your file using the upload button on the top
Loading Schematics
The below command will load a schematic:
/schem load filename
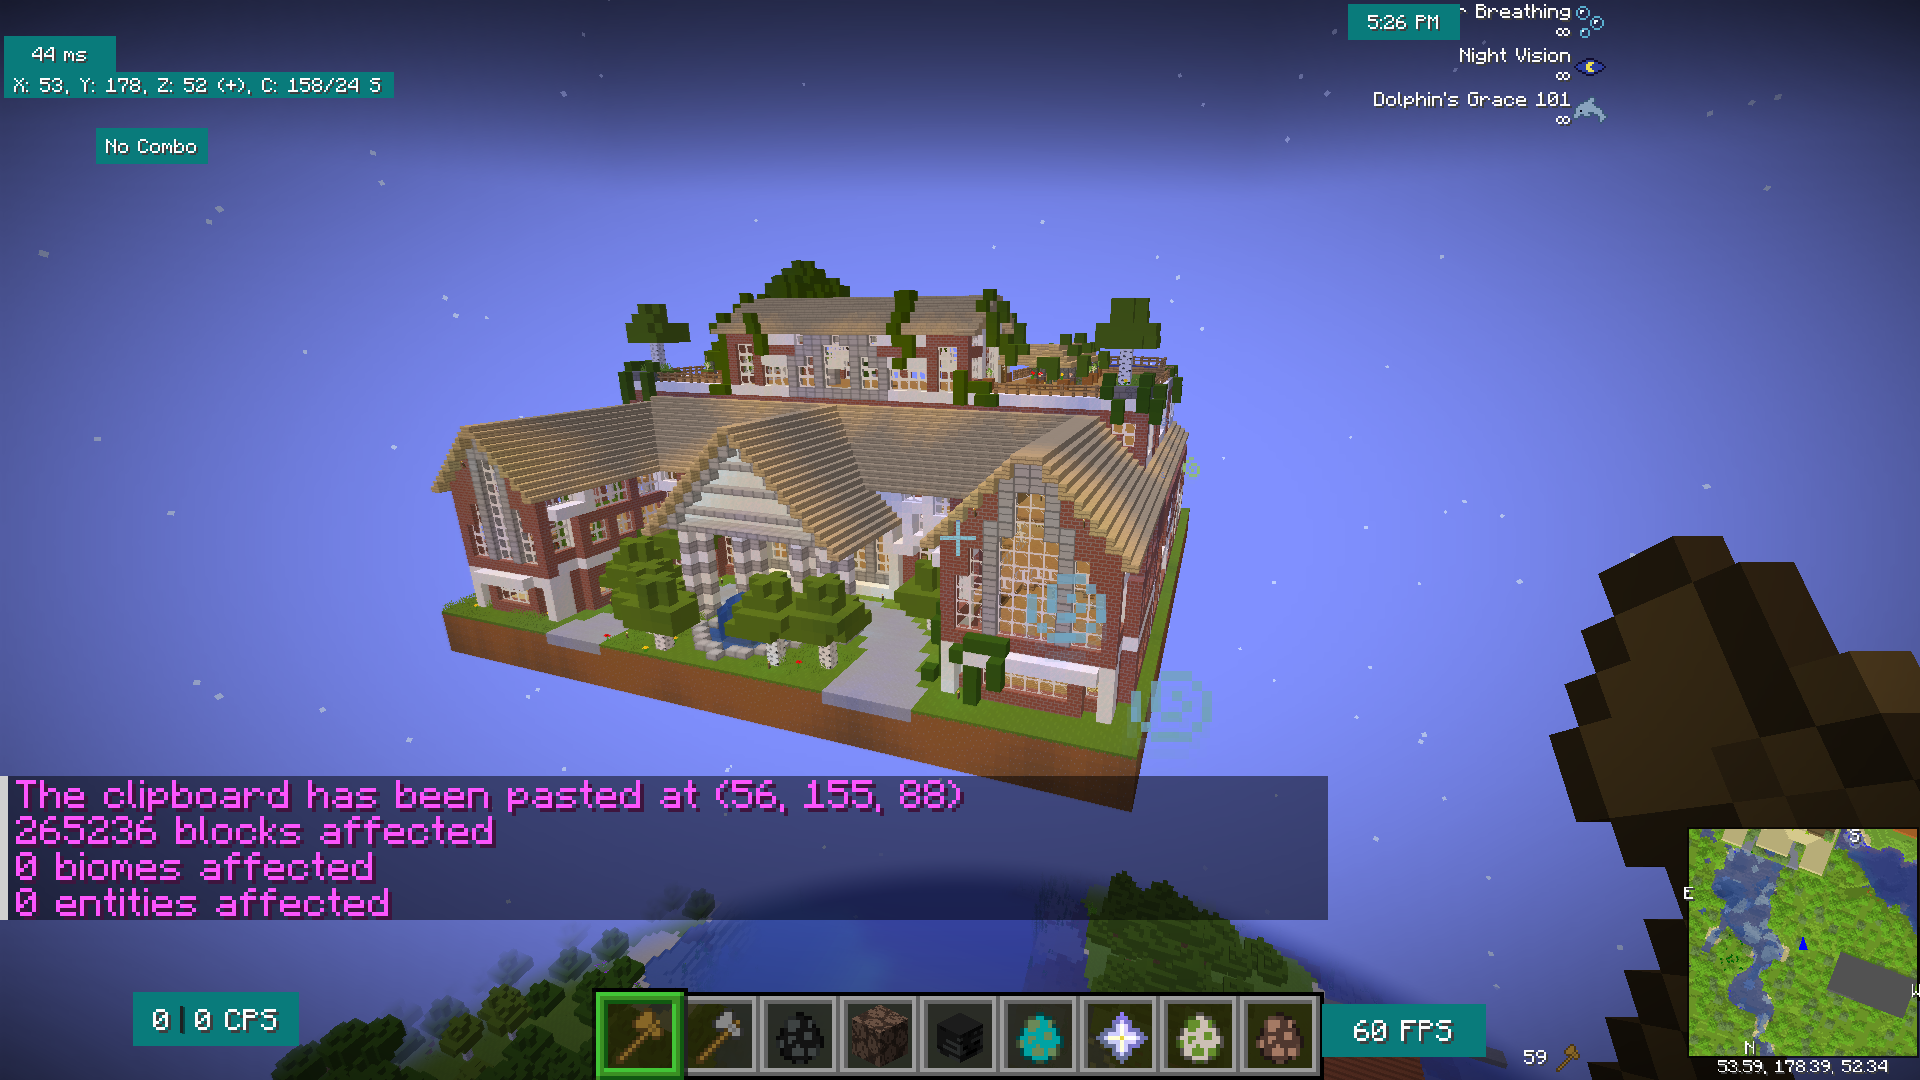
After loading the schematic, you can run this to paste the schematic:
//pasteThis will give you a list of loaded schematics.
/schem list
Saving Schematics
First, select an area and then copy it with:
//copyThen, you can save the file with:
/schem save filename
For undo:
//undoTo redo:
//redoStill Have Some Questions?
Feel free to contact our support team at https://sparkedhost.com/contact.
If you make a ticket, we will respond very fast.
By: Julian T.
Updated on: 03/11/2025
Thank you!