How To Join Project Zomboid Server
Joining a Project Zomboid server is a simple process that opens the door to shared survival, whether you're teaming up with friends or diving into a public world. All you need is the server’s IP address or name, and you’ll be scavenging, surviving, and battling the undead in no time. You can connect through the in-game server browser or via Steam’s join feature. Each method works slightly differently.
Method 1: Using The In-Game Server Browser
- Open Project Zomboid.
- In the Main Menu, click on "Join".
- If the server is available to the public, you can search it using the name of your server in the Name Filter input.
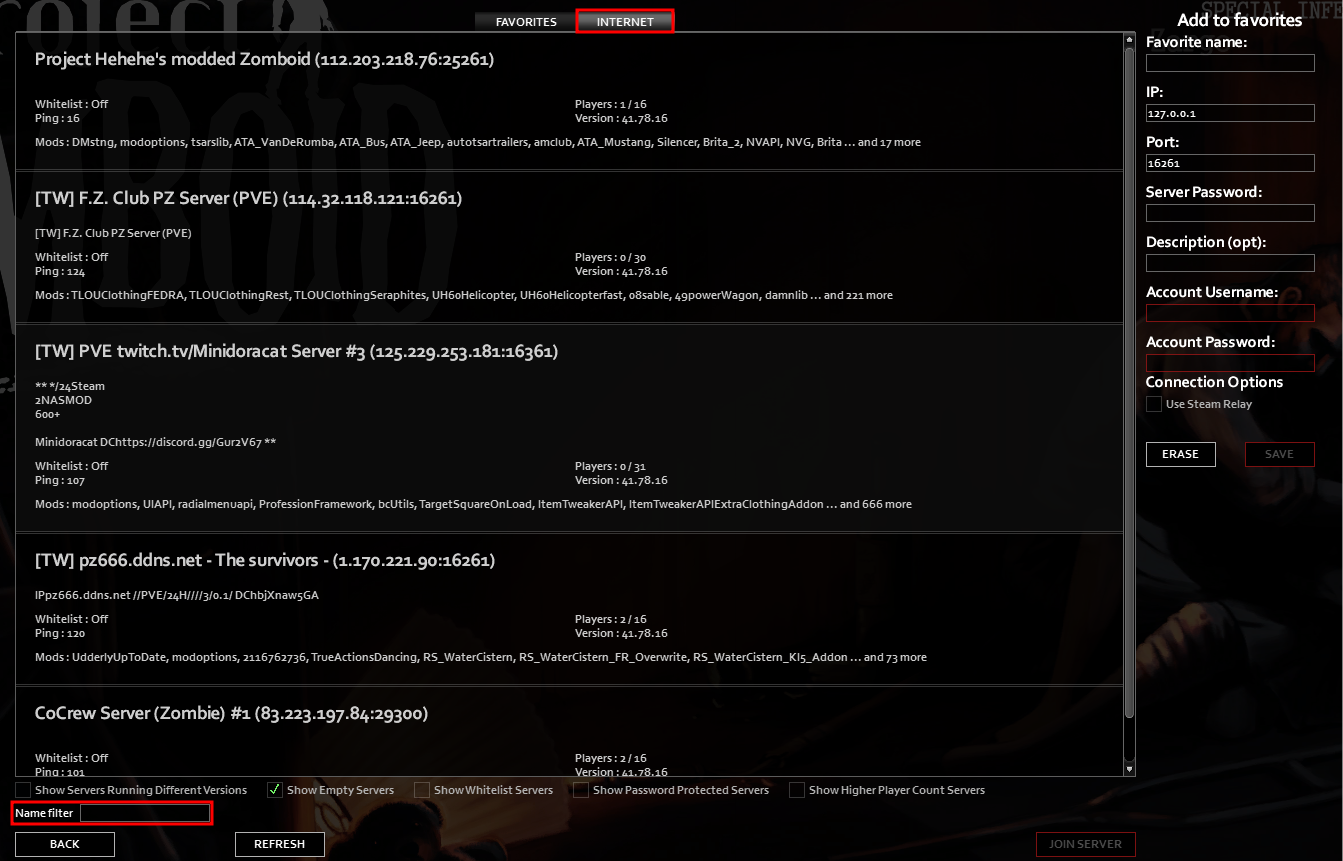
If the server is not publicly available, you can join it by adding it to your favorites. To do this, enter the necessary information, including the Favorite Name, IP, Port, Account Username, and Password. Afterwards, click on "Save" and you will be able to see it in the Favorites tab.

- Once you found the server you want to join, select it then click on the "Join Server" button.
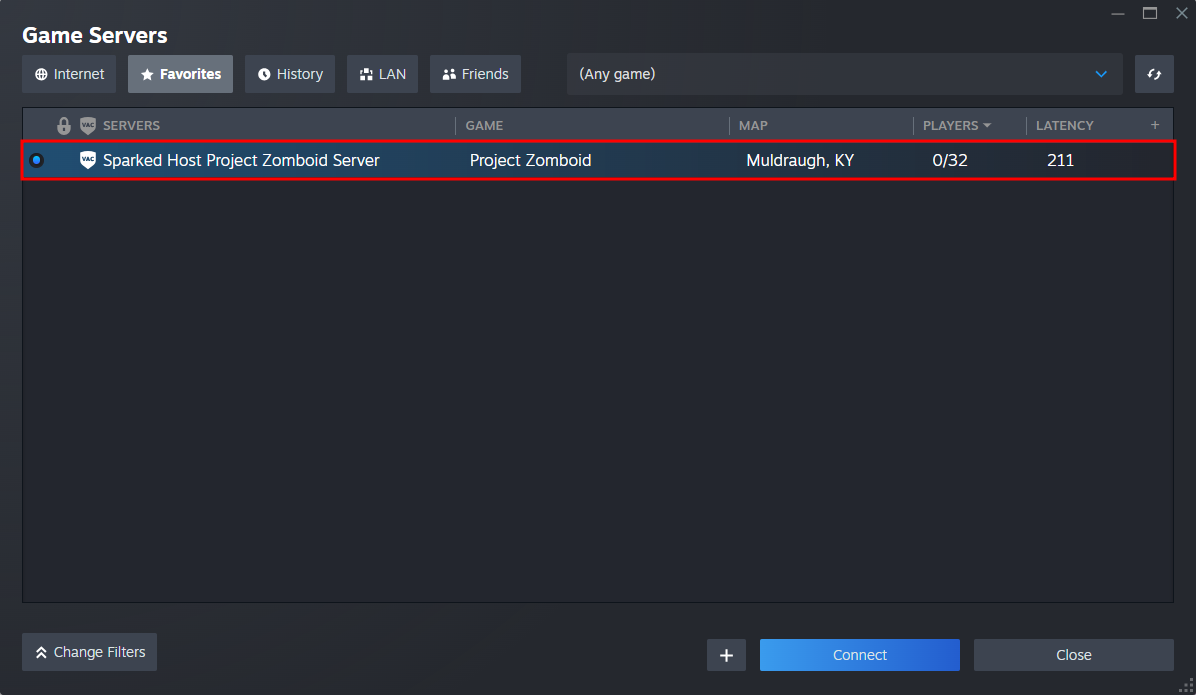
Method 2: Steam Server List
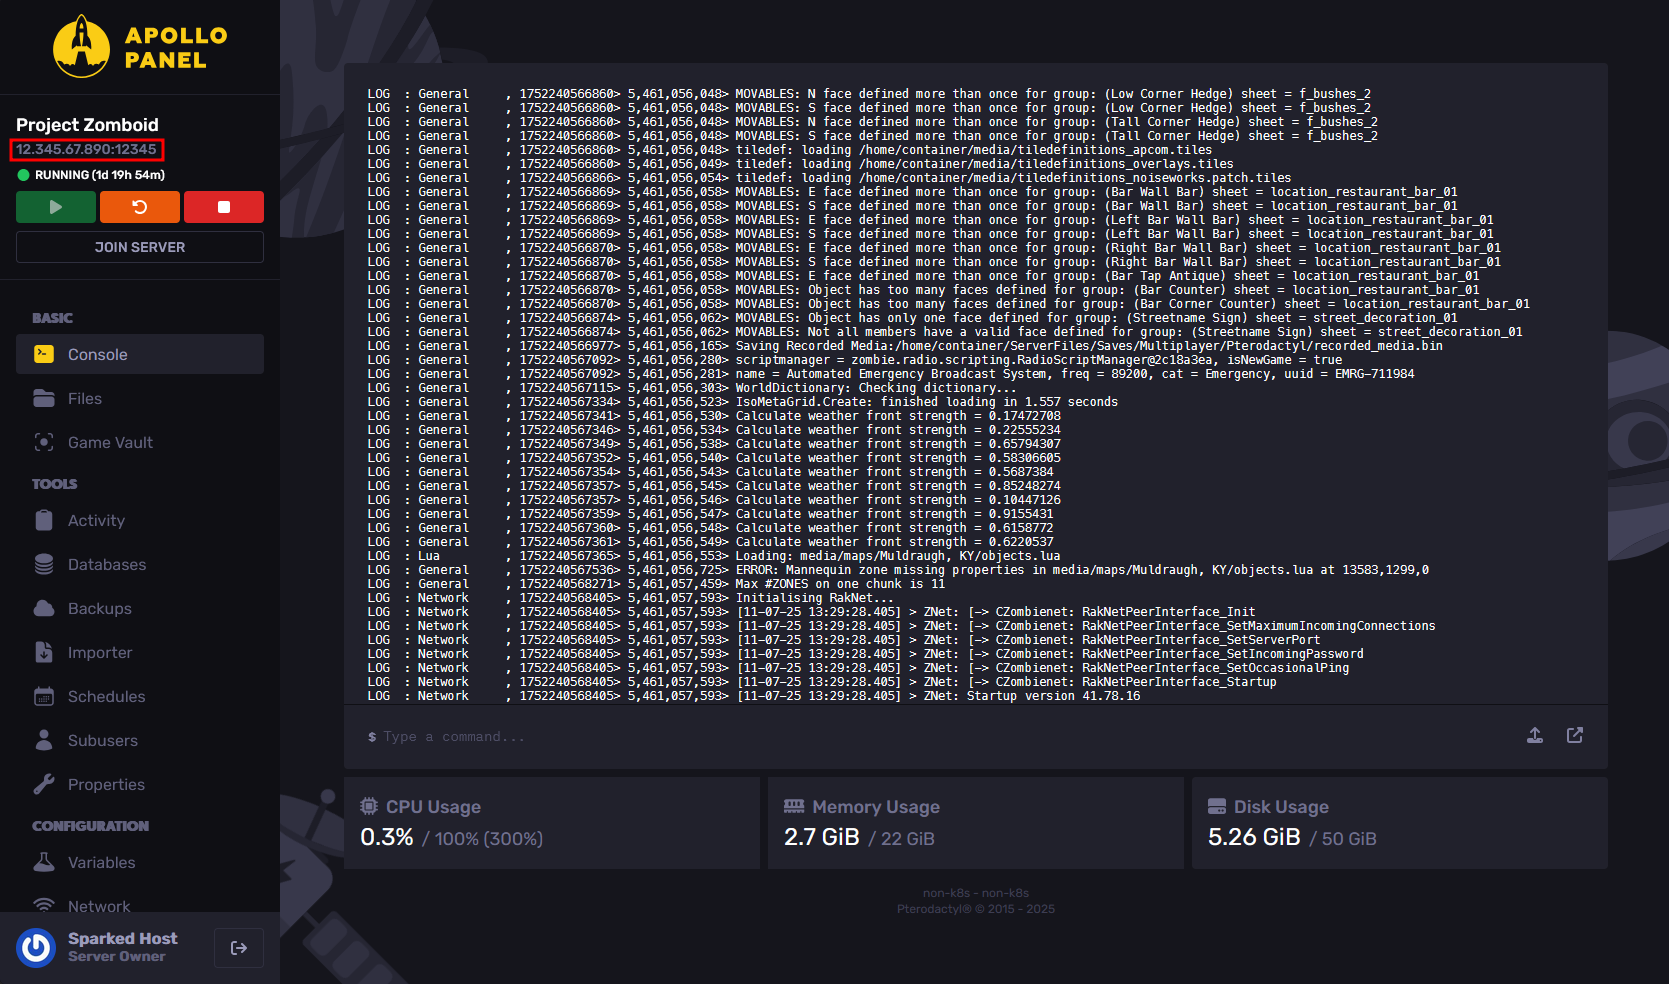
- Go to the Apollo Panel and ensure that the service is running.
- Copy the server address located above the server start and stop buttons.
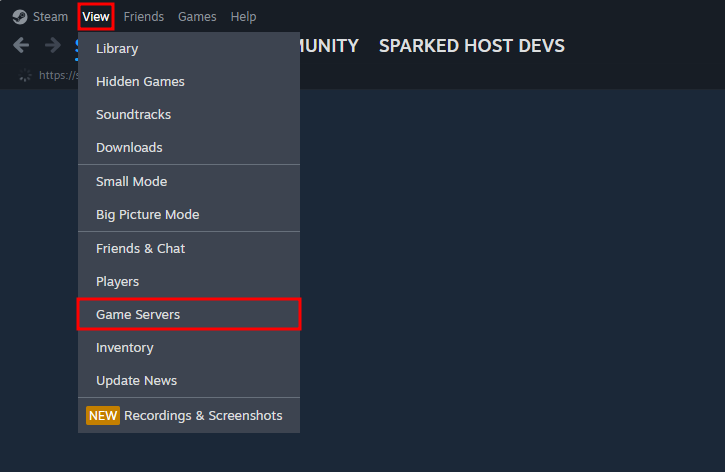
- Open the Steam client, navigate to "View", then "Game Servers".
- Click on "Favorites", then the Add Server button.
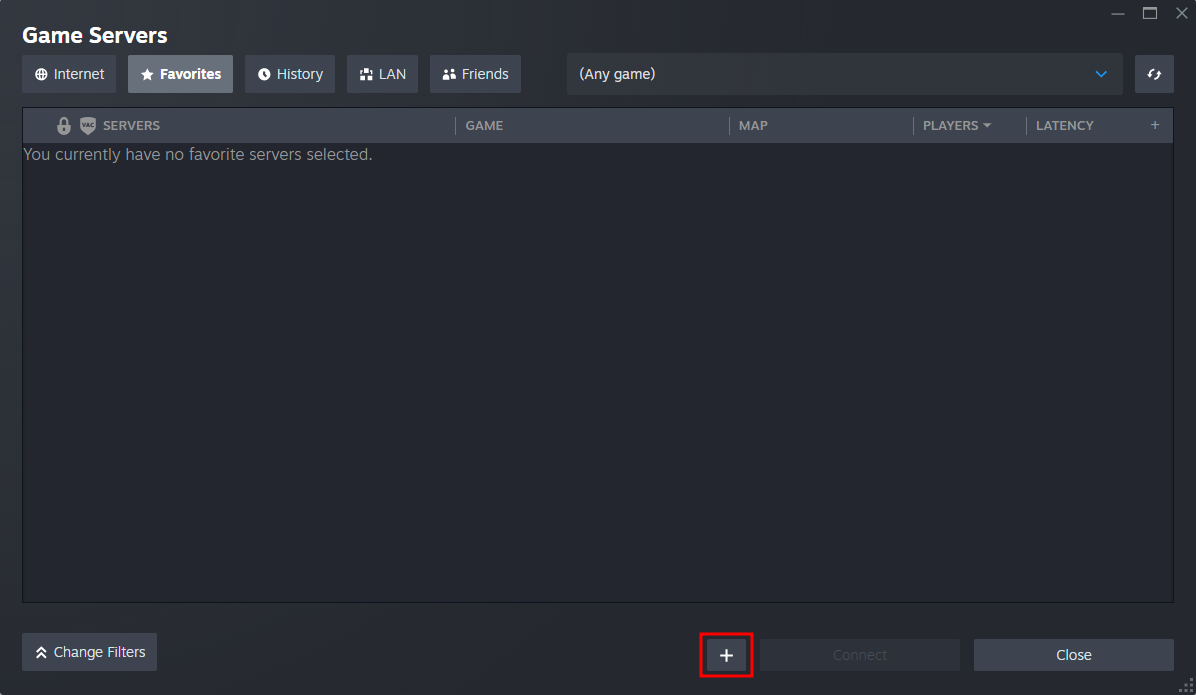
- Paste the server address, then select "OK".

- Choose your server from the list, and click "Connect" to join the server.
Still have some questions about joining a Project Zomboid server?
Don't hesitate to reach out to our support team! We're available 24/7 to assist!
By: Ali A.
Updated on: 13/07/2025
Thank you!