How To Make A Javascript Discord Bot
How To Make A JavaScript Discord Bot
Creating a Discord bot with JavaScript is easier than you might think, thanks to powerful libraries like Discord.js. With just a few lines of code, you can bring your Discord server to life with custom commands, automation, moderation tools, and interactive features. This guide will walk you through the essentials to get your own Discord bot up and running using Node.js.
If you want to learn how to build Discord bots in Python, see https://help.sparkedhost.com/en/article/how-to-make-a-python-discord-bot-14h3jtq/.
You can also find the GitHub repository for the Discord bot that I made during this tutorial here: https://github.com/Blue-Robin-Taken/Sparked-Discord-JS-Tutorial.
Why your own Discord Bot?
Even though bots like MEE6 and Dyno exist, creating your own Discord bot can allow you to:
- Gain a ton of programming knowledge
- Do things without a paywall (MEE6 is quite expensive for basic things that you can program yourself)
- Your Discord bot can automate a lot of tasks, like playing music or moderating chat.
Prerequisites
Basic programming knowledge with JS is recommended. You can learn this at https://www.freecodecamp.org/news/full-javascript-course-for-beginners/. If you already know JS, a JavaScript Discord Bot can be a great project to expand your skills while making something awesome.
Installing Node.js
Most libraries require Node.js as the Discord Bot will run on the server side. Installation is super simple.
- Go to https://nodejs.org/en/download
- Download the latest version of Node.js
Setting up the Discord bot on Discord
Setting up The Application and Token
Note: Most outdated tutorials will say that you need to press "add bot", but Discord changed its UI. The bot is already added when you create a new application. There is no place to press "add bot."
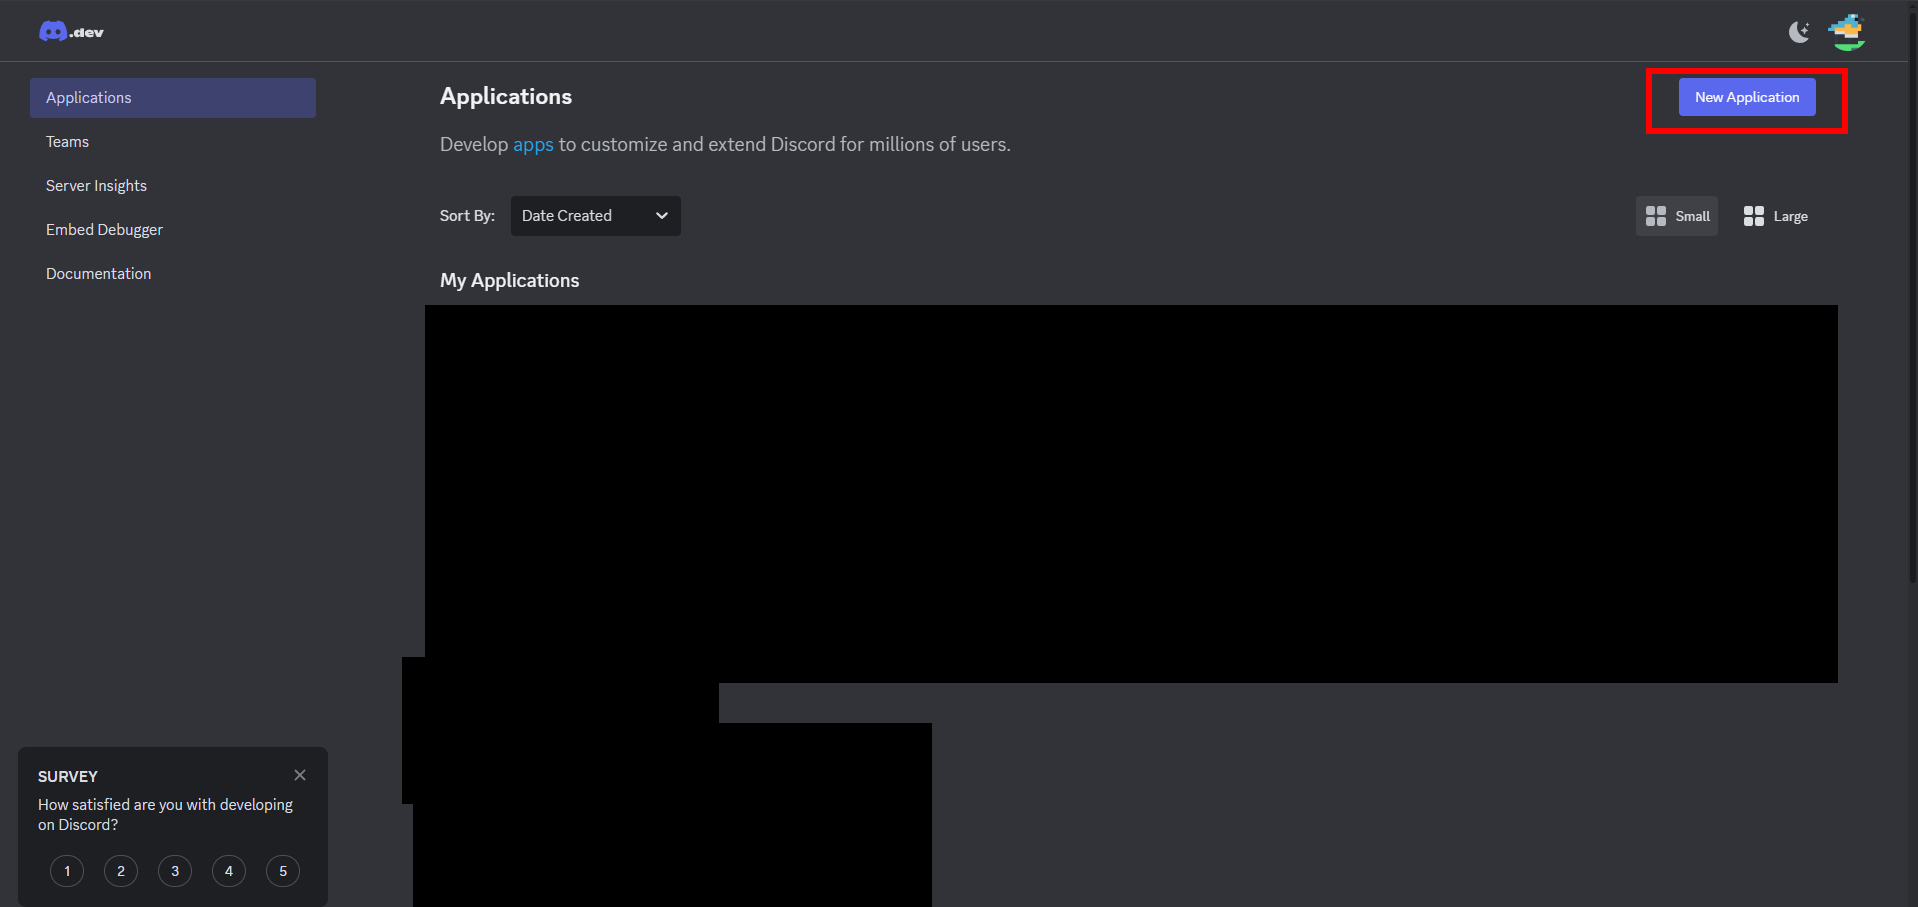
- Go to the Discord developer portal at https://discord.com/developers/applications
- Log in to your Discord account and press `New Application`. The `New Application` page will create your bot application.
- After you create your application, go to the `Bot` page on the left-hand side. This new application will be linked to your Discord account (there is no "add bot" button; the bot should already be added).
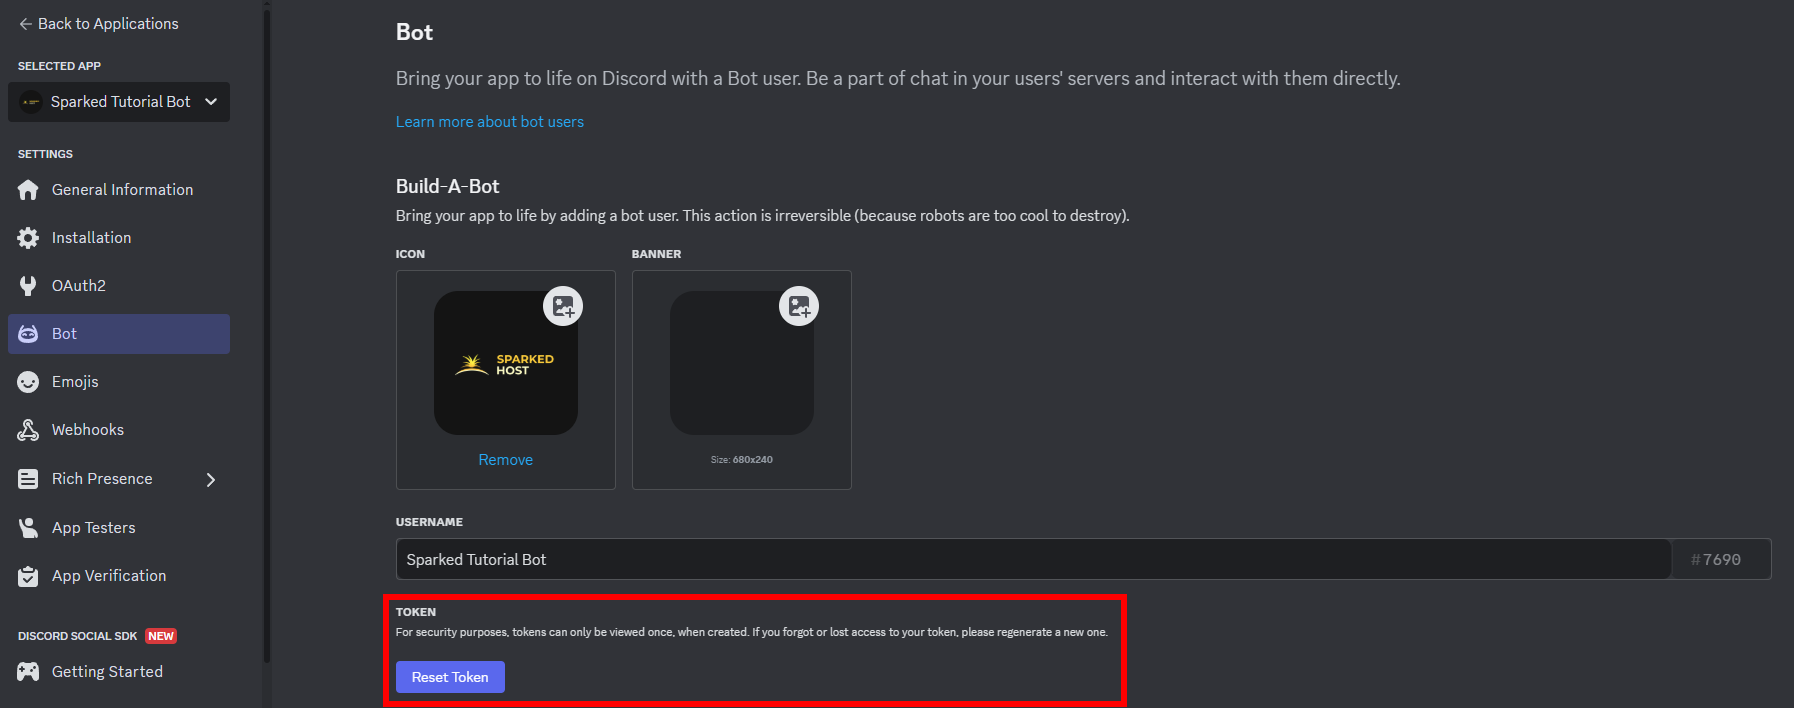
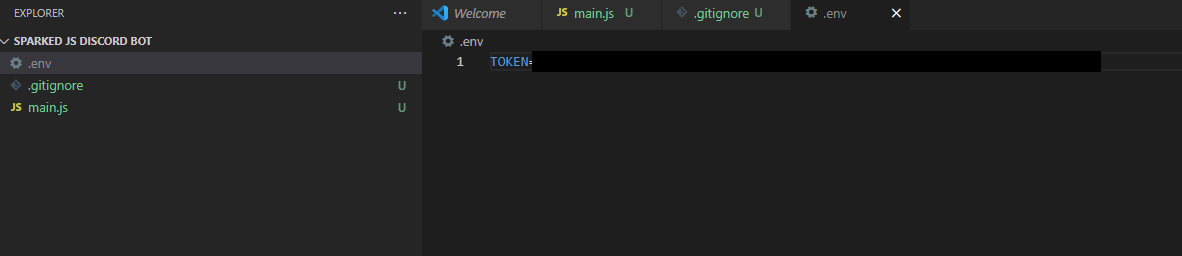
Reset your token with the `Reset Token` button. Copy this token because it will be used to log into the bot. KEEP THIS TOKEN SAFE!!! Do NOT share it with ANYONE. They can take over your bot and do funny things with it. - After that, create a `.env` file (environment variables file) in your project's directory. You'll want to put your token in a variable called `TOKEN` (or whatever you want).\
```
TOKEN=[put your token here]
```
Inviting your Discord Bot
After you get the token set up, you might want to invite your bot. To do that:
- Go back to the developer portal and your Discord application
- Go to the OAuth2 page to create the URL to invite your bot
- Under `Scopes` select `application.commands` and `bot` for the URL generator
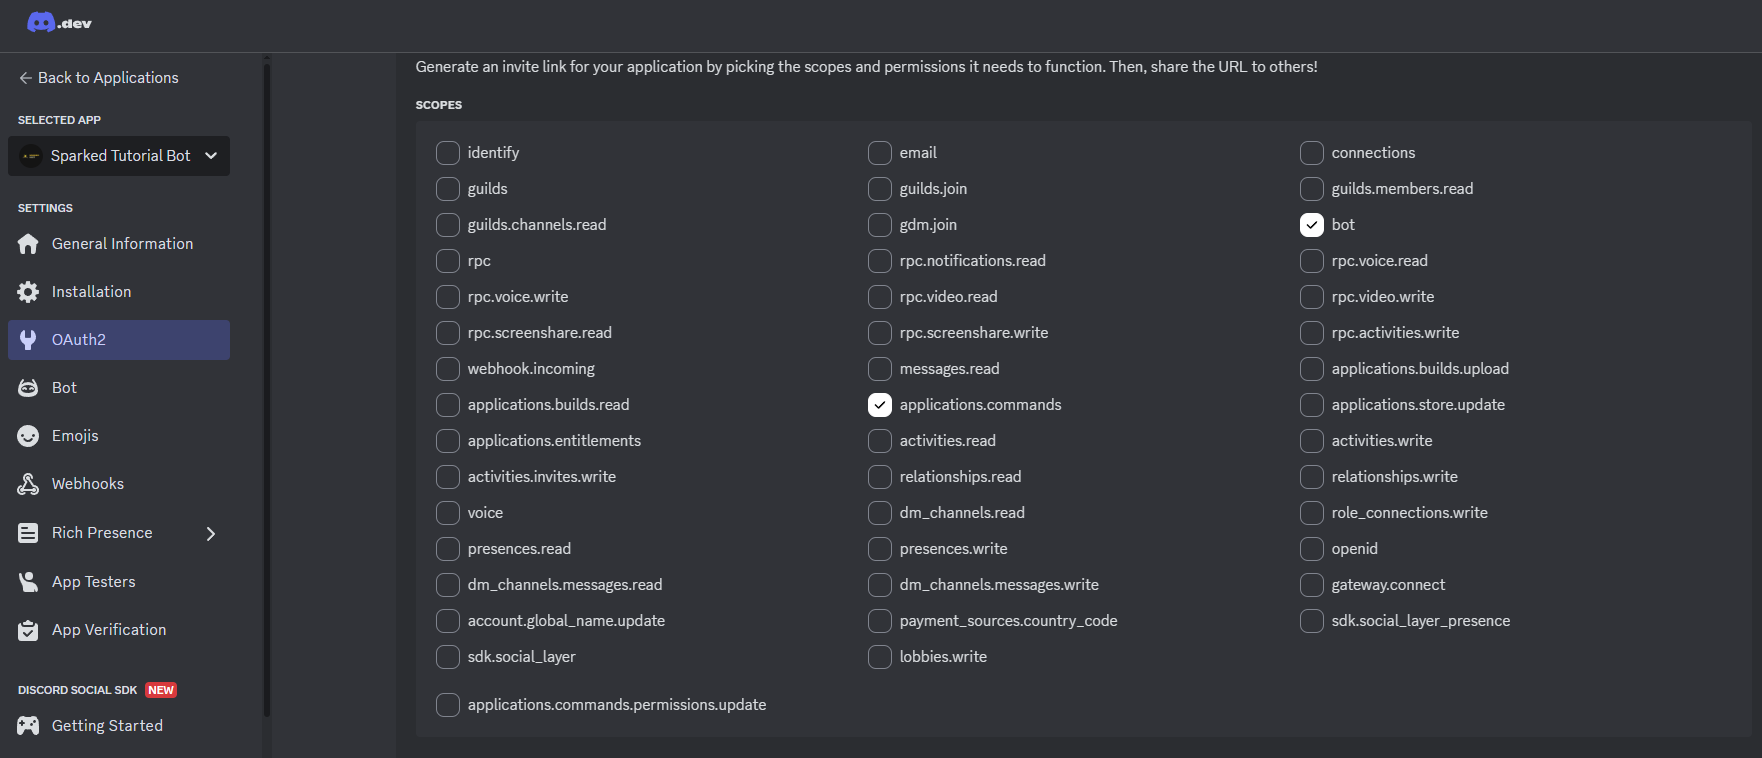
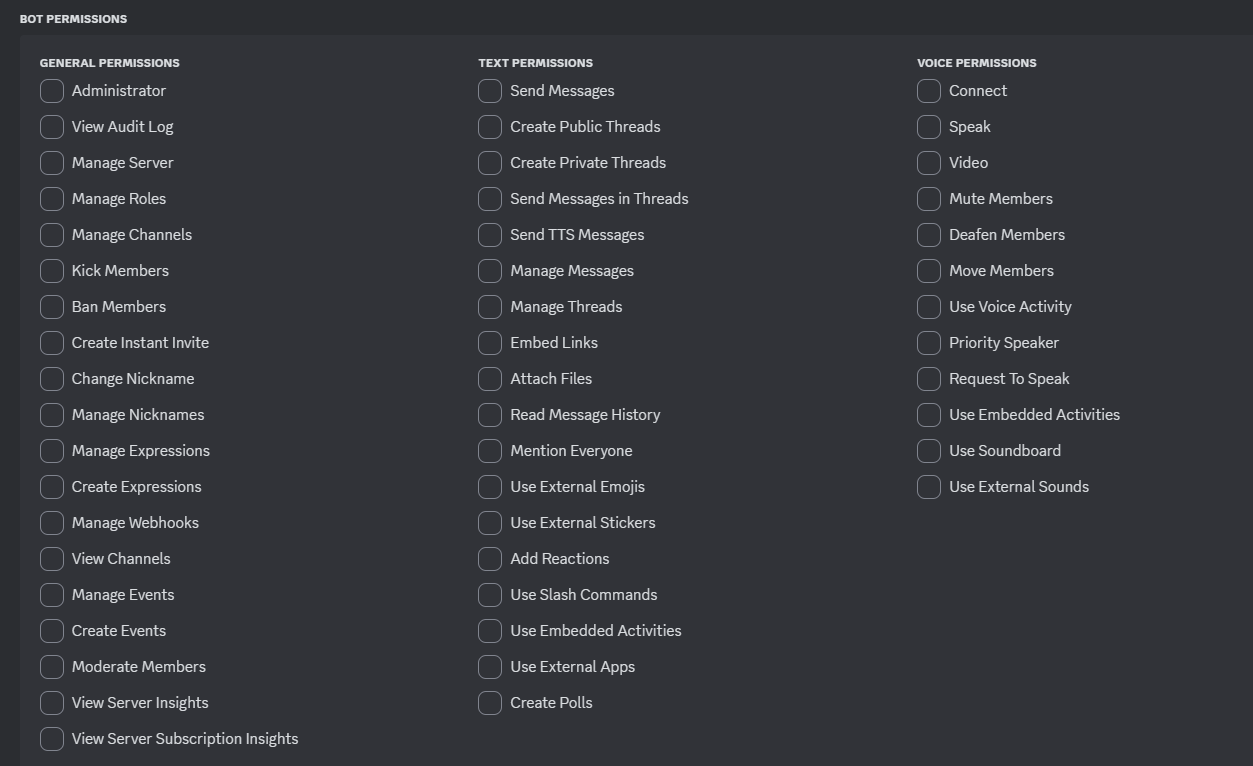
- The URL generator also takes in permissions. For Bot permissions, give it Administrator if you're really lazy, OR just set it to what it needs command-wise. Bot permissions here are the same as user permissions (in the sense that anything set for a user would be the same for the bot):
- Then set the Integration type to `Guild Install` and copy the URL generated
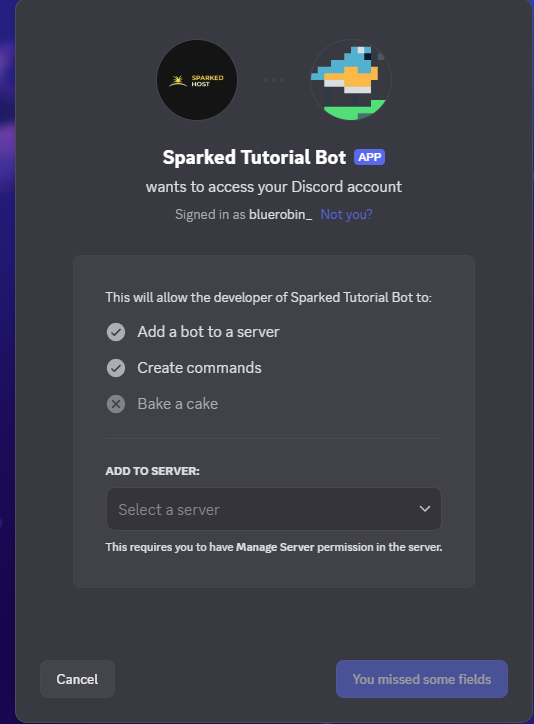
- Go to this URL in a new tab to add it to any Discord server you have permissions on
Integrated Development Environment (IDE)
This section of the tutorial will go over what an IDE is and why you'll need one. If you already know what an IDE is, you can skip this part.
What's an IDE?
An IDE stands for an Integrated Development Environment. It's basically a code editor and where you run your code. An all-in-one workspace for good development.
IDEs can have extensions that are really useful during development. You can also write your own extensions if you're crazy (I mean awesome) enough.
Different types of IDEs
Web IDEs like Replit or GitHub's codespaces are commonly used to develop through a web browser. None of the processes are done with your computer (except loading the website itself); it's all handled on their servers. Yet, there are some drawbacks: it can be slow sometimes, Replit has made some recent paywalls, and limited extension use.
There are also languages built for a particular language. For JS, there aren't really any IDEs made for just JS. However, VSCode (Visual Studio Code) is an awesome IDE.
Creating a Discord Bot with Discord.js
Setup
First, you need to install the discord.js library in your project's directory via:
npm install discord.jsYou'll also want to create your bot's file. I called mine `main.js`.
We'll also want to install `dotenv` for future env usage:
npm install dotenv(optional) You may want to install a linter as well. A linter is a tool that can help with syntax errors and is quite useful. You can install ESLint with:
npm install eslinterCode
The Basic Bot
First, we'll import stuff from `discord.js. You can find the documentation here: https://discord.js.org/.
If you're using a `.js` file:
const { Client, Events, GatewayIntentBits } = require('discord.js');
const dotenv = require('dotenv').config();
If you're using a `.mjs` file for ESLint:
import { Client, Events, GatewayIntentBits } from 'discord.js';
import dotenv from 'dotenv';
dotenv.config();
Next, we'll want to get our token (also called client secret) from the `dotenv` to read environment variables set from our env file. We do this with:
const TOKEN = process.env.TOKEN; If `TOKEN` was not the name you set the client secret to in your env file, then replace `TOKEN` in `process.env.TOKEN` with the name that you used.
Then, we'll create an instance of `Client` that our bot will run off of:
const client = new Client({ intents: [GatewayIntentBits.Guilds] });The intents ensure that your bot only uses certain resources in Discord's api. If you want to read message content (if you're doing message commands), you will have to add `GatewayIntentBits.MessageContent` and `GatewayIntentBits.GuildMessages` to intents:
const client = new Client({ intents: [GatewayIntentBits.Guilds, GatewayIntentBits.GuildMessages, GatewayIntentBits.MessageContent] });Next, we can set an event so that when the bot logs in, we get a notification from Discord's API:
client.once(Events.ClientReady, (readyClient) => {
    console.log(`Ready! Logged in as ${readyClient.user.tag}`);
});
Finally, we'll get our bot running with the token:
client.login(TOKEN);Full code:
// Use commented out imports if you're just using plain js
// const { Client, Events, GatewayIntentBits } = require('discord.js');
// const dotenv = require('dotenv').config();
import { Client, Events, GatewayIntentBits } from 'discord.js';
import dotenv from 'dotenv';

dotenv.config();

const TOKEN = process.env.TOKEN;

const client = new Client({ intents: [GatewayIntentBits.Guilds] });

client.once(Events.ClientReady, (readyClient) => {
    console.log(`Ready! Logged in as ${readyClient.user.tag}`);
});

client.login(TOKEN);
Assuming you did everything properly, you should see your Discord bot go online, and the following message should appear in the console:

Message Interactions
A bot that goes online is cool and all, but we want it to be able to do things. After Discord changed its intents policy, message interaction commands are a bit more difficult to maintain if your bot user manages to find itself in more than 100 servers. If you want to do Discord message commands, make sure you have one of the following:
- Ensure that your command absolutely needs to be able to read messages
- You're not going to have the bot be in more than 100 servers / you're not going to be advertising the bot
So, to actually add Discord message interactions, make sure that:
- The bot's intents on Discord's developer portal are fine to read messages
- The bot intents in your code are properly registered
So to set up message events, we'll first add the event to our client:
client.once('messageCreate', (message) => {})Now, we need to check if the message is not a bot user so that we don't get any recursion:
    // Ignore messages from bots
    if (message.author.bot) return;
After that, we can add our commands:
    if (message.content.startsWith('?')) {
        if (message.content == '?ping') {
            message.channel.send(
                `Pong 🏓! My ping is: ${client.ws.ping}`
            );
            // https://stackoverflow.com/a/63411714/15982771
            return;
        }
    }
This checks if the message starts with `?ping` and then sends "Pong!" with the ping.
The full code for the event should look like:
client.once('messageCreate', (message) => {
    // Ignore messages from bots
    if (message.author.bot) return;

    if (message.content.startsWith('?')) {
        if (message.content == '?ping') {
            message.channel.send(
                `Pong 🏓! My ping is: ${client.ws.ping}`
            );
            // https://stackoverflow.com/a/63411714/15982771
            return;
        }
    }
});
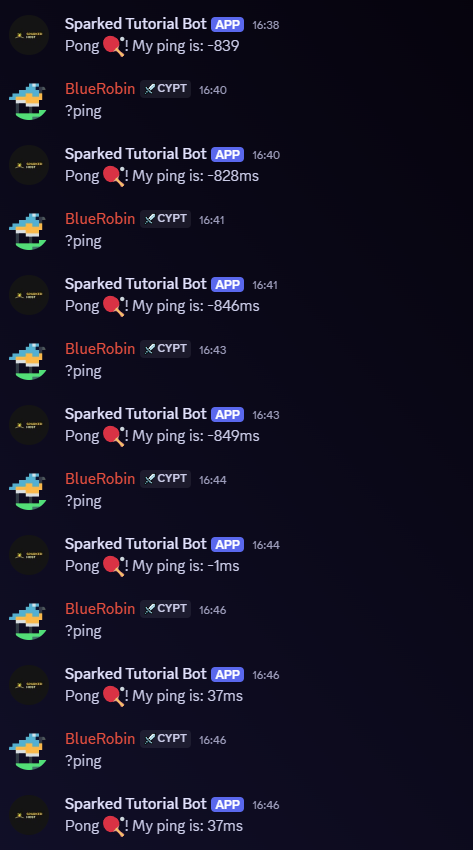
*I know the image shows negative ping... but I have no idea why... This is really weird to reproduce, and there is a post from three years ago about it: https://stackoverflow.com/questions/68649131/ping-has-a-negative-value-discord-js-v13
Slash Commands
Say you want your bot to be in 1k Discord servers and to have some pretty nice commands. The best way to go about creating a Discord bot like this would be to set up some slash commands.
The process for creating slash commands is as follows:
- Create a file to set up your commands in
- Create a method of registering those commands with Discord
- Create a method for registering when Discord sends you those commands so that you can send back a response
First, create a new folder called `commands` and then make a new JavaScript file (it can be named whatever). I will note that all of my examples will be created with `.mjs`, but the process is very similar to `.js`.
Next, we'll create our command in the new file (I'm using .mjs):
import { SlashCommandBuilder } from 'discord.js';

export default {
    data: new SlashCommandBuilder()
        .setName('potato')
        .setDescription('TACTICAL POTATO INCOMING!'),
    async execute(interaction) {
        await interaction.reply('🥔');
    },
};
We also need to make sure commands get loaded on startup from the main file. The below script is from the Discord.js documentation:
client.commands = new Collection();

const foldersPath = path.join(__dirname, 'commands');
const commandFolders = fs.readdirSync(foldersPath);

for (const folder of commandFolders) {
	const commandsPath = path.join(foldersPath, folder);
	const commandFiles = fs.readdirSync(commandsPath).filter(file => file.endsWith('.js'));
	for (const file of commandFiles) {
		const filePath = path.join(commandsPath, file);
		const command = require(filePath);
		// Set a new item in the Collection with the key as the command name and the value as the exported module
		if ('data' in command && 'execute' in command) {
			client.commands.set(command.data.name, command);
		} else {
			console.log(`[WARNING] The command at ${filePath} is missing a required "data" or "execute" property.`);
		}
	}
}
What it does is:
- Loops through every folder in the commands directory
- Sets the `Collection()` instance (it's a Discord.js import that extends Map) to log the command
It's super simple, but it doesn't work with my setup (because I used only one folder instead of two + I'm using `mjs` instead of `js`).
Instead, I did:
client.commands = new Collection();

const foldersPath = fs
    .readdirSync(path.join(__dirname, 'commands'))
    .filter((file) => file.endsWith('.mjs'));

for (const file of foldersPath) {
    const filePath = path.join(path.join(__dirname, 'commands'), file);
    const commandModule = await import(pathToFileURL(filePath).href);
    const command = commandModule.default;
    console.log(commandModule);
    if ('data' in command && 'execute' in command) {
        client.commands.set(command.data.name, command);
    } else {
        console.log(
            `[WARNING] The command at ${filePath} is missing a required "data" or "execute" property.`
        );
    }
}

client.on(Events.InteractionCreate, async (interaction) => {
    if (!interaction.isChatInputCommand()) return;

    const command = interaction.client.commands.get(interaction.commandName);

    if (!command) {
        console.error(
            `No command matching ${interaction.commandName} was found.`
        );
        return;
    }

    try {
        await command.execute(interaction);
    } catch (error) {
        console.error(error);
        if (interaction.replied || interaction.deferred) {
            await interaction.followUp({
                content: 'There was an error while executing this command!',
                flags: MessageFlags.Ephemeral,
            });
        } else {
            await interaction.reply({
                content: 'There was an error while executing this command!',
                flags: MessageFlags.Ephemeral,
            });
        }
    }
});
Now that we have our command, we have to register it!
Guild commands
Guild commands are commands that are only registered for a specific server. This is really useful for testing, but I wouldn't recommend this if your bot is on multiple servers that rely on your bot's commands.
Below is the deployment script from the Discord.js documentation.
const { REST, Routes } = require('discord.js');
const { clientId, guildId, token } = require('./config.json');  // client id from the config.json file
const fs = require('node:fs');
const path = require('node:path');

const commands = [];
// Grab all the command folders from the commands directory you created earlier
const foldersPath = path.join(__dirname, 'commands');
const commandFolders = fs.readdirSync(foldersPath);

for (const folder of commandFolders) {
	// Grab all the command files from the commands directory you created earlier
	const commandsPath = path.join(foldersPath, folder);
	const commandFiles = fs.readdirSync(commandsPath).filter(file => file.endsWith('.js'));
	// Grab the SlashCommandBuilder#toJSON() output of each command's data for deployment
	for (const file of commandFiles) {
		const filePath = path.join(commandsPath, file);
		const command = require(filePath);
		if ('data' in command && 'execute' in command) {
			commands.push(command.data.toJSON());
		} else {
			console.log(`[WARNING] The command at ${filePath} is missing a required "data" or "execute" property.`);
		}
	}
}

// Construct and prepare an instance of the REST module
const rest = new REST().setToken(token);

// and deploy your commands!
(async () => {
	try {
		console.log(`Started refreshing ${commands.length} application (/) commands.`);

		// The put method is used to fully refresh all commands in the guild with the current set
		const data = await rest.put(
			Routes.applicationGuildCommands(clientId, guildId),
			{ body: commands },
		);

		console.log(`Successfully reloaded ${data.length} application (/) commands.`);
	} catch (error) {
		// And of course, make sure you catch and log any errors!
		console.error(error);
	}
})();
If you're interested in how this works:
- It goes through every single folder in the folder provided (commands)
- It filters for every subfolder's JavaScript file
- It puts what's in the file into JSON and puts that in a list called [commands]
- It inserts your token into an instanced `REST` class, which makes requests to Discord's API
- Then it uses that instanced class to make a `PUT` request to Discord's API to register those commands.
- What you'll notice, however, is that this setup is slightly different from the setup we created earlier (with one file in one folder called commands versus multiple subfolders). We'll have to edit this deployment script.
This script also requires you to make a `config.json`:
{
	"token": "your-token-goes-here",
	"clientId": "your-application-id-goes-here",
	"guildId": "your-server-id-goes-here"
}
But, I made a slightly different deployment script using only loaded environment variables (no config.js) and only one directory:
import { REST, Routes } from 'discord.js';
import dotenv from 'dotenv';
dotenv.config();

const clientId = process.env.clientID;
const guildId = process.env.guildID;
const token = process.env.TOKEN;
import { readdirSync } from 'node:fs';
import { join } from 'node:path';
import { fileURLToPath } from 'url';
import { dirname } from 'path';
import { pathToFileURL } from 'url';
const __filename = fileURLToPath(import.meta.url);
const __dirname = dirname(__filename);
const commands = [];
const foldersPath = join(__dirname, 'commands');
const commandFiles = readdirSync(foldersPath).filter((file) =>
    file.endsWith('.mjs')
);

(async () => {
    for (const file of commandFiles) {
        const filePath = join(foldersPath, file);
        const commandModule = await import(pathToFileURL(filePath).href);
        const command = commandModule.default;

        console.log(command);

        if ('data' in command && 'execute' in command) {
            commands.push(command.data.toJSON());
        } else {
            console.log(
                `[WARNING] The command at ${filePath} is missing a required "data" or "execute" property.`
            );
        }
    }

    const rest = new REST().setToken(token);
    try {
        console.log(
            `Started refreshing ${commands.length} application (/) commands.`
        );

        const data = await rest.put(
            Routes.applicationGuildCommands(clientId, guildId),
            { body: commands }
        );

        console.log(
            `Successfully reloaded ${data.length} application (/) commands.`
        );
    } catch (error) {
        console.error(error);
    }
})();
Because I used `mjs`, there's a top-level async to make sure one part doesn't get run before the other part. Other than that, if you're using JS, the process should be very similar.
If you use the script that I created, make sure you set the following environment variables in your `.env` file:
TOKEN=[token here]
clientID = [id here]
guildID = [id here]
If you're wondering how to get the client and guild ID:
- Enable developer mode on your Discord account (User settings -> Advanced -> Developer Mode)
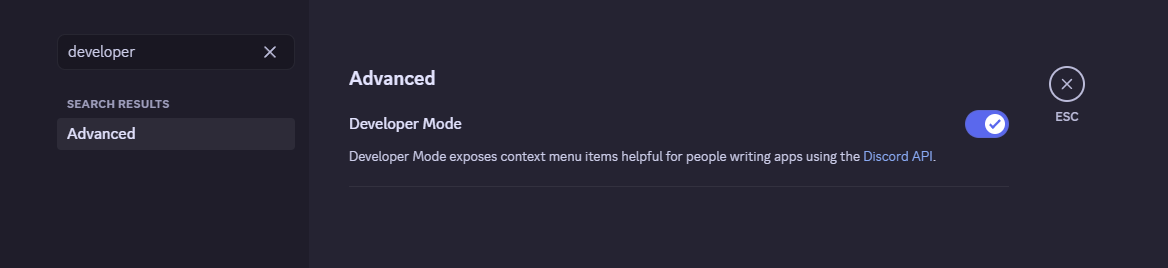
- Then, go to your guild/server and right click -> copy ID
- Do that for the Discord bot's account as well
After you create that file and fill in the parameters, run your deployment script:
node deploy-commands.jsIf this works, you should see:

Global commands
Global commands are commands that are registered in every server that the bot is in. This is good if your bot is in a ton of servers. Yet, there's a drawback: the bot will take a little longer to register commands (an hour or two at most). I would only recommend this if the bot will be on multiple servers.
It's also good to note that global commands will need the `application.commands` scope enabled when inviting the bot (in the URL generation).
To do this, all you need to change in your deployment script is `applicationGuildCommands` to `applicationCommands`; also, remove the parameter to the `guildID` (read section on guild commands).
So instead of:
const data = await rest.put(
	Routes.applicationGuildCommands(clientId, guildId),
	{ body: commands },
);
It's:
await rest.put(
	Routes.applicationCommands(clientId),
	{ body: commands },
);
Running the command
Mine looked like:

Where do I run my Discord bot?
After you get all the code finished and the bot done, you may realize that once you turn off your computer, nobody else can use your bot (because the code isn't running). You have a couple of options:
- Keep your computer on (Maybe get a Raspberry Pi)
- Use Replit and uptime robot to keep your bot alive (not recommended!!!)
- Buy a server (SparkedHost is perfect and cheap from my own personal experience)
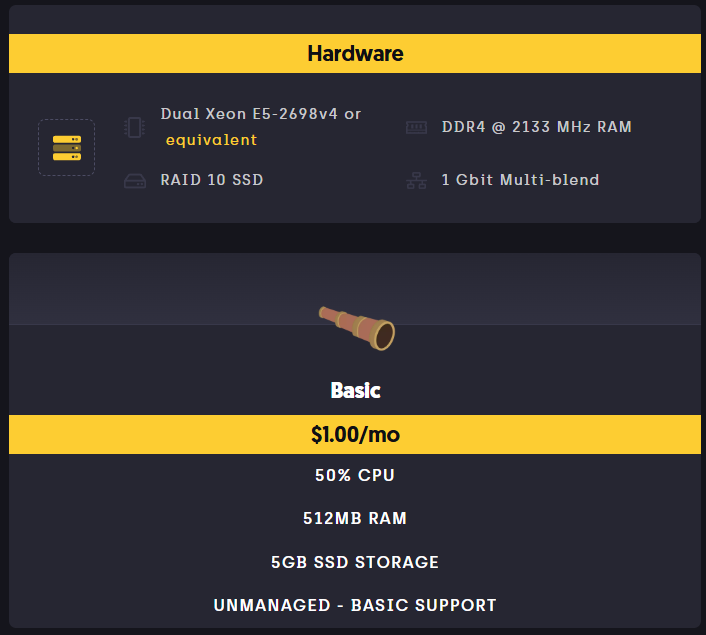
If your bot is relatively small, the initial cost investment into buying a SparkedHost server is way cheaper than purchasing a Pi and keeping it running (It'll be ~$12 for the entire year versus three times that for the Pi). The support is also really good.
Still have some questions about making a JavaScript Discord Bot?
You'll find that our Discord chat server will be quite helpful at https://discord.gg/sparked.
Updated on: 27/05/2025
Thank you!