How To Make A Minecraft 1.16.5 Server
Hosting a Minecraft server on version 1.16.5 is a great choice for those who want a stable, mod-friendly environment for friends. Known as the final update in the Nether Update series, 1.16.5 is widely used for modpacks and community servers thanks to its strong compatibility and performance.
This article will teach you how to make a 1.16.5 minecraft server on Java edition for a Linux VPS (or your own Linux computer) or a shared server with Sparked Host.
Don't already host with us? 10,000+ server owners trust Sparked Host for lag-free Minecraft worlds. Claim your server savings to get higher performance at less $ per month.
Key Features of Version 1.16.5 (and 1.16 Overall)
Minecraft 1.16.5, the final patch in the Nether Update series perfect for multiplayer, focused on fixing bugs and improving stability for multiplayer servers. While 1.16.5 itself didn’t introduce new content, it solidified the experience introduced in 1.16, one of the most transformative updates in Minecraft’s history—especially for the Nether dimension.
- Revamped Nether: Introduced multiple new biomes—Crimson Forest, Warped Forest, Basalt Deltas, more places to explore with friends, and Soul Sand Valley
- New Structures: Added Bastion Remnants, which house Piglins, loot, and unique blocks
- Piglins and Hoglins: New Nether mobs with unique behaviors and trading mechanics
- Netherite gear: A new tier above Diamond—stronger, lava-resistant, and more durable
How to Change Your Minecraft Server Version to 1.16.5
Thankfully, making a 1.16.5 Minecraft server on a Sparked Host server is easy because of the simple GUI.
To make a Minecraft server that runs on 1.16.5:
- Shutdown your Minecraft server.
- Select versions on the righthand side
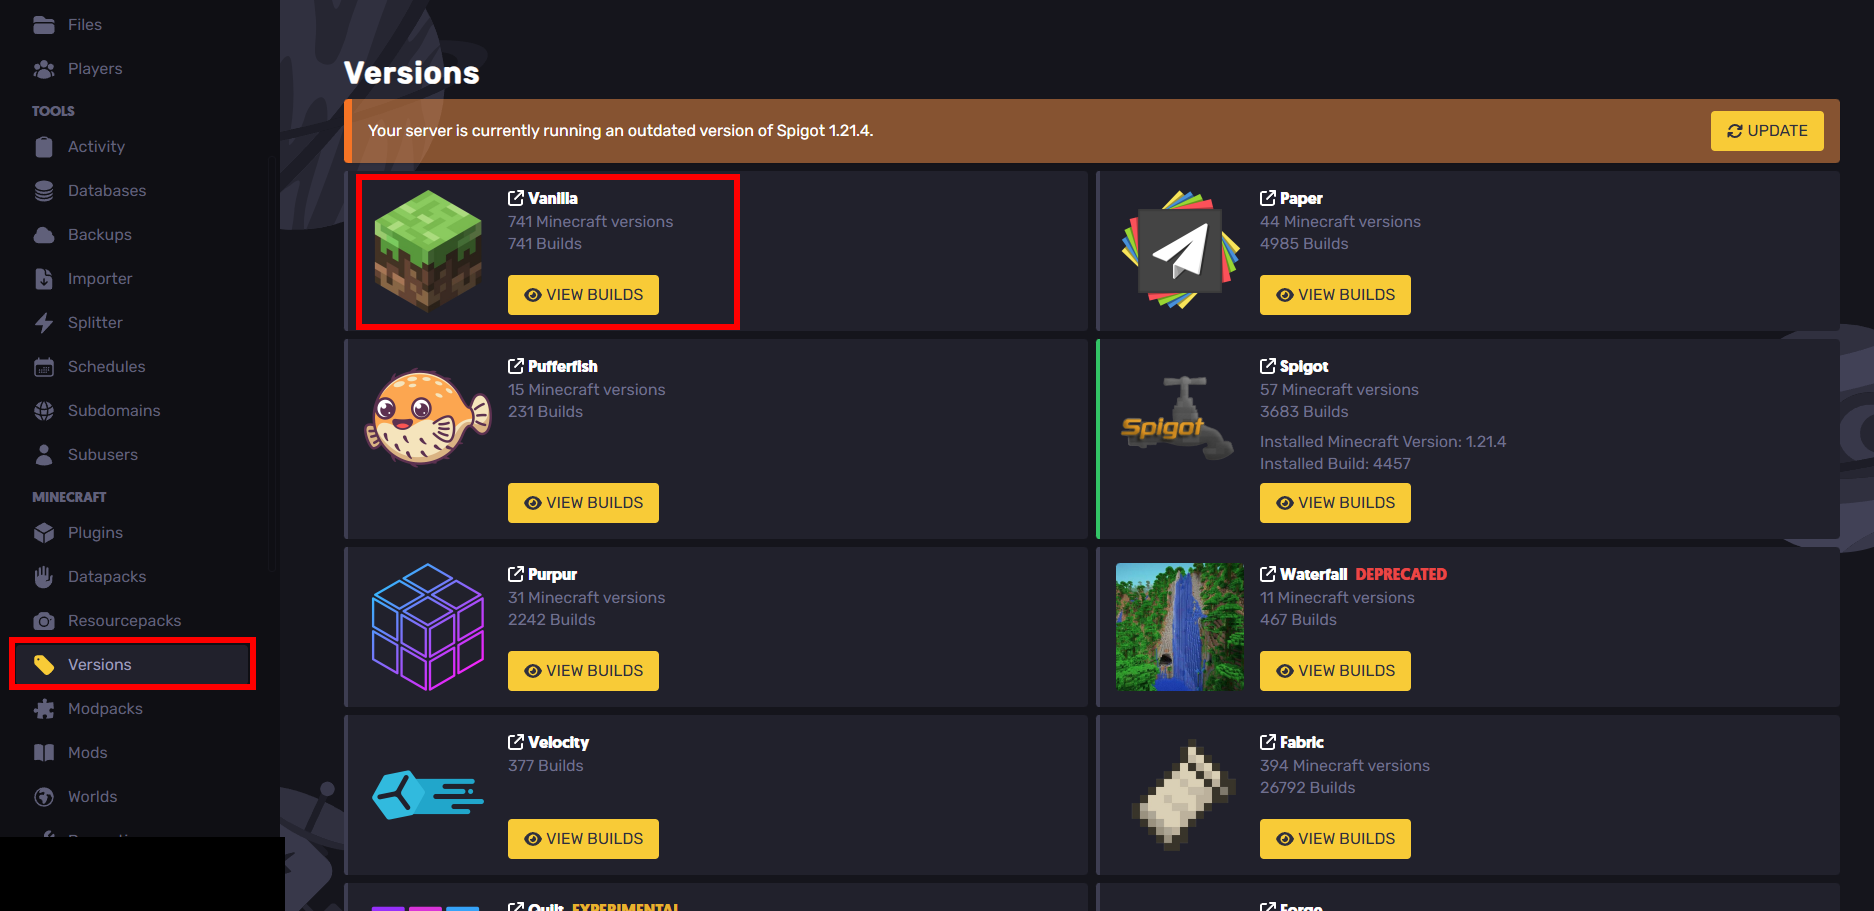
- Click on
VIEW BUILDSforVanilla
- Scroll down and select 1.16.5
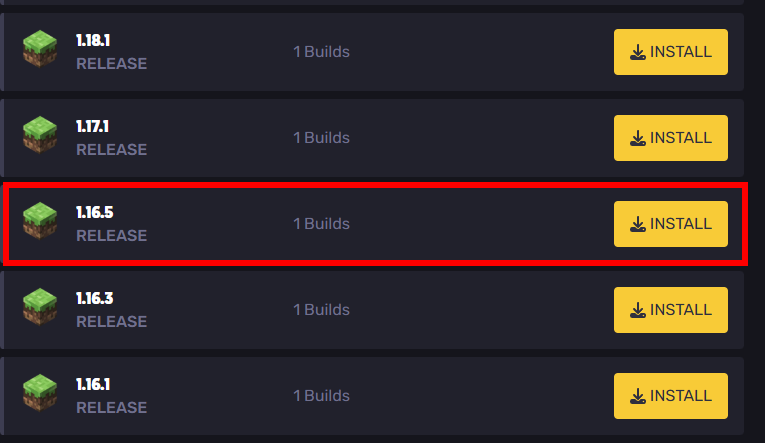
- Press install. Do note that if you had another version before that you were playing on, you should backup those files.
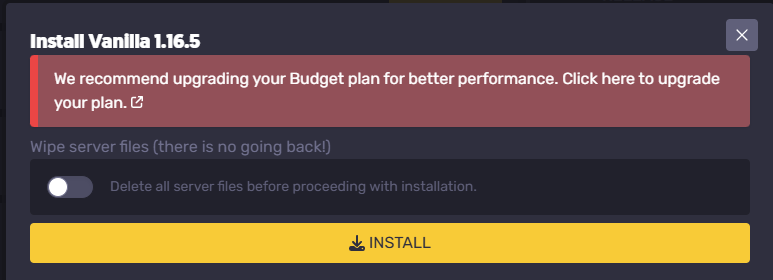
- Restart your server
How to Make a Minecraft 1.16.5 Server on a VPS
Minecraft servers can be run on Windows, macOS, GNU/Linux, and BSD operating systems. This tutorial assumes that you're on a Linux operating system for your VPS.
This process will be a little more difficult if you don't know linux commands. It's good to know the basic commands like cd and ls before proceeding.
However, if you don't know these commands, you can blindly follow this tutorial no problem either way.
Setting Up Java
For version 1.16.5, we'll at least want a Java version of at least Java 8 installed. For this tutorial, we'll have the latest Java installed so you can switch the version of your Minecraft server to a newer version in the future. There are also some performance benefits that come with using Java 24.
Here are some quick terms that are good to know:
- Java Virtual Machine (JVM) - Interprets the java code.
- Java Runtime Environment (JRE) - Used to run java programs, can't be used to create them. You'll need this to run your server. Includes the JVM as well.
- Java Development Kit (JDK) - Used to create java programs. Installing a JDK will include a JRE.
You might also have java already installed. Check if you do with the command:
java --version
If it's greater than 17 then you can skip this part of the tutorial. However, if you're running mods then you might want to consider lowering the version if the mod requires it.
For this tutorial, we'll install the lastest version of Java at https://www.oracle.com/java/technologies/downloads/.
Choose the download based off of what CPU architecture you have.
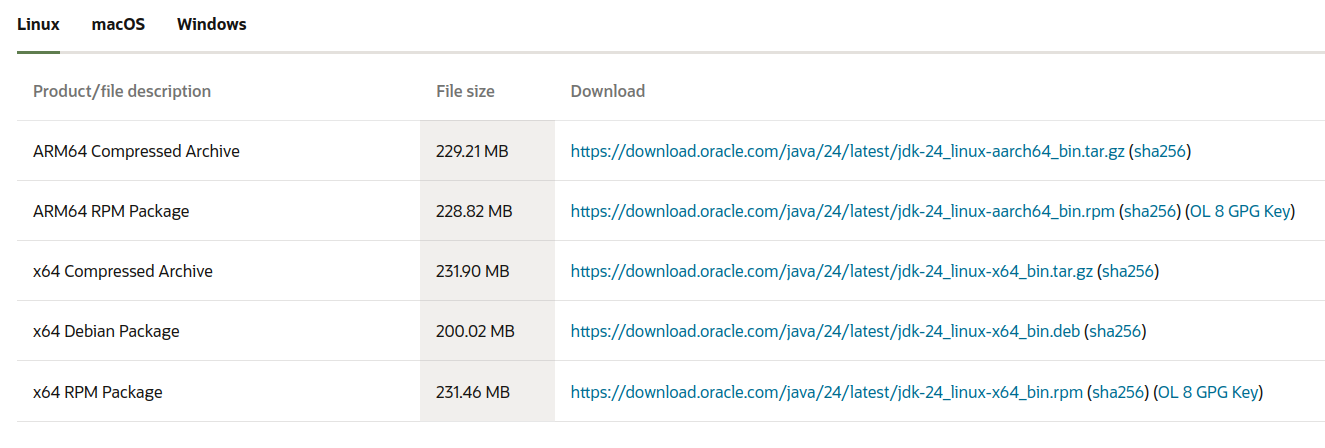
You can determine this with the command (in the image example: x86_64 = I would install the x64 compressed archive):
uname -p

Also, download the Compressed Archive type because it's easier to decompress (unless you know what you're doing of course).
Once it installs, decompress it with:
tar -xzvf jdk-24_linux-x64_bin.tar.gz
(Replace jdk-24linux-x64_bin.tar.gz with the file name)
Although this is now installed, we'll need to add this to PATH. In my example, I already had java 21 installed and I'm replacing it with java 24.
First, I echoed the PATH environment variable:

echo $PATH
Next, I:
- Got the current directory
pwd
- Rewrote the path variable with what it was before except I removed and replaced the older java version with the newer one I installed.
/home/julian/.sdkman/candidates/java/current/bin:/usr/local/sbin:/usr/local/bin:/usr/sbin:/usr/bin:/sbin:/bin:/usr/games:/usr/local/games:/snap/bin:/snap/bin
became
/home/julian/Downloads/jdk-24/bin:/usr/local/sbin:/usr/local/bin:/usr/sbin:/usr/bin:/sbin:/bin:/usr/games:/usr/local/games:/snap/bin:/snap/bin
With the
export PATH=
command.
Be very careful with what you set this command to because it can mess up other commands if set improperly.
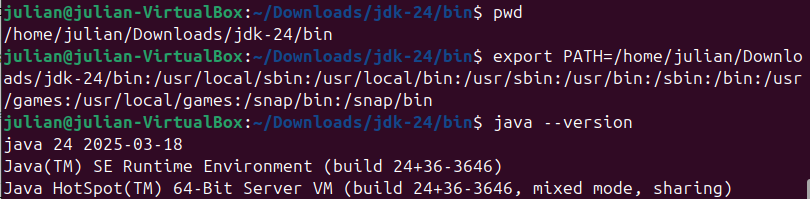
After that, check your version with:
java --version
(The output should give you the version)
If the path was set properly then it should work!
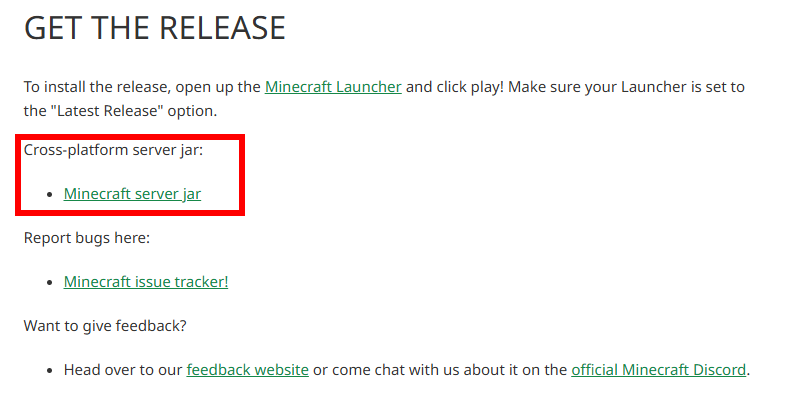
Downloading the 1.16.5 Server File
Go to https://feedback.minecraft.net/hc/en-us/articles/360055096392-Minecraft-Java-Edition-1-16-5 and install the server jar file.
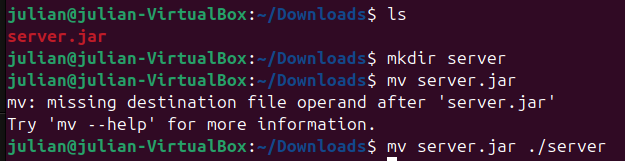
After installing, cd into your Downloads folder (or wherever it downloaded) and mkdir a new directory to store your server files in. mov the jar into that new server folder.
Starting Your 1.16.5 Minecraft Server
cd into the server folder that you moved your server jar file into. To get your minecraft server running, run the server jar file with java -jar server.jar (replace server.jar with the name of the server jar file if it's different) in your server folder. You can also run this command with the flag -nogui if you don't want any gui (say, you're running remotely). This will install server files.
The Minecraft server requires you to accept the EULA (end user license agreement) before it can run:
[16:04:38] [ServerMain/INFO]: You need to agree to the EULA in order to run the server. Go to eula.txt for more info.
Edit the eula.txt file with your preferred editor and change the eula variable to true. I used nano (please don't get mad vim supremacists).
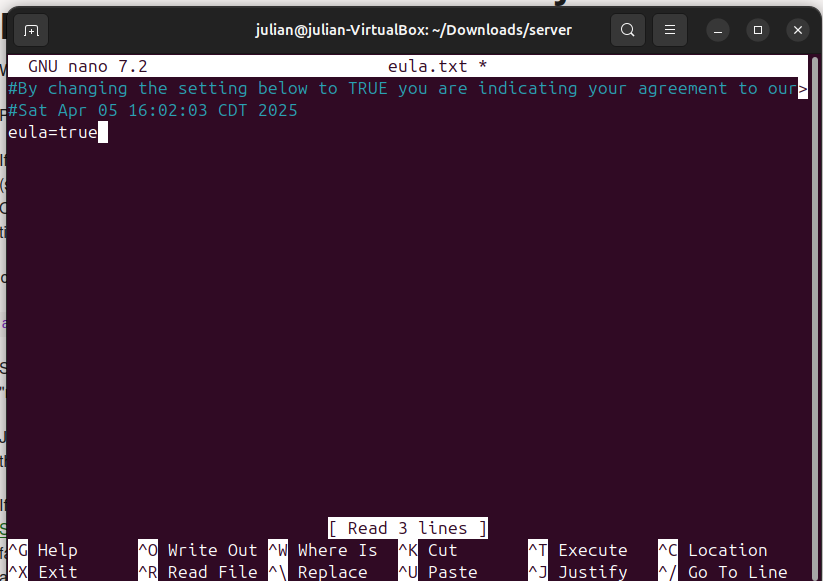
Then, rerun your server. It should launch and start creating your world files and generating the world.
If it's stuck at 0% for a while, you might need to allocate more ram/memory. This can be done with adding the flags -Xms and -Xmx to your command. -Xms changes the starting memory and -Xmx changes the max memory. For example:
java -jar -Xms2048M -Xmx2048M
Changing Server Settings
To change the server settings of your 1.16.5 Minecraft server:
- Shutdown your server by writing
stopin the console orCtr+C
- Use
vimornanoto openserver.properties(your server properties file)
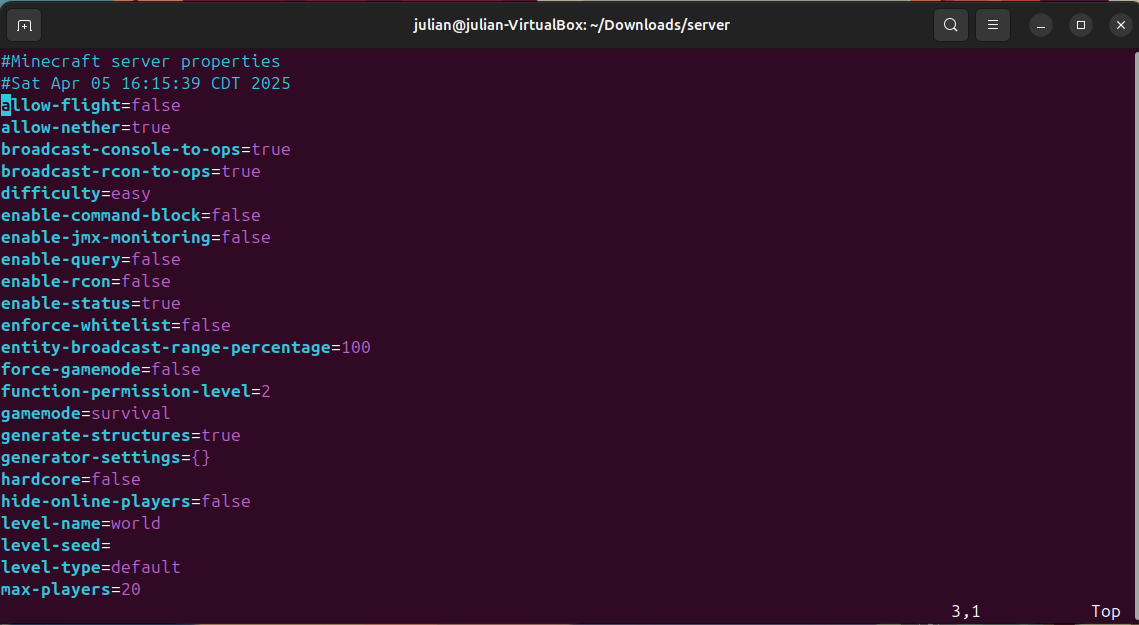
- Edit
- Save
- Restart the server
Setting Up Port Forwarding
Setting Up the Firewall
The default port for Minecraft servers is 25565. This can be changed in server.properties.
We'll also enable the firewall and add the port before we forward through the router. If your system is debian based the firewall is ufw (uncomplicated firewall) paste the following:
sudo ufw enable
cat server.properties | grep server-port
sudo ufw allow 25565

(Of course, replace 25565 with the port number that server.properties has)
After the port has been added to the firewall, devices in your local network should be able to join (but not devices outside that!)
Setting Up Router Settings
Access your router in the browser with your router's IP address to port forward. (This is the default gateway address when you do ipconfig on a windows machine or route -n on a linux machine)
For this tutorial I'm using an AT&T router. It's always good to research your router's settings beforehand.
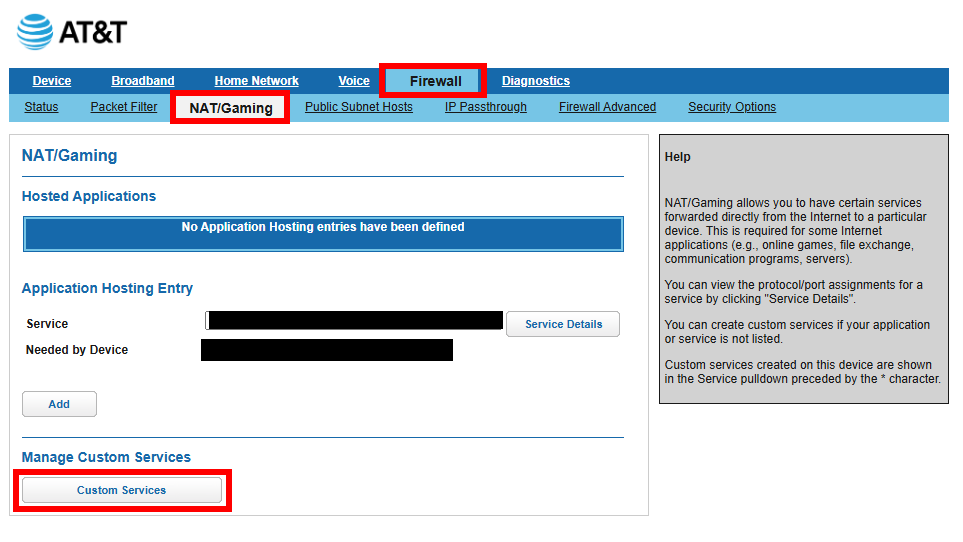
- Go to "Firewall"
- Go to NAT/Gaming
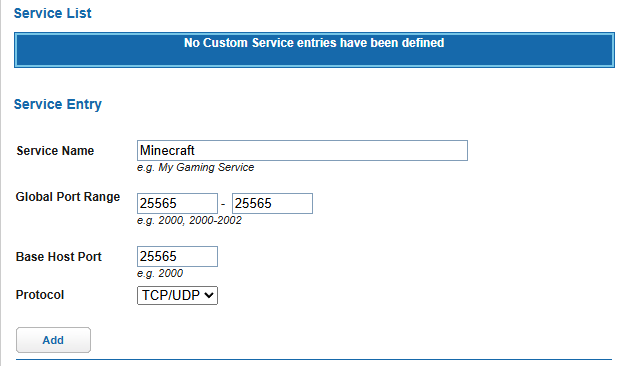
- Go to Custom Services and create a new service
- Add go back and then select the service as the custom service that you added. Then select the device that's running the server. I'm using a virtual machine which is why I selected vbox.
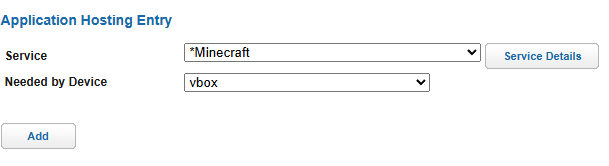
This took me so long to figure out but I eventually got port forwarding to work! I tested it through a hotspot and also the website https://portchecker.co/check-v0 is helpful to use. Turns out that I had selected the wrong device under Needed by Device but now it works which is awesome.
Joining Your Minecraft 1.16.5 Server
Joining your Minecraft 1.16.5 server is extremely easy.
- Open Minecraft 1.16.5
- Obtain the local IP of the server with the following command ( If you want to join from the SAME network) that you'd paste into the command line:
ifconfig | grep -Eo 'inet (addr:)?([0-9]*\.){3}[0-9]*' | grep -Eo '([0-9]*\.){3}[0-9]*' | grep -v '127.0.0.1'
(From StackOverflow)
If you want to join from a different network, go to https://whatismyipaddress.com/ and use that address.
- Open minecraft add the server IP under "add server"
If it's a different port from the traditional 25565 for connections, then you'll need to append :1234 to the end of it (replace 1234 with the actual port of course)
- Join and connect to the server
Still have some questions?
Thanks for reading this article!
If you had any issues or failed to do port fowarding, you can contact SparkedHost at https://sparkedhost.com/contact. Also, you can join our discord server at https://discord.com/invite/sparked where you can get your problem fixed fast.
By: Julian T.
Updated on: 03/11/2025
Thank you!