How To Make A Minecraft 1.20 Server
Setting up a Minecraft Java Edition server to play Minecraft for version 1.20 is the perfect way to dive into the Trails & Tales update with friends or other players. This version introduces unique blocks, new mobs, and immersive features that enrich vanilla Minecraft for both survival and creative modes. Hosting your own Java edition Minecraft server gives you control over rules, datapacks, and even mods or plugins.
With just a few steps, you can download the Minecraft server jar, run the jar file, and start playing Minecraft right away. Once your Minecraft server starts, you can easily share your IP address for others to connect via direct connect. Whether you're customizing the port number or editing your Minecraft server.properties file, everything is easy to manage.
Don't already host with us? 10,000+ server owners trust Sparked Host for lag-free Minecraft worlds. Claim your server savings to get higher performance at less $ per month.
Key Features of Version 1.20
Minecraft 1.20, also called the Trails & Tales update, focuses on storytelling, expression, and world-building. It adds blocks, mobs, and mechanics that open up creative and technical possibilities for players. It’s a great version number to host your own multiplayer world or shared community experience.
- Archaeology system – Brush suspicious sand and gravel to uncover pottery shards and hidden artifacts
- Cherry Grove biome – Explore a beautiful pink forest filled with blossoms and falling petals
- Camels – A new rideable mob with dashing and two-player seating, perfect for adventure maps
- Sniffer – An ancient passive mob that finds rare plant seeds from the ground
- New decorative blocks – Includes bamboo wood, hanging signs, and chiseled bookshelves
- Chiseled Bookshelves – Stores books manually; can trigger redstone for puzzles and hidden mechanisms
- Armor trims – Personalize armor with colorful patterns using smithing templates
- New music and UI changes – Improve the feel and sound of gameplay in both singleplayer and multiplayer
Minecraft 1.20 is a standout update that brings creativity and personality to every world. If you're looking to create a fun, flexible, and modern Minecraft server, this is one of the best versions available.
Hosting Options
You could rent a Minecraft dedicated server or a shared Minecraft server. Shared Minecraft servers through SparkedHost can cost as low as $1 a month. Using a hosting service can also protect your Minecraft server against DDOS attacks.
Check out our cheap 1.20 Minecraft server hosting for more information.
For Minecraft bedrock edition, the price range is also the same! There is slightly faster performance though because of the programming language that bedrock was built in.
You could also host the server yourself, but you will need to expose your IP publicly.
How to Change Your Minecraft Server Version to 1.20
Thankfully, making a 1.20 Minecraft server on a Sparked Host is easy because of the simple GUI.
To make a Minecraft server that runs on version 1.20:
- Shutdown your Minecraft server.
- Select versions on the righthand side
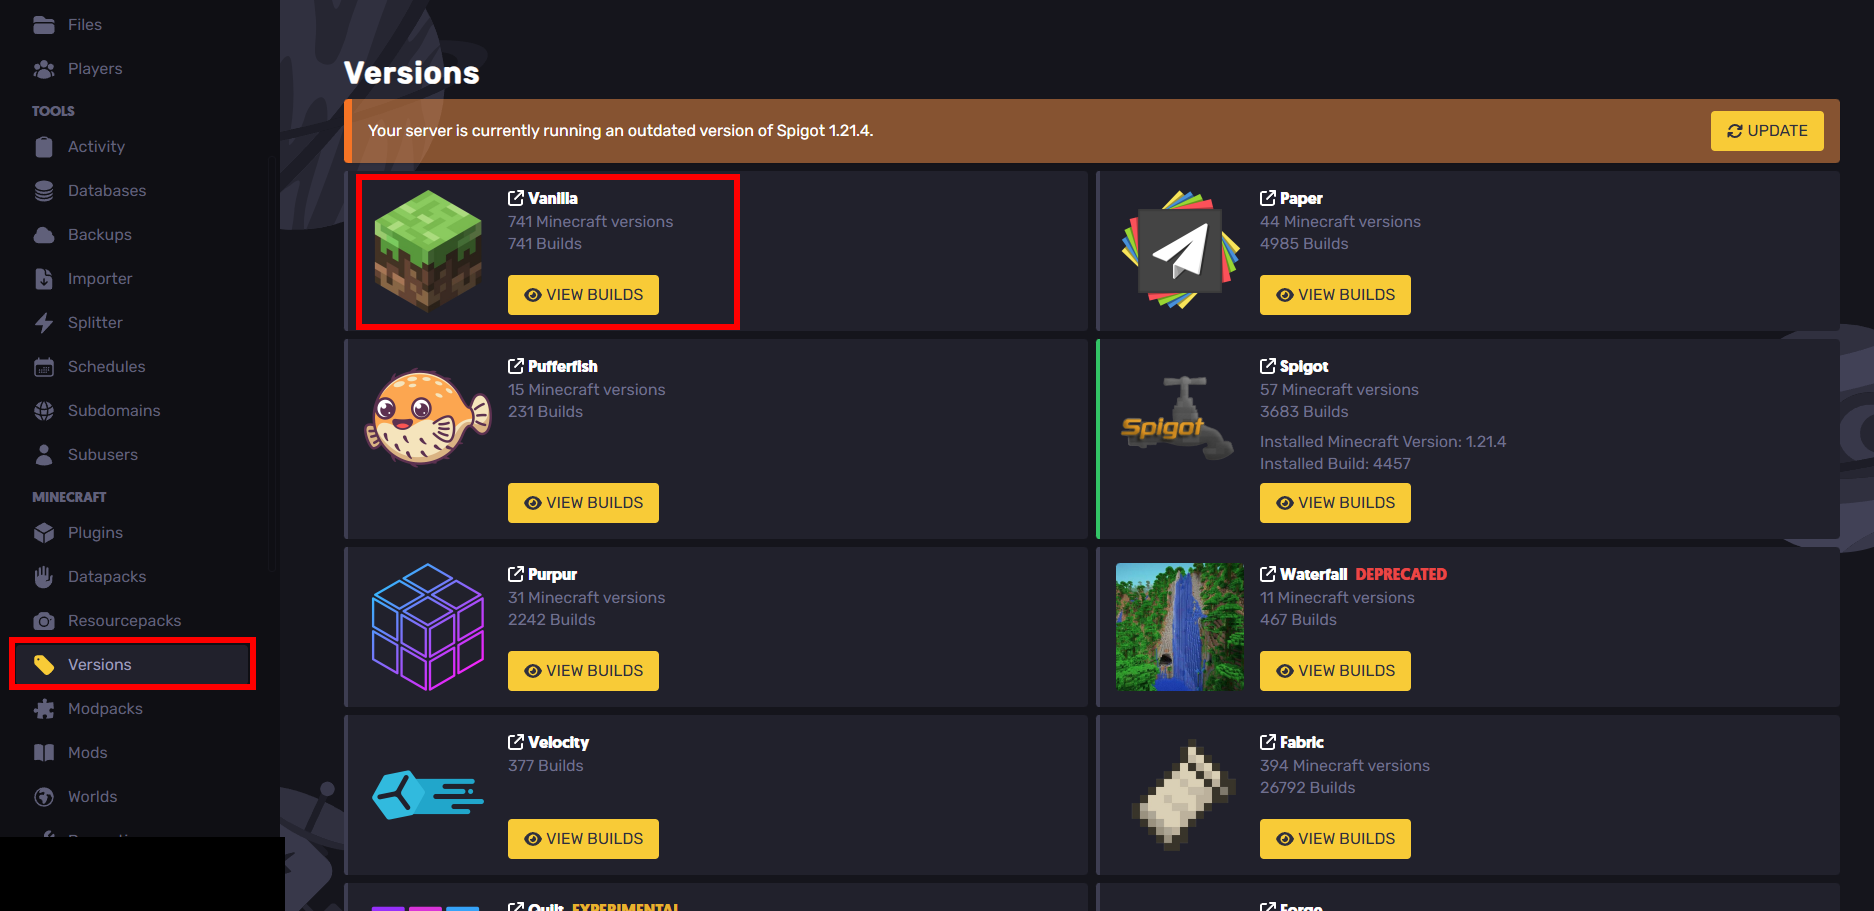
- Click on
VIEW BUILDSforVanilla
- Scroll down and select 1.20
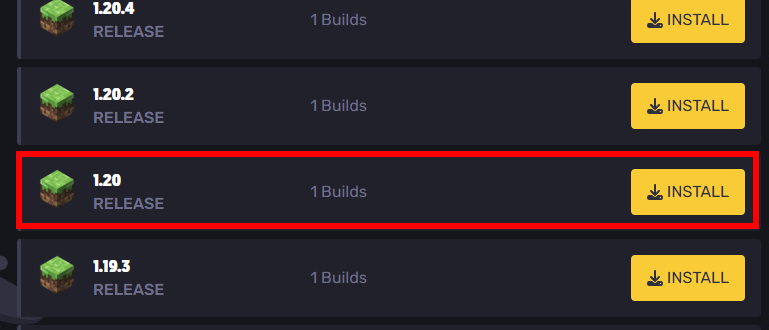
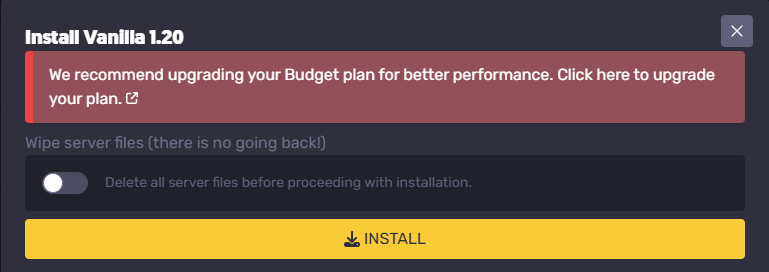
- Press install. Do note that if you had another version before that you were playing on, you should backup those files.
- Restart your Minecraft server
How to Make a Minecraft 1.20 Server on a VPS
Minecraft servers can be run on Windows, macOS, GNU/Linux, and BSD operating systems. This tutorial assumes that you're on a Linux system for your VPS.
Below, we'll outline how to do:
- Minecraft server setup for Java
- Minecraft server setup for port forwarding
- Minecraft server setup for joining
Running your own Minecraft server will be a little more difficult if you don't know linux commands/the command line. It's good to know the basic commands like cd and ls before proceeding. If you want to learn more about the command line, see https://pwn.college/linux-luminarium/.
However, if you don't know these commands, you can blindly follow this tutorial no problem either way.
Setting Up Java
Having Java installed is required for your Minecraft 1.20 server setup.
For this Minecraft version, we'll at least want a Java version of at least Java 17 installed. For this tutorial, we'll have the latest version of Java installed so that if you wanted to switch the version of your Minecraft server, you can.
Here are some quick terms that are good to know:
- Java Virtual Machine (JVM) - Interprets the java code.
- Java Runtime Environment (JRE) - Used to run java programs, can't be used to create them. You'll need this to run your java edition server. Includes the JVM as well.
- Java Development Kit (JDK) - Used to create java programs. Installing a JDK will include a JRE.
You might also have java already installed. Check if you do with the command:
java --version
If it's greater than 17 then you can skip this part of the tutorial. However, if you're running mods then you might want to consider lowering the version if the mod requires it.
For this tutorial, we'll install the latest version of Java at https://www.oracle.com/java/technologies/downloads/.
Choose the download based on what CPU architecture you have.
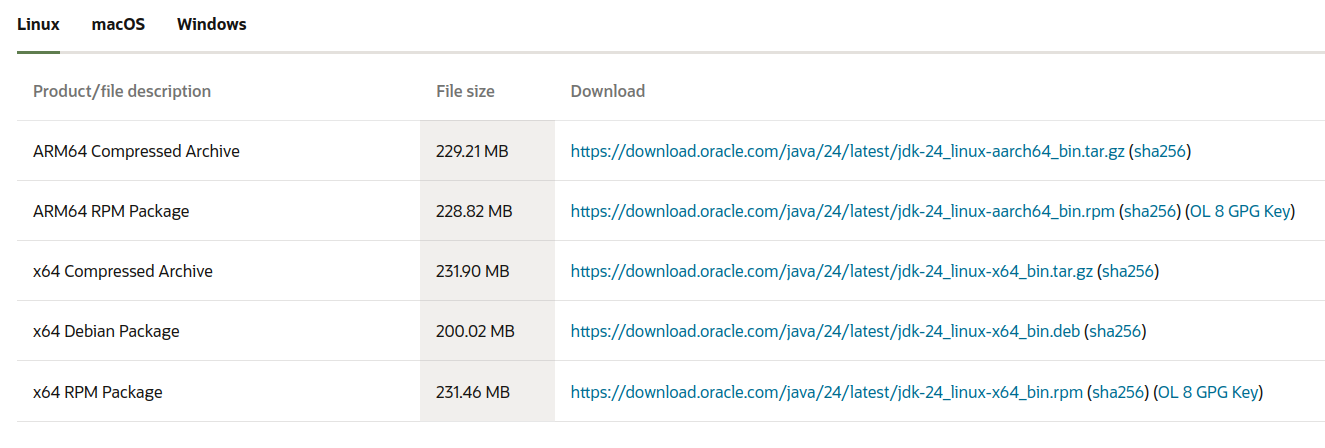
You can determine this with the command (in the image example: x86_64 = I would install the x64 compressed archive):
uname -p

Also, download the Compressed Archive type because it's easier to decompress (unless you know what you're doing of course).
Once it installs, decompress it with:
tar -xzvf jdk-24_linux-x64_bin.tar.gz
(Replace jdk-24linux-x64_bin.tar.gz with the file name)
Although this is now installed, we'll need to add this to PATH. In my example, I already had java 21 installed and I'm replacing it with java 24.
First, echo the PATH environment variable:

echo $PATH
Next you'll need to:
- Get the current directory by using this command:
pwd
- Rewrite the path variable with what it was before, remove and replace the older java version with the newer one you just installed.
/home/julian/.sdkman/candidates/java/current/bin:/usr/local/sbin:/usr/local/bin:/usr/sbin:/usr/bin:/sbin:/bin:/usr/games:/usr/local/games:/snap/bin:/snap/bin
if done correctly, it will become:
/home/julian/Downloads/jdk-24/bin:/usr/local/sbin:/usr/local/bin:/usr/sbin:/usr/bin:/sbin:/bin:/usr/games:/usr/local/games:/snap/bin:/snap/bin
With the
export PATH=
command.
Be very careful with what you set this command to, it can mess up other commands if set improperly.
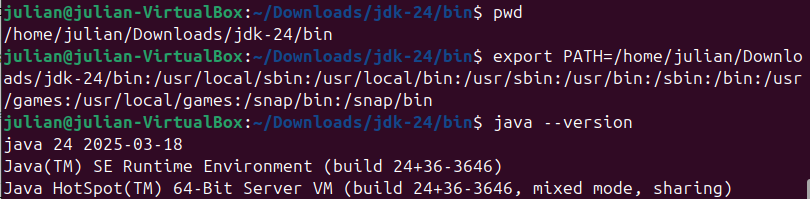
After that, check your version with:
java --version
If the path was set properly, then it should work!
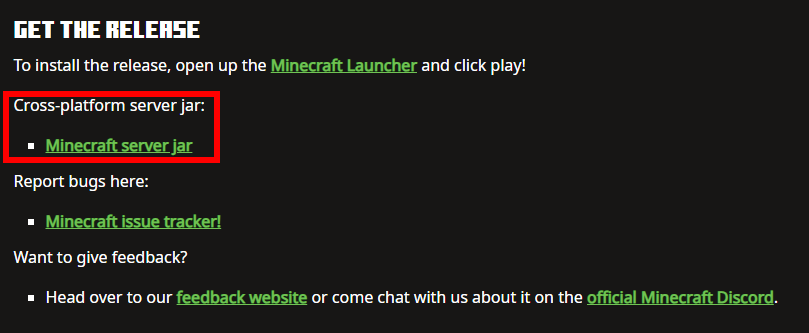
Downloading the 1.20 Server File
You can download the 1.20 Java edition server jar at https://feedback.minecraft.net/hc/en-us/articles/16499677456781-Minecraft-Java-Edition-1-20-Trails-Tales.
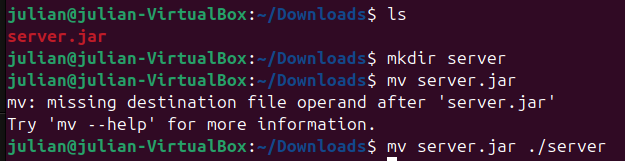
After installing, cd into your Downloads folder (or wherever it downloaded) and mkdir a new directory to store your java edition server files in. mov the jar into that new folder.
Starting Your Minecraft Server
cd into the folder that you moved your server jar file into. To get your Minecraft server running, run the server jar file with java -jar server.jar (replace server.jar with the name of the server jar file if it's different). You can also run this command with the flag -nogui if you don't want any gui (say, you're running remotely).
The Minecraft server requires you to accept the EULA (end user license agreement) before it can run:
[16:04:38] [ServerMain/INFO]: You need to agree to the EULA in order to run the server. Go to eula.txt for more info.
You need to agree to the Minecraft EULA by changing EULA=false to EULA=true in the EULA.txt file.
Edit the eula.txt file with your preferred editor like vim or nano. I used nano (please don't get mad vim supremacists).
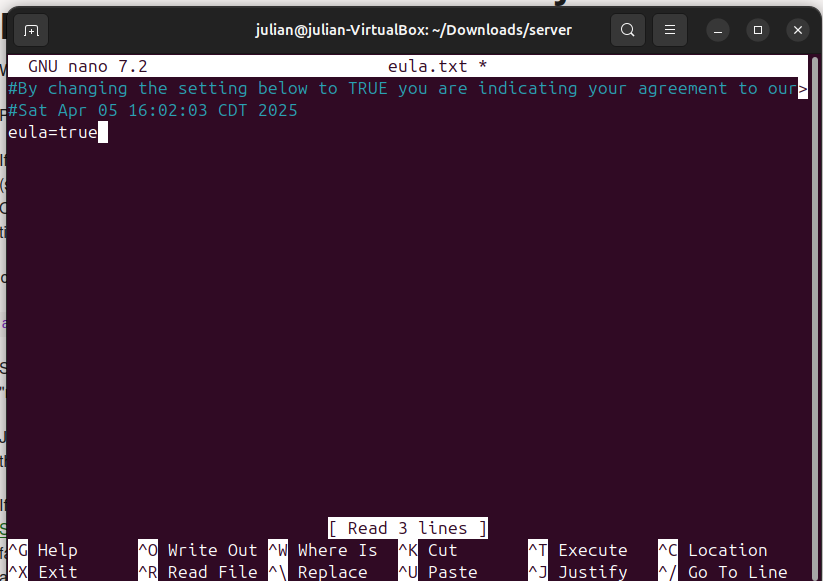
Then, rerun your Minecraft server. It should start creating your world files and generating the world.
If it's stuck at 0% for a while, you might need to allocate more ram. This can be done with adding the flags -Xms and -Xmx to your command. -Xms changes the starting memory and -Xmx changes the max memory. For example:
java -jar -Xms2048M -Xmx2048M
Changing Minecraft Server Settings
- Shutdown your Minecraft server by sending
stoporCtr+C
- Use
vimornanoto openserver.properties(your Minecraft server properties file)
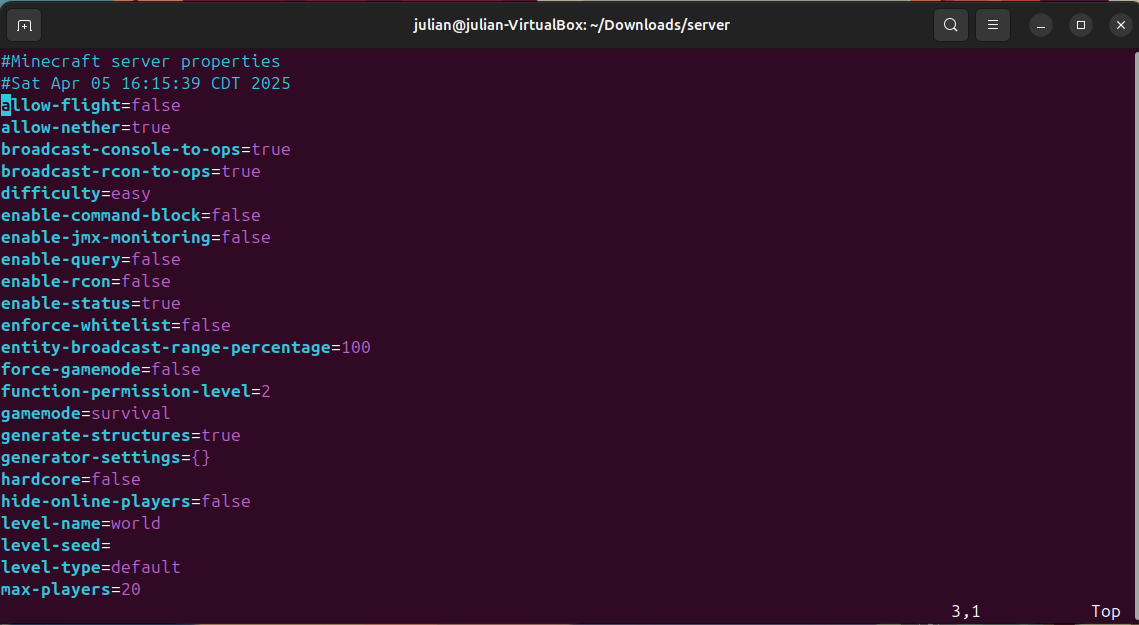
- Edit
- Save
- Restart the server
Setting Up Port Forwarding
The default port for Minecraft servers is 25565. This can be changed in server properties file ( server.properties).
If not configured properly, port forwarding can cause security risks! You should only give your IP address to trusted individuals.
Adding Minecraft through the firewall may be necessary.
If it's not enabled beforehand, we'll also enable the firewall and add the port before we forward through the router. If your system is debian based the firewall is ufw (uncomplicated firewall):
sudo ufw enable
cat server.properties | grep server-port
sudo ufw allow 25565

(Of course, replace 25565 with the port number that server.properties has)
After the port has been added to the firewall, devices in your local network should be able to join (but not devices outside that!)
Access your router in the browser with your router's IP address. (This is the default gateway address when you do ipconfig on a windows machine or route -n on a linux machine)
To configure port forwarding, access the router's admin page and find the port forwarding section. For this tutorial, I'm using an AT&T router.
Your modem might also need port forwarding configuration if it acts as a router. This will not be covered, however.
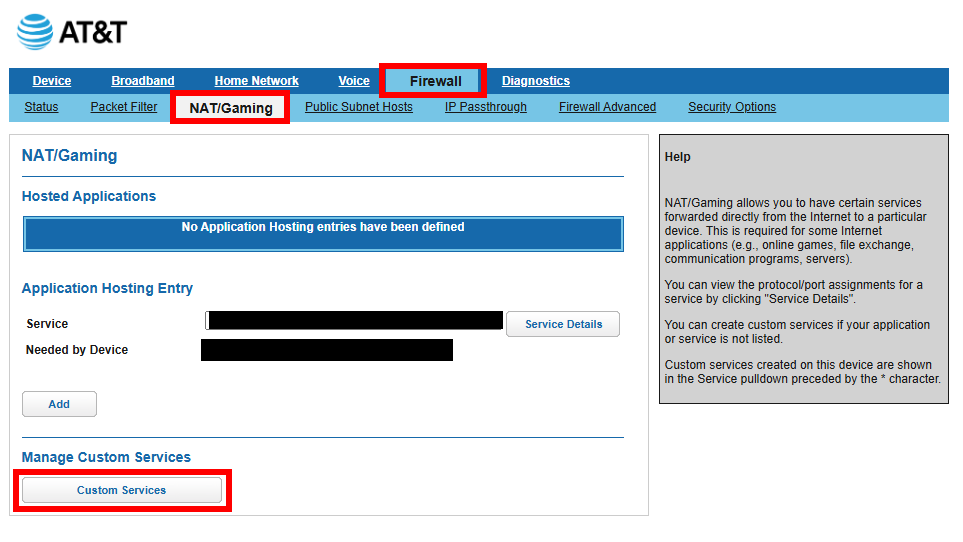
- Go to "Firewall"
- Go to NAT/Gaming
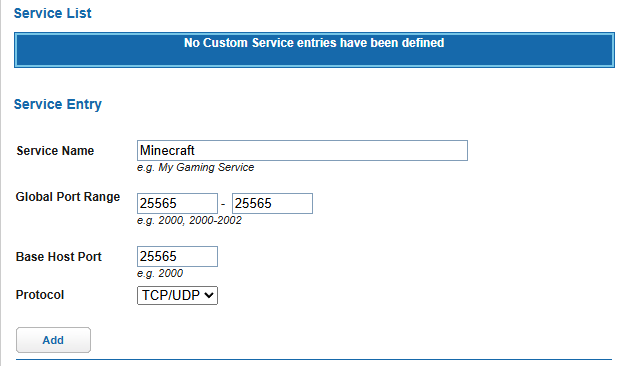
- Go to Custom Services and create a new service
Enter 25565 for both in the global port range.
- Add go back and then select the service as the custom service that you added. Then select the device that's running the server. I'm using a virtual machine which is why I selected vbox.
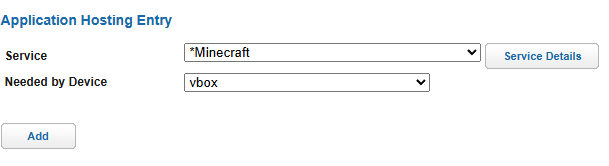
This took me so long to figure out but I eventually got port forwarding to work! I tested it through a hotspot and also the website https://portchecker.co/check-v0 is helpful to use. Turns out that I had selected the wrong device under Needed by Device but now it works which is awesome.
Joining The Server
Connecting to Your VPS
Joining to a dedicated/VPS Minecraft server is extremely easy.
Your friends will use your public IP address to connect to your Minecraft server.
- Open Minecraft Version 1.20
- Obtain the local IP of the server with the command ( If your Minecraft client is on the SAME network):
ifconfig | grep -Eo 'inet (addr:)?([0-9]*\.){3}[0-9]*' | grep -Eo '([0-9]*\.){3}[0-9]*' | grep -v '127.0.0.1'

    (From StackOverflow)

    If you want to join from a different network, go to https://whatismyipaddress.com/ and use that address.
- Open Minecraft, then add the server IP under "add server"
If it's a different port from the traditional 25565 for connections, then you'll need to append :1234 to the end of it (replace 1234 with the actual port of course)
Do note that you must have port forwarding on the router that the server is connected to. Port forwarding however, is not required if you're using a dedicated server.
- Join and connect to the server
Basic Minecraft Server Security
- Regularly back up your server. If it gets griefed, you need a place to go back to. This can be as simple as a bash script that copies the server files to another directory or a plugin that does it for you.
- Share the server IP with trusted individuals.
- Use a secure password for your server to prevent unauthorized access to your panel.
- Keep server software updated to prevent exploits.
- You can use a VPN as an intermediary between your friends and the server if you don't want to share your IP.
- Use a whitelist.
Still have some questions?
If you had any issues or failed to do port forwarding, you can contact SparkedHost at https://sparkedhost.com/contact.
You can also join our Discord server at https://discord.com/invite/sparked where you can get your problem fixed fast.
By: Julian T.
Updated on: 03/11/2025
Thank you!