How To Make A Project Zomboid Server
Creating a Project Zomboid server is the ultimate way to experience the apocalypse with friends, manage your own game world, and enjoy full control over server settings and gameplay rules. Instead of struggling with unstable internet connections or complex self hosting setups, using a Project Zomboid dedicated server from a reliable hosting provider like Sparked Host gives you instant deployment, powerful hardware, and seamless performance.
Whether you're looking to build a private multiplayer server with invite-only access or open up a public Project Zomboid server for the community, Sparked Host offers a user-friendly control panel that makes managing server files, and game settings incredibly easy.
In this guide, we'll show you how to make a Project Zomboid server, explore different server hosting options, and help you choose the best Project Zomboid server solution for your gaming experience.
Step 1: Decide What Project Zomboid Hosting You Want
The first step to setting up a Project Zomboid server is choosing the right type of hosting based on your needs. Each method offers different levels of server control, customization, hardware access, and ease of setup. Whether you're a casual player looking for smooth gameplay with friends or a dedicated community admin wanting full access to server settings, this step will help you choose the best way to host your own Project Zomboid server.
Managed Project Zomboid Server Hosting
Managed Project Zomboid server hosting is perfect for players who want to skip technical setup like port forwarding and jump straight into the game. With features like instant setup, DDoS protection, automatic updates, and an easy-to-use control panel, this option makes it simple to create and configure your server without needing advanced technical skills.
At Sparked Host, we offer a secure and optimized hosting environment with high-performance hardware, low ping, and tools like a web interface to edit settings, backups, and more. Our support team is ready to assist with any issues, including troubleshooting and access to your Project Zomboid server files.
This option is ideal if you want to play with friends, run your own persistent world, or host a public Project Zomboid server with zero lag and minimal effort.
Project Zomboid VPS Hosting
VPS hosting offers a balance between flexibility and performance. Your Project Zomboid server runs in a virtual environment where you can access game server files, adjust configuration settings, set custom ports, and manage connected players.
With a VPS, you have more control than managed hosting, including the ability to install specific operating systems, configure advanced settings, and scale resources as your community grows. You still get a stable hosting environment, but with extra freedom to customize your Project Zomboid server setup.
This is a great option for experienced users who want to configure the server manually or host a custom experience with more access to system-level settings.
Project Zomboid Dedicated Server Hosting
A dedicated server gives you the highest level of control and performance for your Project Zomboid server. You’ll have full access to all the dedicated server files, ports, and hardware resources, allowing for complete customization. From editing server settings and configuration files to managing game port assignments and operating systems, this method offers total control over every detail.
This is the best choice for hosting large-scale servers with high max players or maintaining a consistent Project Zomboid gaming experience for a public server community or content platform. With full control of your dedicated server, you can fine-tune everything, ensuring smooth gameplay and server stability.
Which Option Is The Best?
Choosing the right Project Zomboid server hosting depends on your goals. If you want to get started quickly with minimal hassle, managed hosting provides instant setup, automatic updates, and an easy-to-use control panel. For users who want more flexibility, VPS hosting allows deeper configuration while maintaining affordability and scalability. If you're building a high-traffic or heavily populated server, dedicated server hosting delivers maximum power, performance, and full access.
No matter your choice, Sparked Host ensures your Project Zomboid server runs smoothly with top-tier hardware, secure ports, and excellent support. Hosting your own Project Zomboid server isn’t just about launching a game, it's about delivering a high-quality experience, connecting with players, and having full control of your world.
Step 2: Buy A Plan
For Managed Project Zomboid Server Hosting
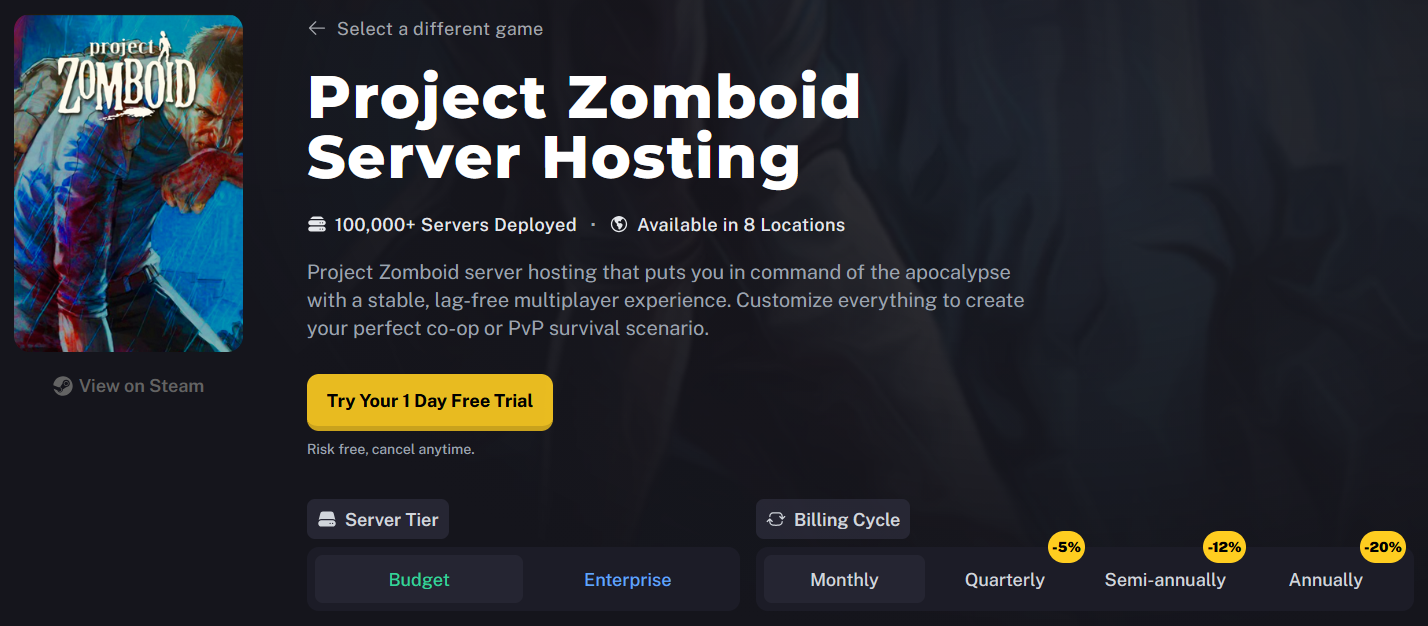
- Go to the Project Zomboid Server Hosting page.
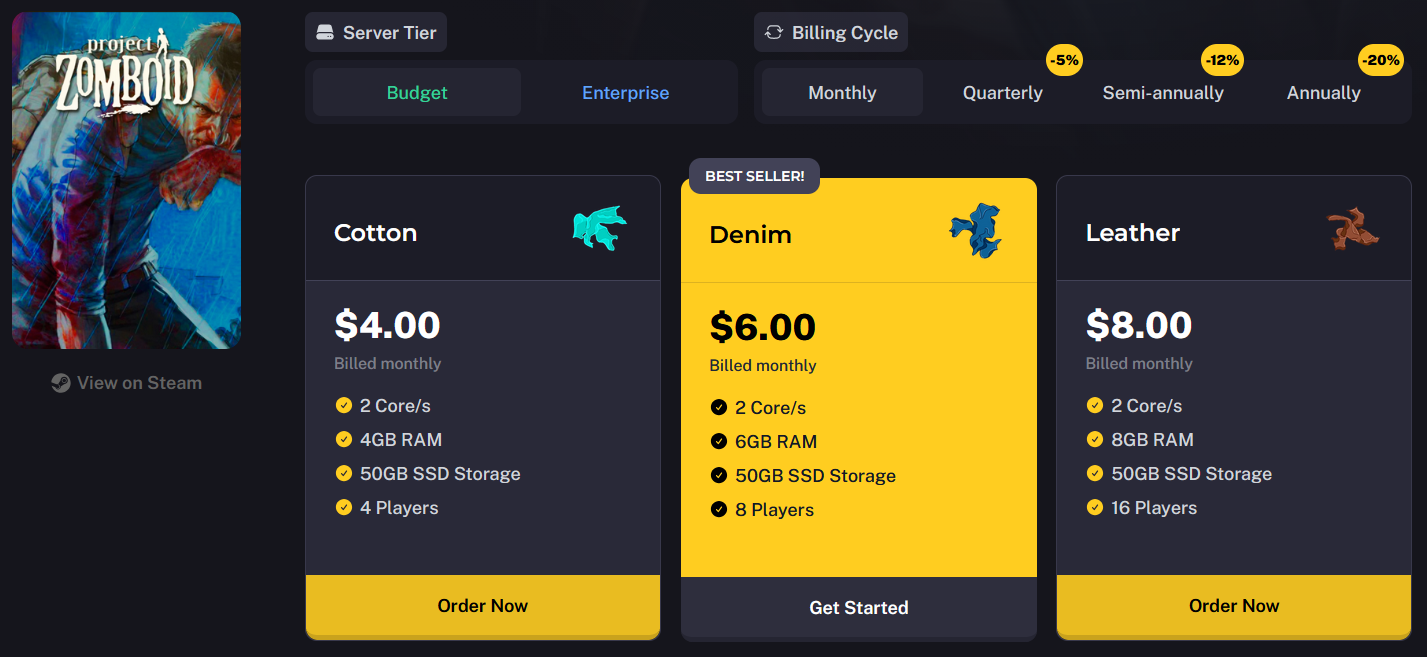
- Choose between the Budget or Enterprise server tiers.
Budget Tier: This tier is ideal for small groups or casual Project Zomboid players. It runs on standard hardware but provides enough performance to host a stable server for a few friends. It includes full configuration options, secure access, and smooth gameplay for lower player counts.
Enterprise Tier: A balanced option with upgraded hardware, increased storage, and enhanced performance, perfect for active Project Zomboid communities or servers with more players. It offers the same features as the Budget Tier but with better responsiveness, more consistent uptime, and a smoother overall experience.
The main difference between the two server tiers is that the hardware components (CPU, RAM, SSD, etc.) differ. The Enterprise tier uses better components than the Budget Tier, which uses our lowest-priced components. You can view the Hardware used for each location and server tier on our Hardware & Locations page.
- After choosing the Server Tier you want, select the individual Project Zomboid Server Hosting plan. The prices of each Project Zomboid Hosting plan are scaled according to the resources and RAM they use.
You can also change the Billing Cycle to suit your preference, choose between Monthly, Quarterly, Semi-Annually, or Annually. Longer billing cycles often come with discounted rates, making them a great choice if you plan to host your Project Zomboid server long-term.
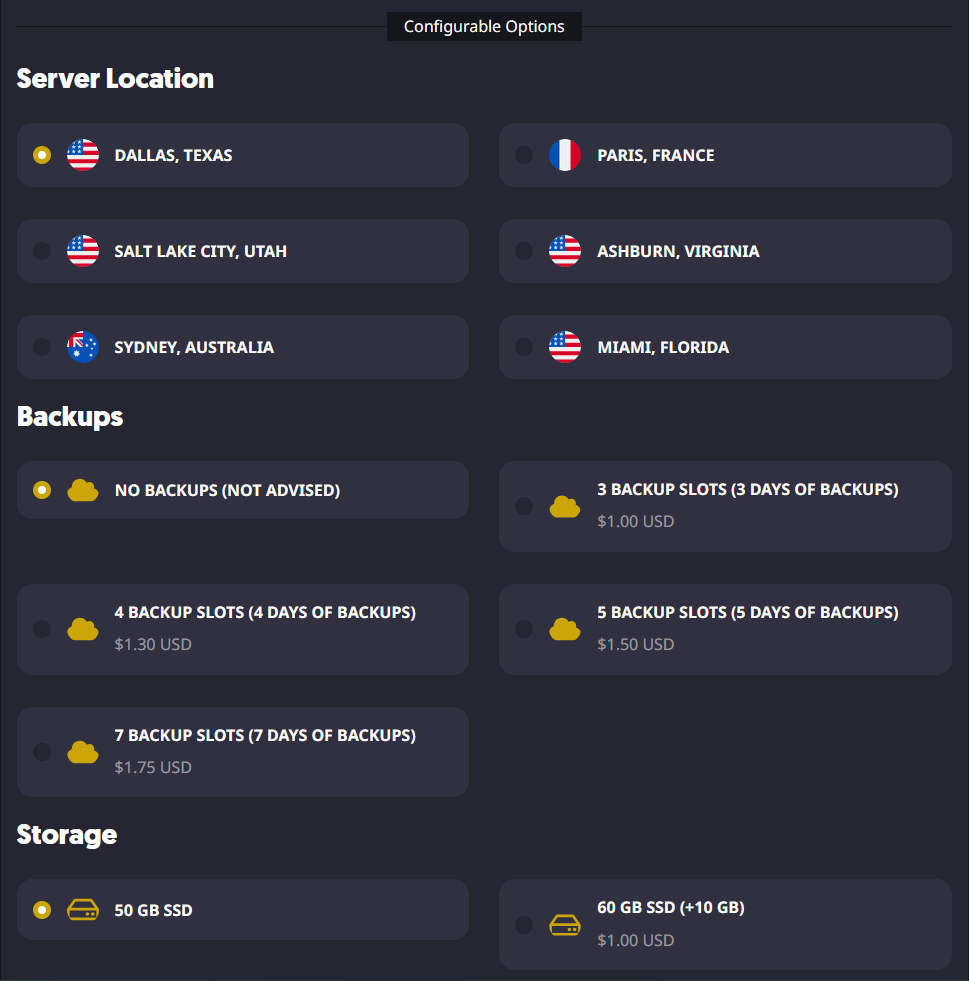
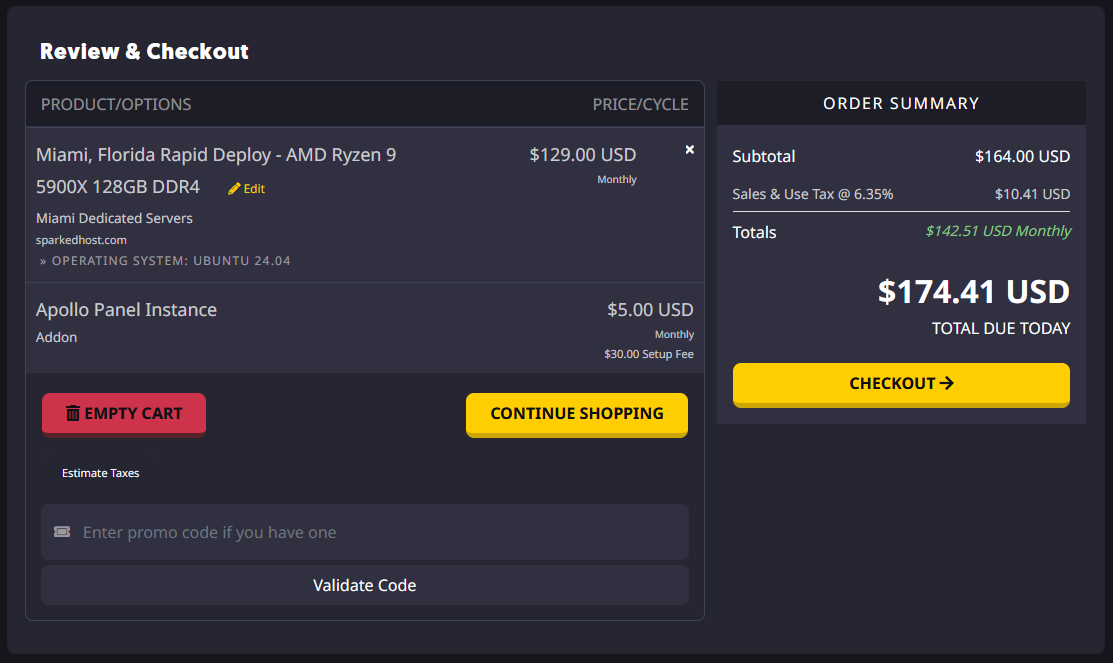
- Once you have selected the plan and billing cycle you want to use, fill out the rest of the configurable options, such as the Project Zomboid Server Location, the number of backups you want, and the server storage size.
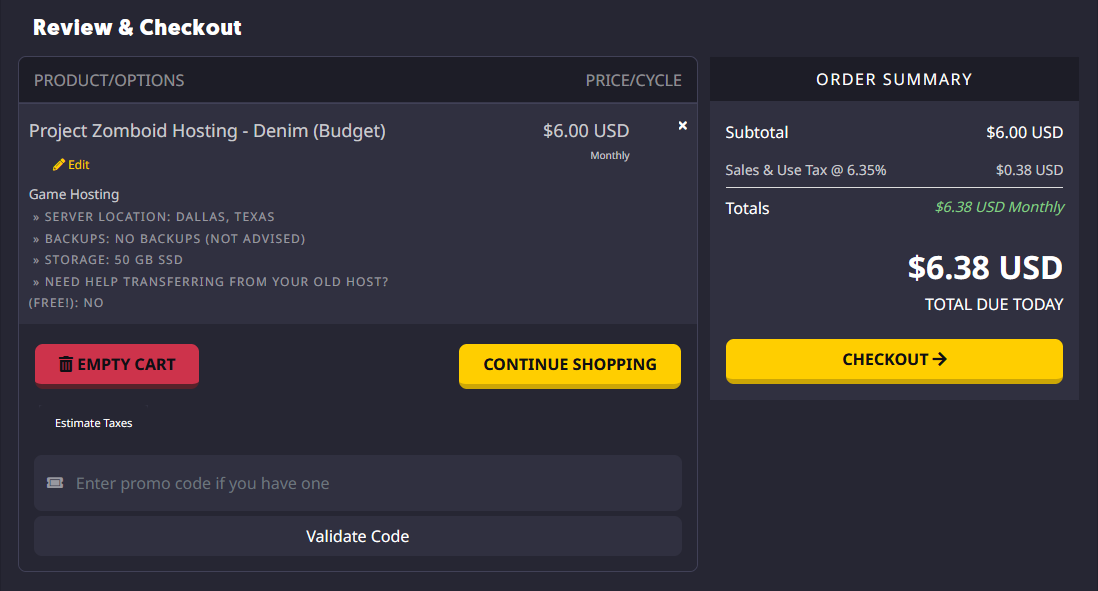
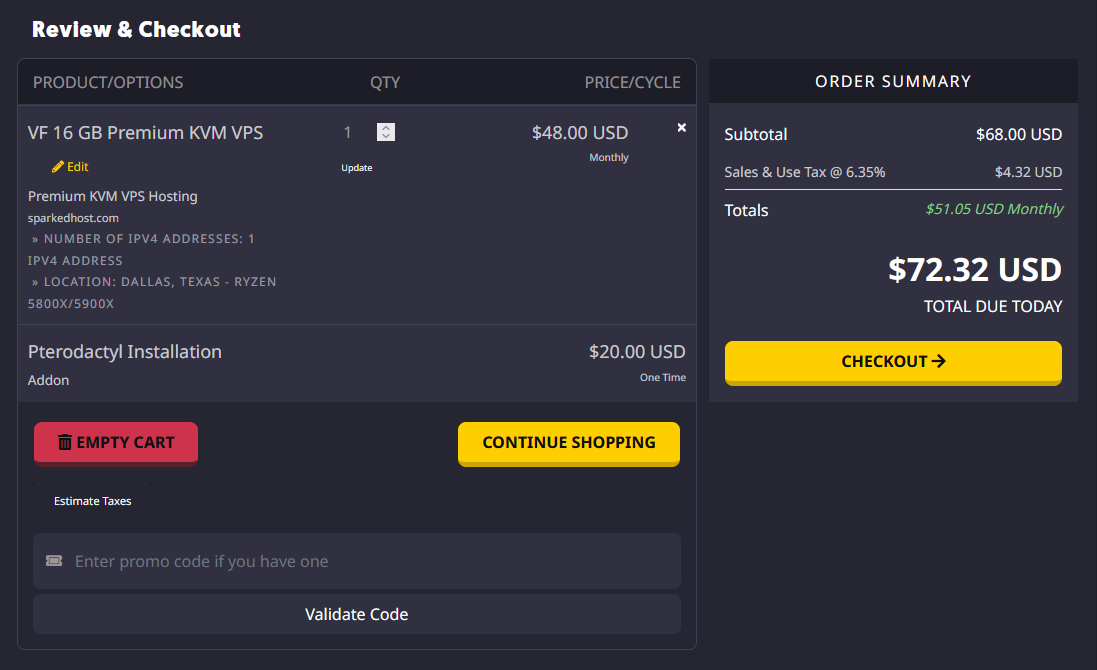
- When you are ready to purchase the services you selected, you can go to your cart to review the selected items and check out when you are ready. Optionally, if you have one, you can also enter a promo code to get a discount on your purchase.
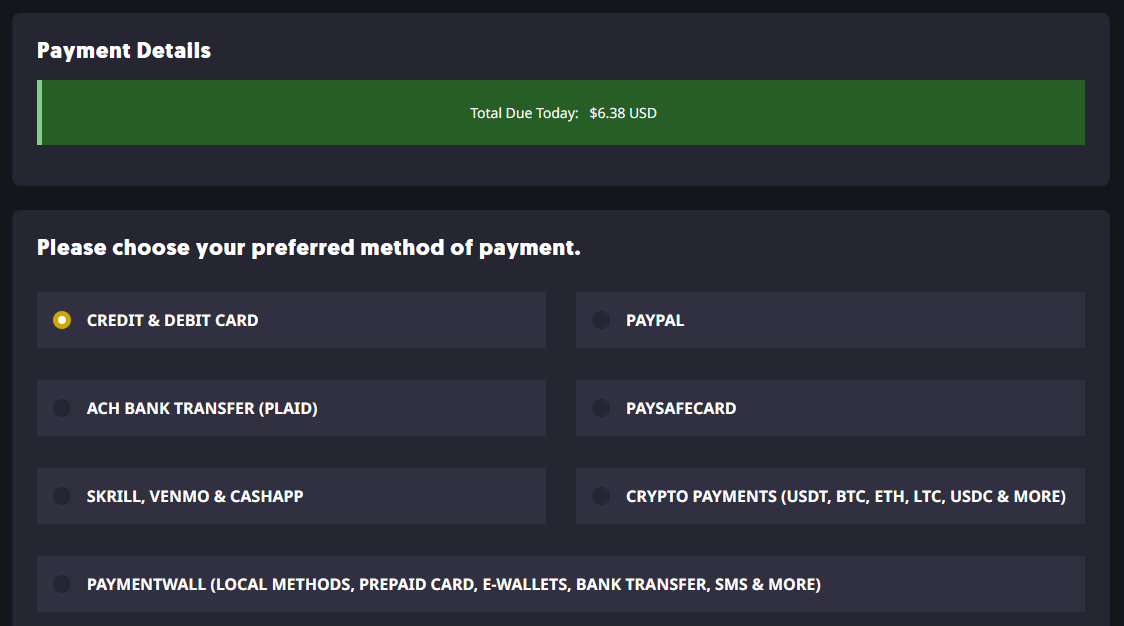
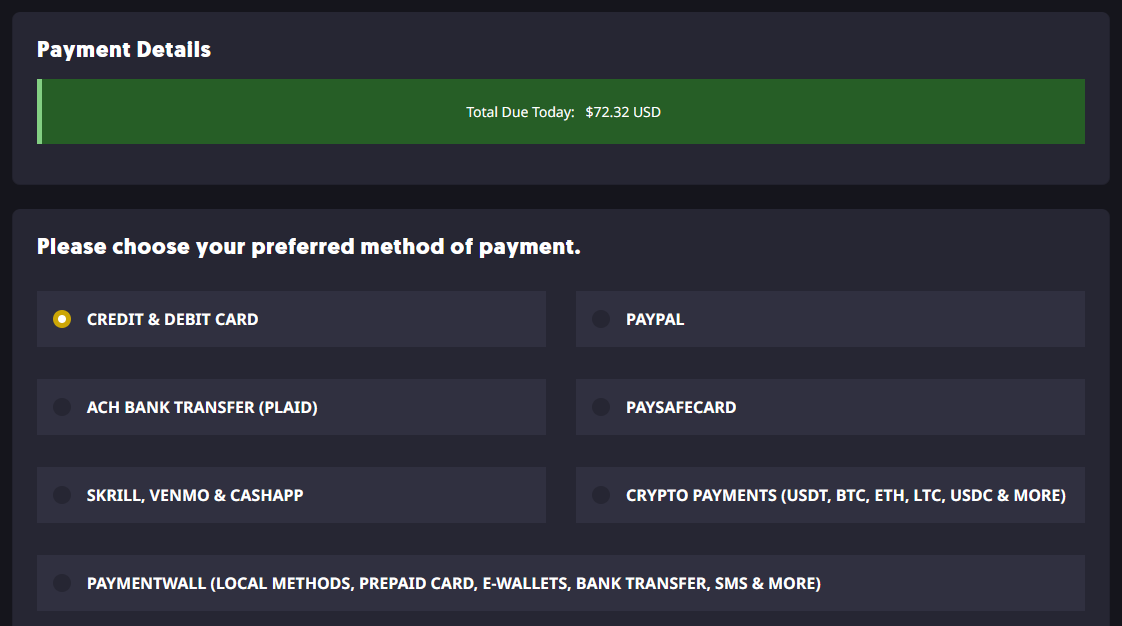
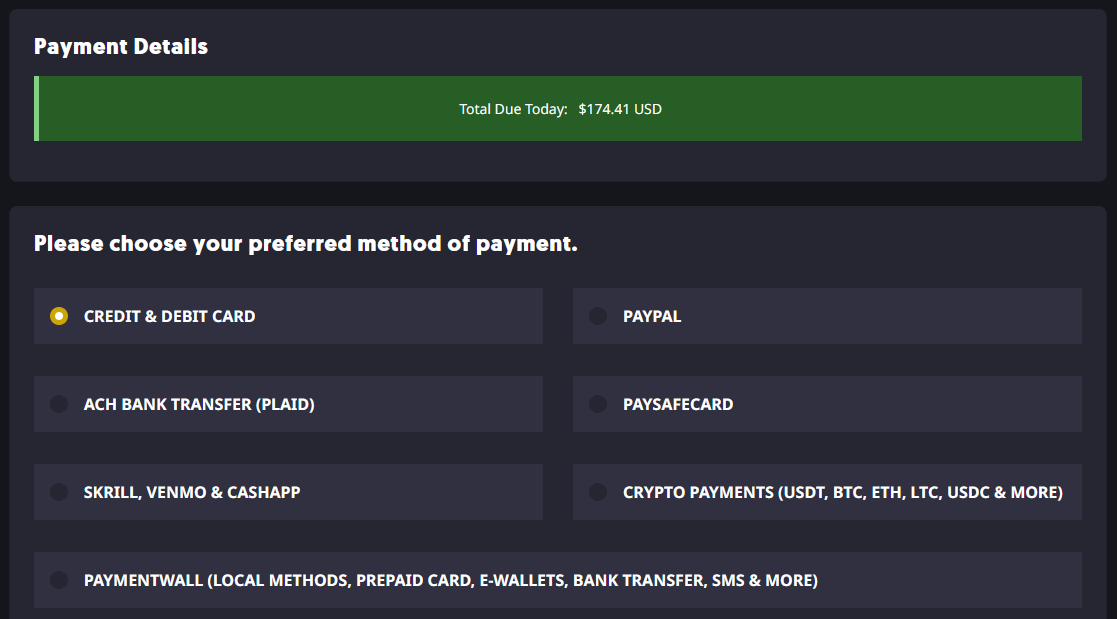
- From there, you can select your preferred payment method and register a Sparked Host Client Area account if you do not already have one.
You can view the different payment methods we accept and their availability on our Payment Methods page.
For Project Zomboid VPS Hosting
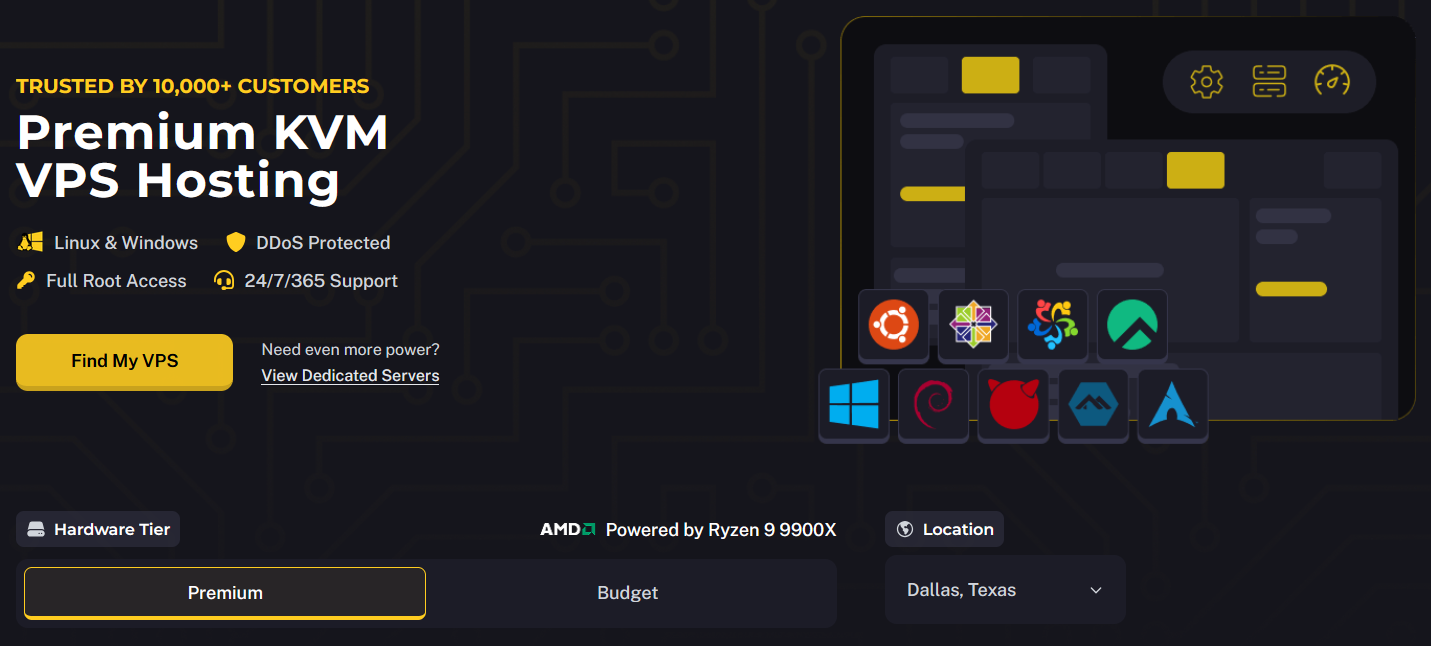
- Go to the VPS Hosting website.
- Choose between the Premium and Budget hardware tiers.
Budget Tier: This tier is ideal for small-scale Project Zomboid server setups or testing server settings. It offers reliable performance at a lower cost, making it perfect for hosting a few connected players, exploring the world, and configuring basic gameplay features. With access to full configuration, it's a great entry point for those looking to host their own server without needing advanced resources.
Premium Tier: The Premium Tier provides enhanced CPU power, increased network bandwidth, and greater overall stability, ideal for larger Project Zomboid servers, more active players, and complex server configurations. It’s built for demanding sessions, such as populated worlds or high-traffic community servers, ensuring smoother gameplay, lower ping, and better performance during peak activity.
Choose the Budget Tier if you're starting small, testing server settings, or hosting a limited group of players. Opt for the Premium Tier if you plan to grow your player base, run larger Project Zomboid servers, or want consistently smooth gameplay and low ping, especially during high-traffic periods and intense in-game activity.
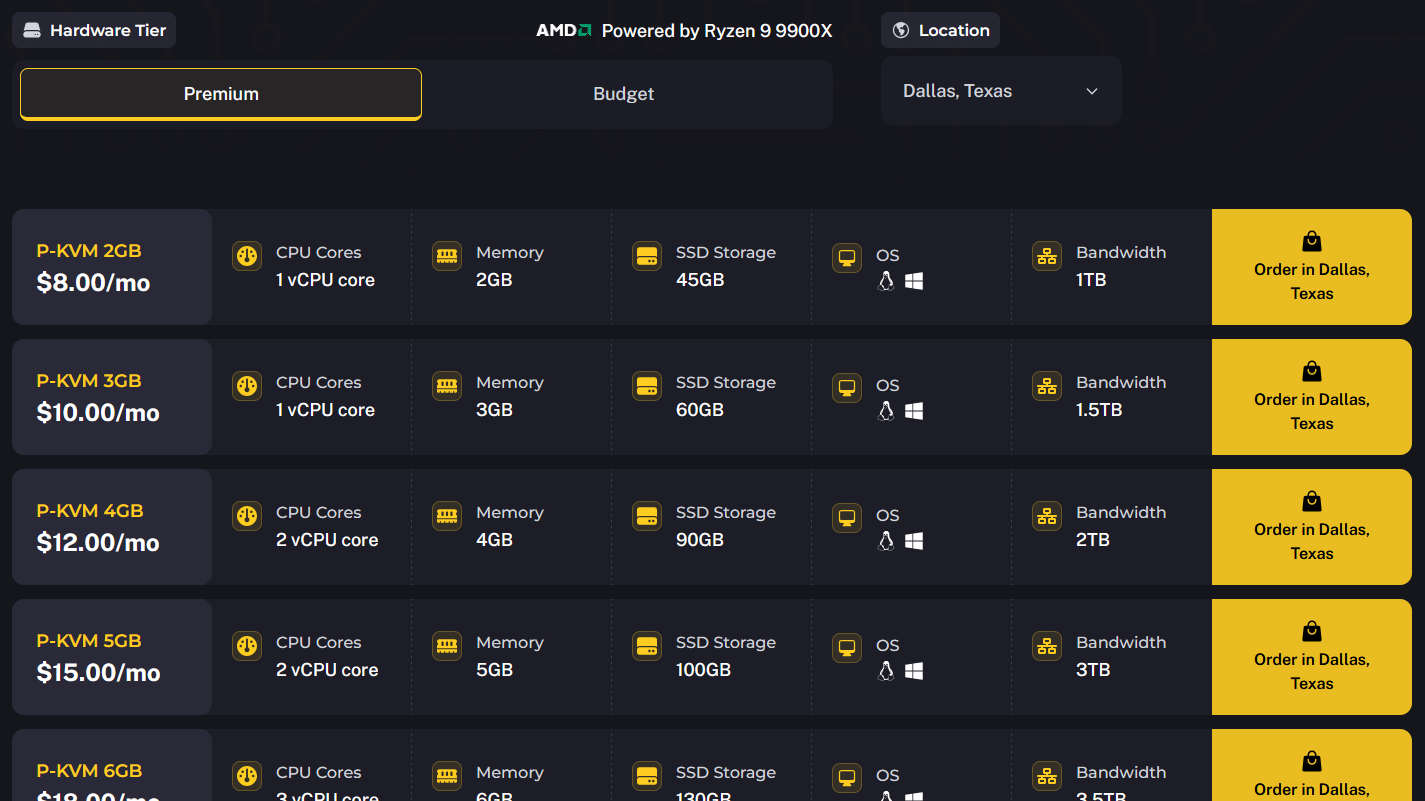
Each location may use different hardware configurations but offer equivalent performance. You can check the specific hardware used at each location by visiting our Hardware & Locations page.
- Once you've selected your preferred Hardware Tier, choose the VPS Hosting plan that suits your needs. Each plan is priced based on the resources and bandwidth it offers.
You can also choose the Server Location that best suits your needs. Sparked Host offers multiple server locations, allowing you to host your VPS Hosting service closer to you or your player base. Selecting a location near your region helps reduce latency and ensures a smoother, more responsive gameplay experience for you and other players.
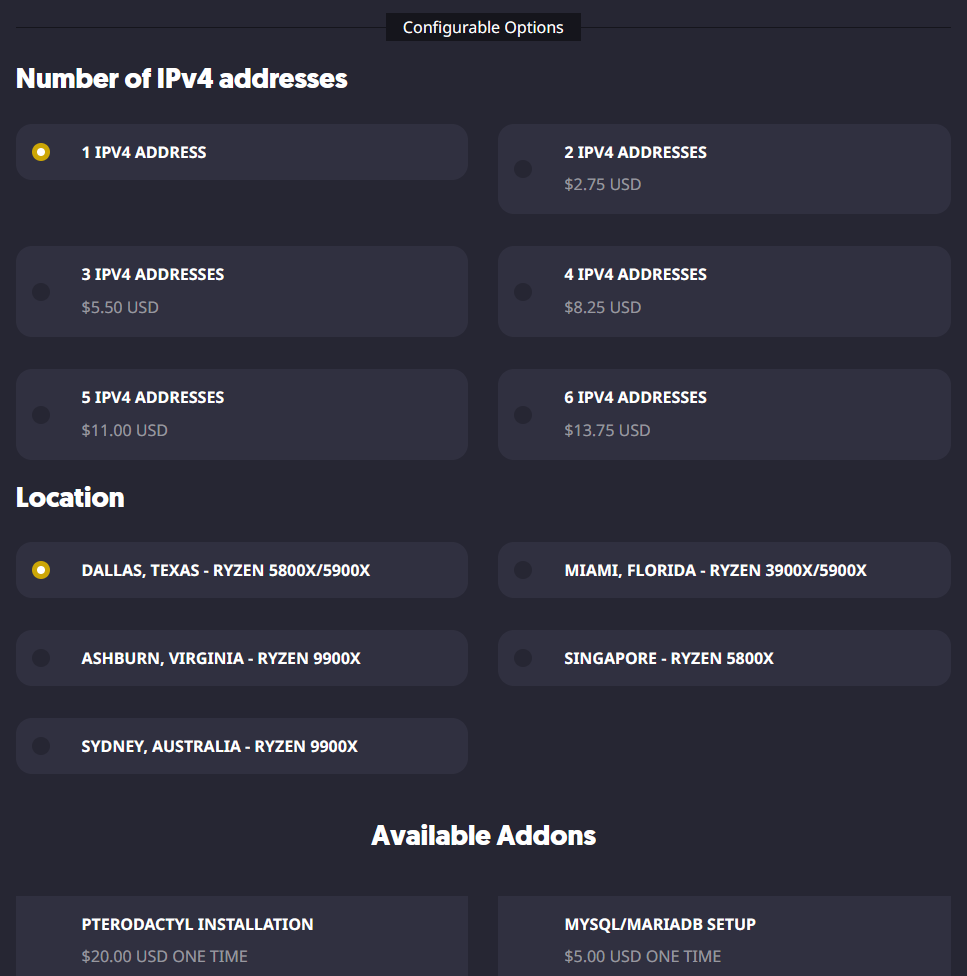
- Once you have selected the plan you want to use, fill out the rest of the configurable options, such as the number of IPv4 Addresses you want and other additional add-ons like our "Pterodactyl Installation" and "Security Check" add-ons.
- When you are ready to purchase the services you selected, you can go to your cart to review the selected items and check out when you are ready. Optionally, if you have one, you can also enter a promo code to get a discount on your purchase.
- From there, you can select your preferred payment method and register a Sparked Host Client Area account if you do not already have one.
You can view the different payment methods we accept and their availability on our Payment Methods page.
For Project Zomboid Dedicated Server Hosting
- Navigate to the Dedicated Server Hosting page.
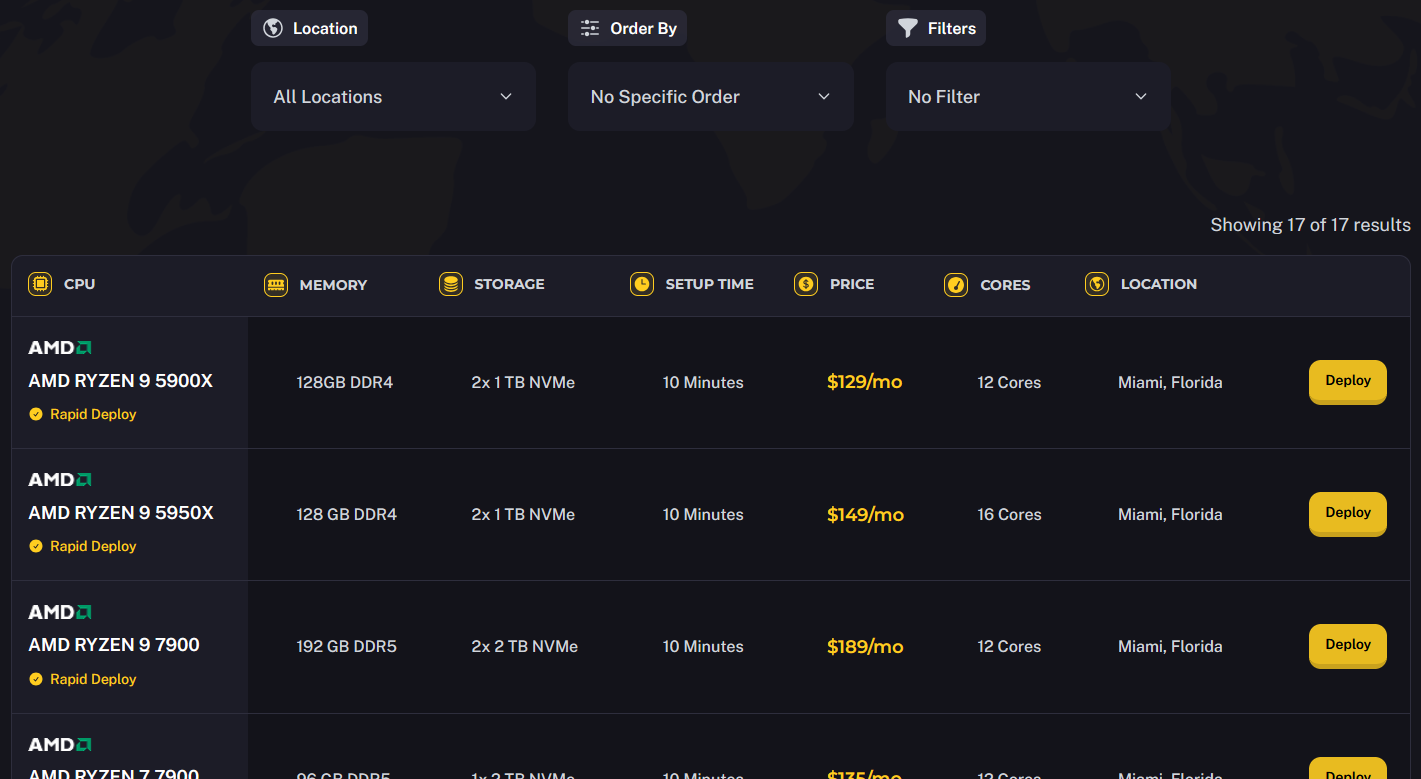
- Click the Deploy button to select the Dedicated Server you want to deploy. You can filter the list by location, order it by highest performance, and even filter it if you wish the server to use an AMD or Intel processor.
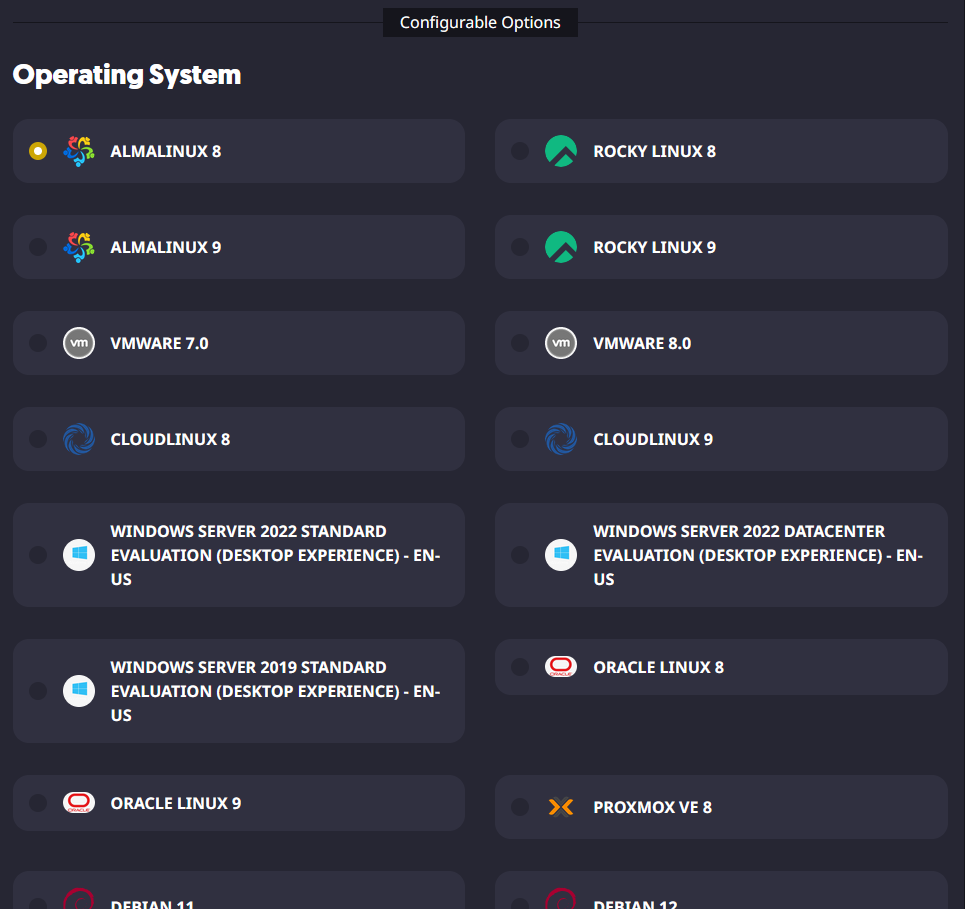
- After selecting the server you want to use, you can configure options such as the OS it should use and use addons such as our "Full Software Support/Managed Dedicated Server" and "Apollo Panel Instance" addons.
- When you are ready to purchase the services you selected, you can go to your cart to review the selected items and check out when you are ready. Optionally, if you have one, you can also enter a promo code to get a discount on your purchase.
- From there, you can select your preferred payment method and register a Sparked Host Client Area account if you do not already have one.
You can view the different payment methods we accept and their availability on our Payment Methods page.
Step 3: Get Your Login Details
For Managed Project Zomboid Server Hosting
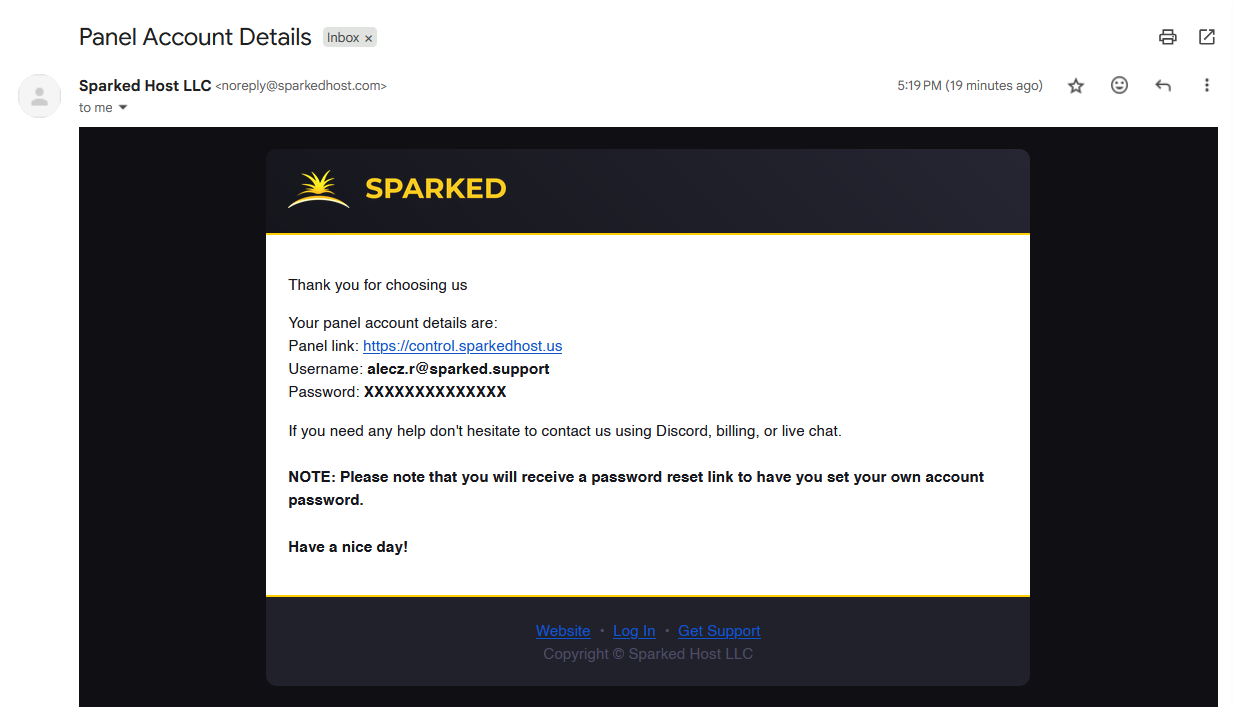
You can retrieve your login details for your Apollo Panel account to manage the game server by looking for an email from us with the subject "Panel Account Details." The email will contain details such as the link to the panel to manage your game server and your Panel Account username and password.
For Project Zomboid VPS Hosting
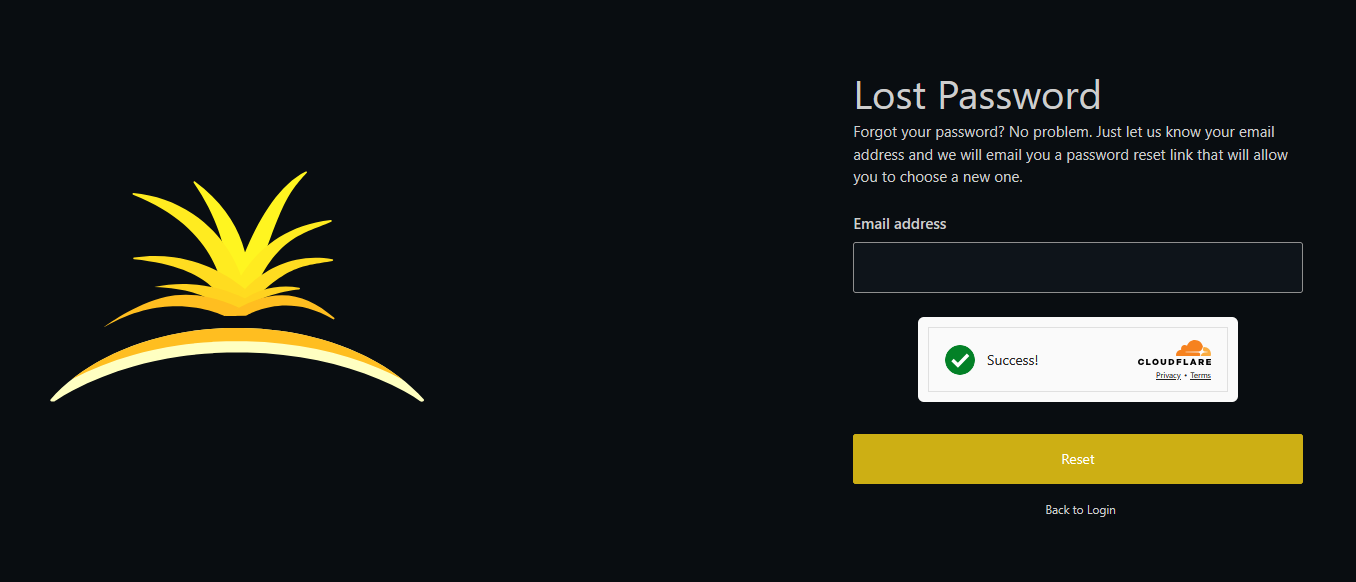
You will not get an email with your VF Panel login details, just like the email for a Managed Project Zomboid Server Hosting service. Therefore, to get the password for your VF Panel account, you will need to reset it first. You can do so by going to the VF Panel Lost Password page, and then you will be sent an email to reset your VF Panel Account password. The email address will be the same as the one used for your Client Area account.
For Project Zomboid Dedicated Server Hosting
If you purchased a Rapid Deploy Dedicated Server, you can find your login details for your Dedicated Server Manager account to manage the dedicated server by looking for an email from us with the subject "Your Dedicated Server Information." The email will contain details such as the URL to the panel to manage your dedicated server, the server's IP Address, and other information.

If it isn't a Rapid Deploy Dedicated Server or a custom-built one, you will get the login details from the ticket made for the Dedicated Server.
Step 4: Setup Your Project Zomboid Server
For Managed Project Zomboid Server Hosting
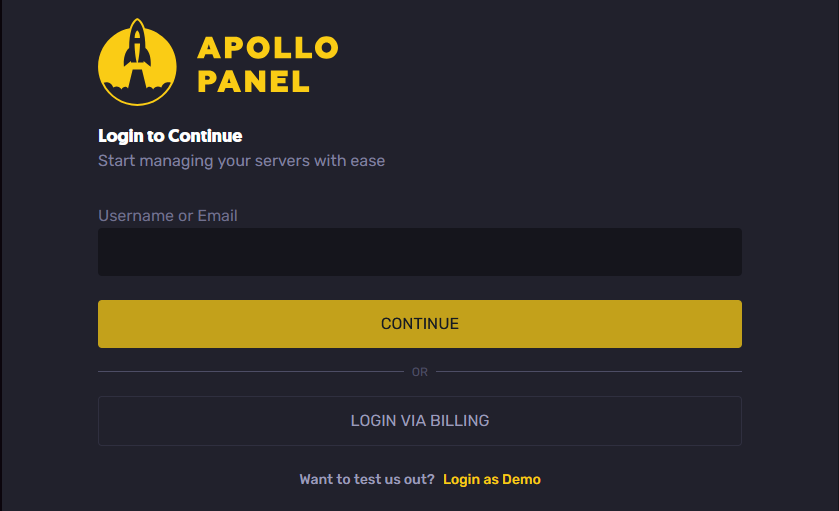
- You can log in to the Apollo Panel with the login details you received earlier or using your Client Area account with the "Login via Billing" button.
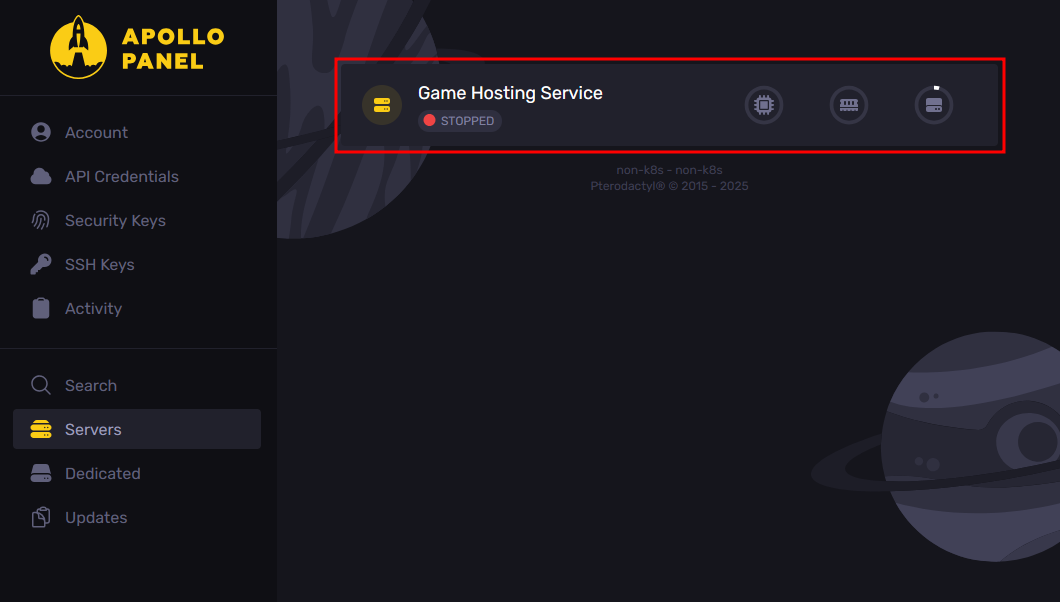
- Once you've logged in, select your Project Zomboid Server Hosting service on the Servers page.
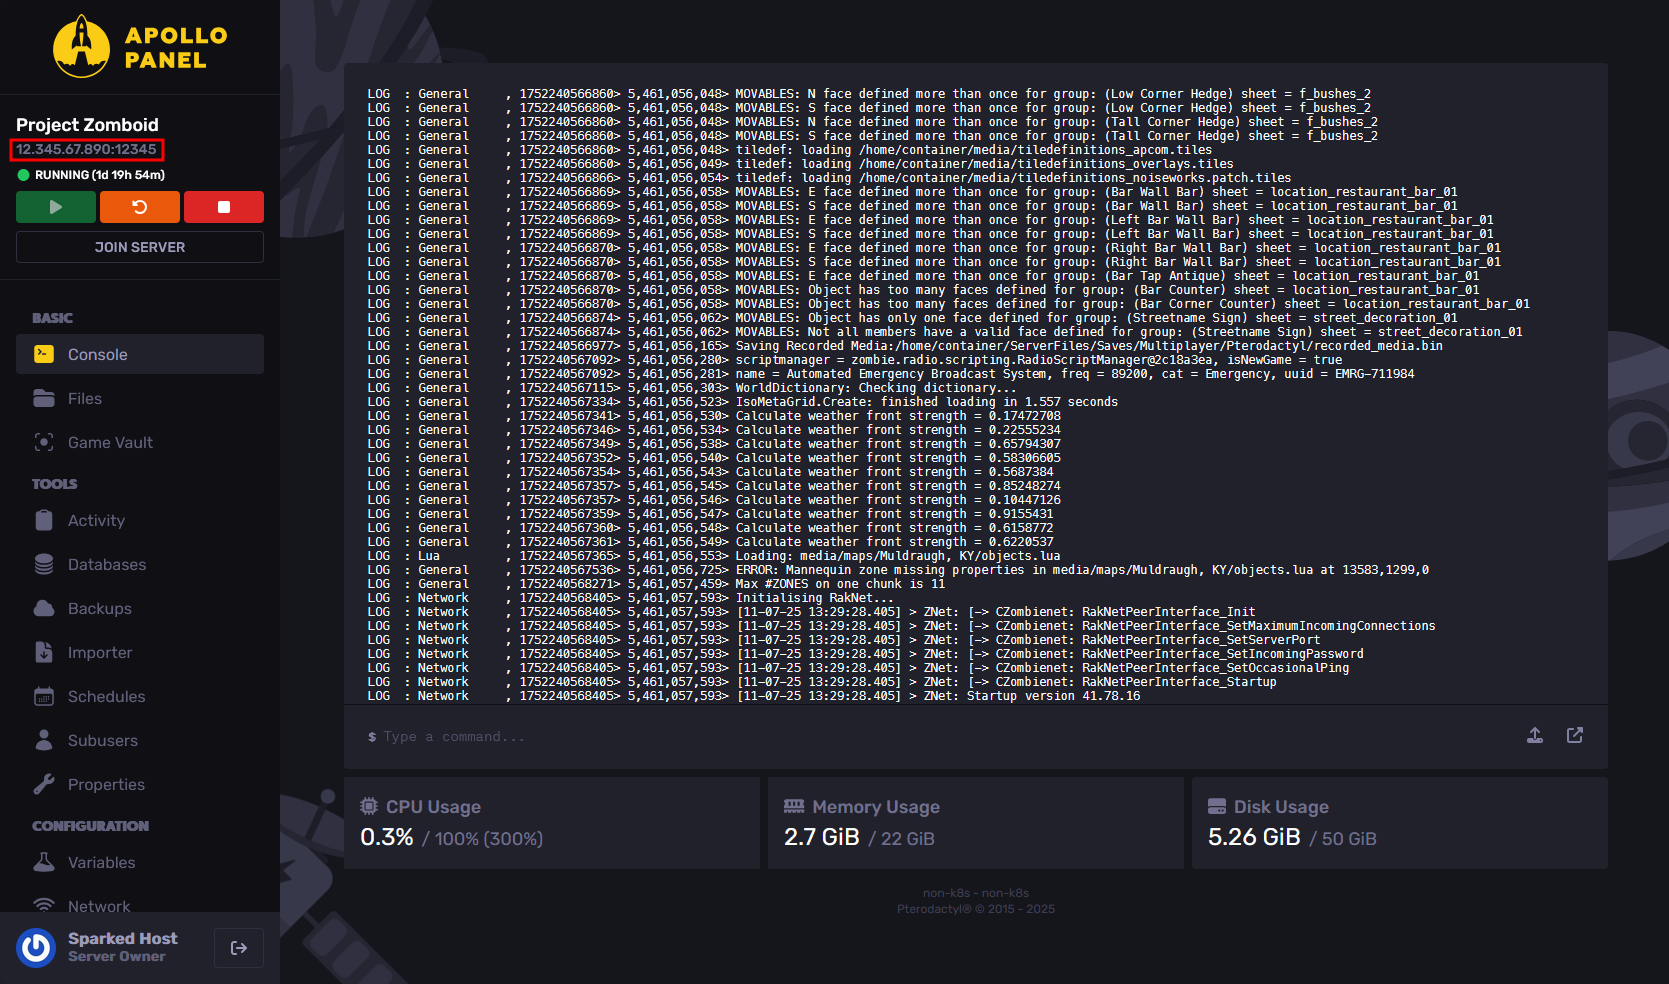
- After configuring all the necessary settings, click the Start button to launch the service and connect to the server with the server IP Address and Port located above the start and stop buttons, once it's up and running.
For Project Zomboid VPS Hosting and Project Zomboid Dedicated Server Hosting
If you use a VPS or Dedicated Server Hosting service, you must manually set up the server to run as a Project Zomboid Server. There are guides from sites like the Official Project Zomboid Wiki, which you can follow to install the necessary Project Zomboid server software to run a Project Zomboid Server on your own server.
Optionally, for Dedicated Servers, you can include the "Apollo Panel Instance" addon in your service order, wherein we will install the Apollo Panel, our sleek, custom-built control panel for Sparked Host users that will allow you to effortlessly manage your server with powerful tools, an easy-to-use interface, and all the features you need to stay in control.
Updated on: 13/07/2025
Thank you!