How To Make An Email Server With A VPS
Running your own email server with a VPS gives you complete control over your communication and data privacy. With the right setup, you can ditch third-party services and build a reliable, secure system tailored to your needs. This guide walks you through how to make an email server with a VPS, covering essential components like DNS records, SSL certificates, and email server software.
You’ll learn how to:
- Set up a private mail server using a Linux VPS
- Configure SPF, DKIM, and DMARC for better email deliverability
- Install email server software such as Postfix and Dovecot
- Set up an email client such as Roundcube
- Create and manage email accounts with full control over DNS settings
Let’s get your own email server up and running.
Why Should You Use A VPS For Your Email Server?
Using a Virtual Private Server (VPS) for your email server gives you complete control, better privacy, and improved performance compared to shared hosting or third-party services. With a VPS, you can install your email server software, manage all necessary DNS records like SPF, DomainKeys Identified Mail (DKIM), and MX record, and secure your private mail server with your SSL certificate. It allows you to customize your email server setup, ensure reliable email delivery with a dedicated IP and reverse DNS, and protect sensitive data. Learning how to make an email server with a VPS empowers you with hands-on server administration experience and a self-hosted email service that's secure, flexible, and under your control.
Understanding Email Basics
Before getting started, there are a few definitions you should be aware of:
- DNS: The Domain Name System (DNS) translates domain names into IP address values. For an email server, your domain's DNS settings must include MX and TXT records, and reverse DNS to direct email clients and recipient servers to your own mail server.
- SPF: The Sender Policy Framework (SPF) is a type of DNS record that helps prevent email spoofing by specifying which IP address or mail server is authorized to send mail for your domain. An accurate SPF record improves email deliverability and protects your server's reputation.
- DKIM: DomainKeys Identified Mail (DKIM) uses cryptographic keys in DNS records to sign outgoing messages from your email server. This ensures email integrity and verifies that your email server is authorized to send messages, enhancing mail security.
- DMARC: Domain-based Message Authentication, Reporting & Conformance (DMARC) builds on SPF and DKIM by telling recipient servers what to do when an email fails authentication checks. Adding a DMARC policy to your DNS settings boosts the trustworthiness of your private mail server.
- Sending IP: The sending IP is the public IP address from which your outgoing mail server sends emails. Using a dedicated IP on your VPS Hosting Service gives you better control over email delivery and helps avoid being flagged by spam filters.
- SMTP/POP3/IMAP: These are email server protocols. The SMTP server handles mail transfer from your self-hosted email service to others. POP3 and IMAP are used by email clients to retrieve mail. Correctly configuring these on your VPS Hosting Service with proper email server software is essential for reliable email account access.
How To Host Your Own Mail Server On A VPS
Step 1: Set Up Your Virtual Private Server
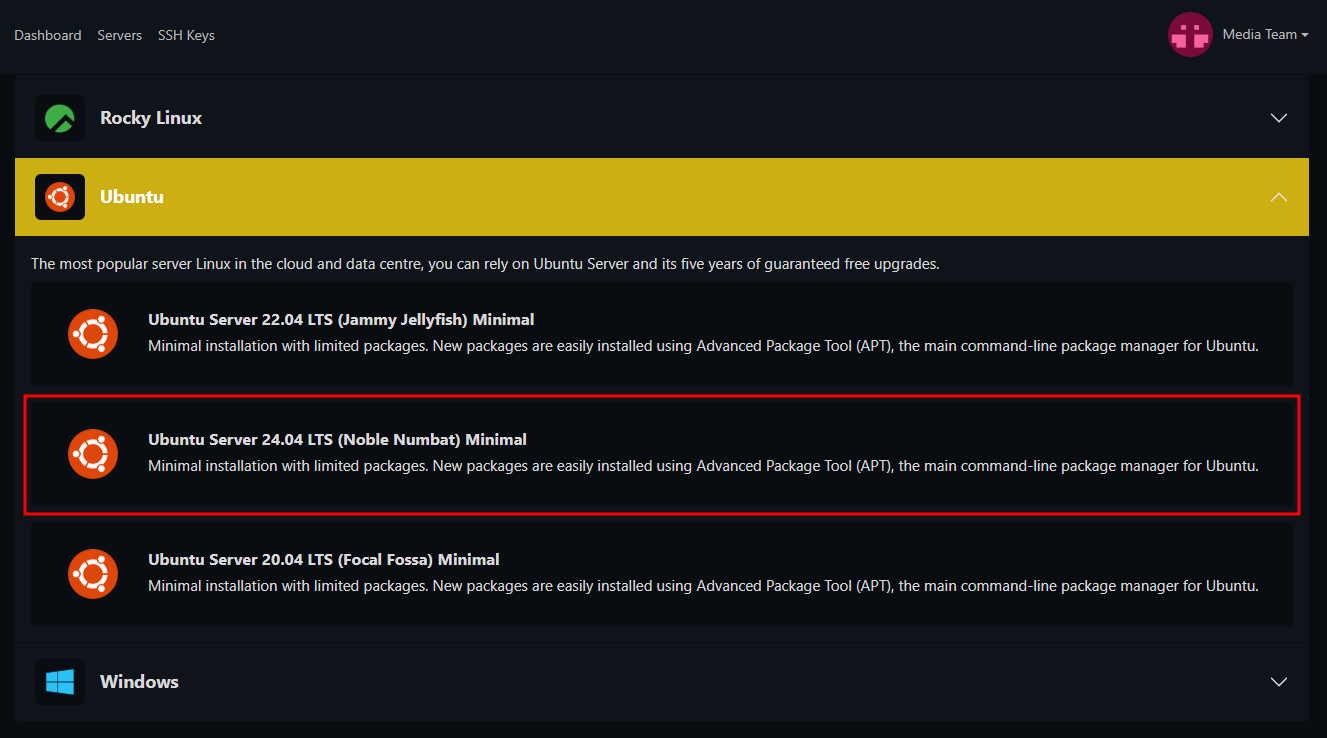
Once you have purchased a Premium VPS or a Budget VPS, make sure you install Ubuntu as the Operating System. For this guide, we will be using Ubuntu 24.04.
Step 2: Point Your Domain To Your Mail Server
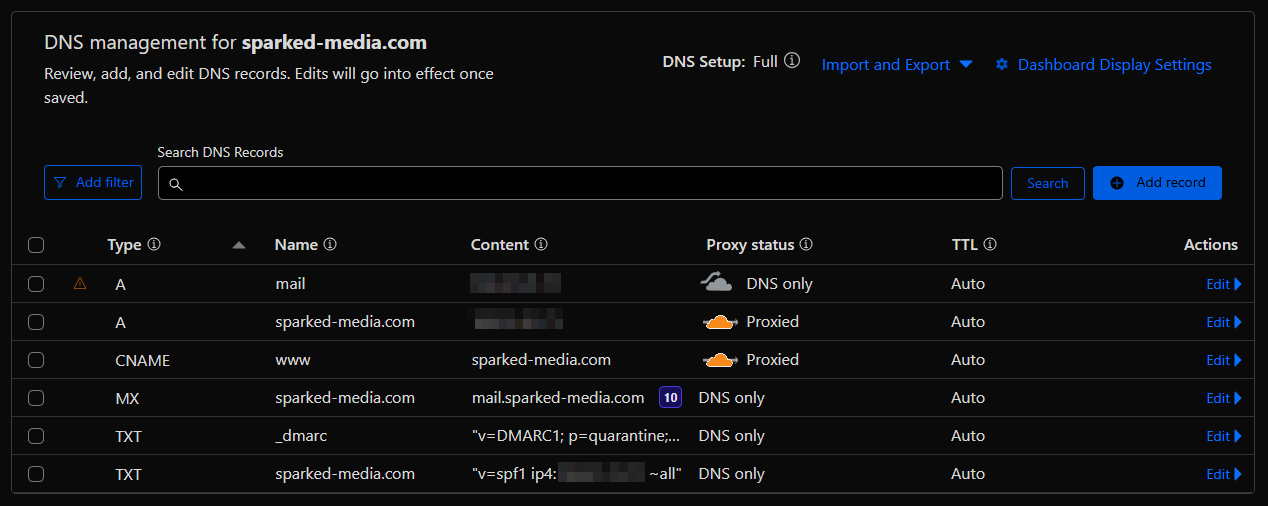
Now that you have finished setting up your VPS, add the following records to your domain's DNS settings.
Record Type | Name | Value |
|---|---|---|
A | <Your VPS IP Address> | |
MX | @ | mail.<Your Domain> |
TXT | @ | "v=spf1 ip4:<Your VPS IP Address> ~all" |
TXT | _dmarc | "v=DMARC1; p=quarantine; rua=mailto:<Your Email>" |
Take note, if you are using a service like Cloudflare that offers proxying for the DNS Records, make sure you disable the proxy status for the "mail" A Record, just like the image below.
Step 3: Install and Configure Postfix
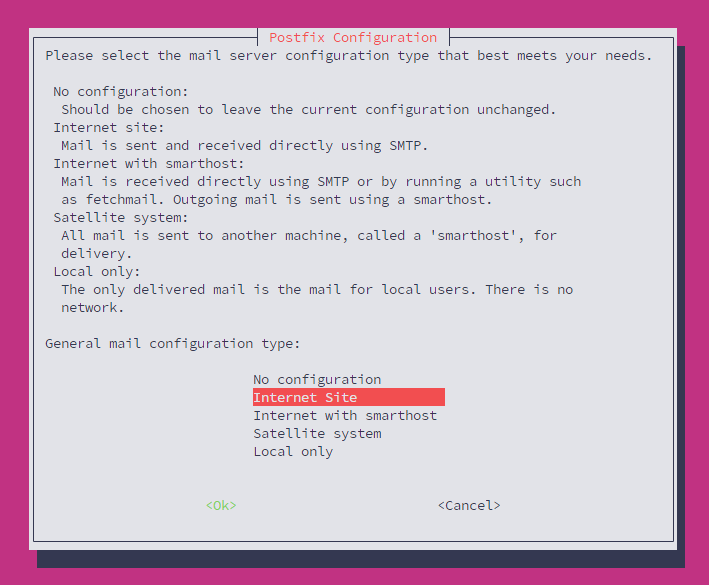
Now, lets install the email server software, in this case, Postfix. Once you connect to your VPS Hosting service via SSH(which you can do by following this guide), run the command sudo apt install postfix -y. Once you have entered the command, you will see a dialog that will ask you to select the mail server configuration type that best meets your needs. In this, case, we will select the "Internet Site" option.
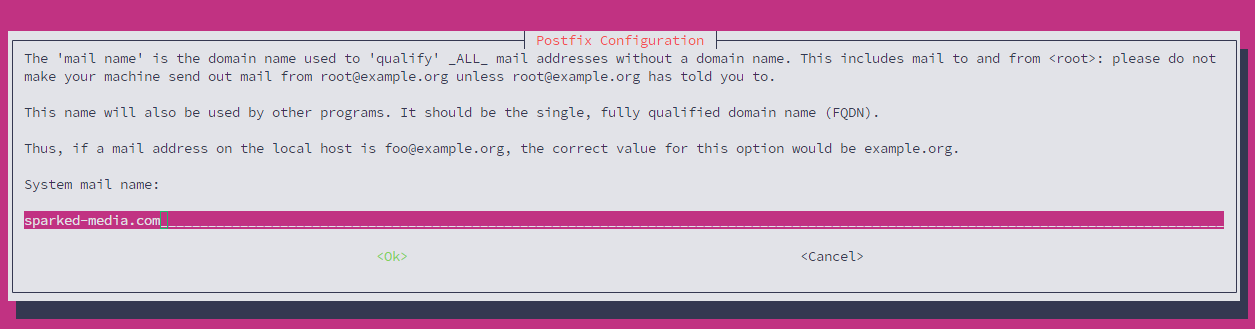
Afterwards, you will be asked to enter the Mail Name, which for this guide, it will be sparked-media.com.
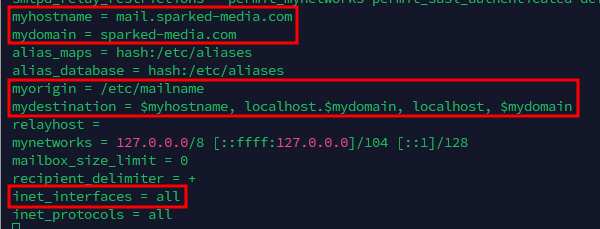
Once postfix is installed, run the command sudo nano /etc/postfix/main.cf then add or modify the following settings:
Name | Value |
|---|---|
myhostname | mail.<Your Domain> |
mydomain | <Your Domain> |
mydestination | $myhostname, localhost.$mydomain, localhost, $mydomain |
myorigin | /etc/mailname |
inet_interfaces | all |
Here is how it looks like when I used the same domain earlier during the DNS Configuration.
When you have added or modified the mentioned settings, do Ctrl + X, then Y and Enter to exit and save the file.
After configuring Postfix, restart it to apply the changes by running the command sudo systemctl restart postfix
Step 4: Set up DKIM with Postfix
To add DKIM with Postfix, we first install OpenDKIM, which you can do by running the command sudo apt install opendkim -y. Afterwards, edit the OpenDKIM main configuration file by running the command sudo nano /etc/opendkim.conf, and lets create a folder for our DKIM key by running the command mkdir /etc/opendkim.
Once you have run those commands, we can now generate the DKIM key by running the command opendkim-genkey -D /etc/opendkim -s mail -d mail.<Your Domain>. After doing so, run the command cat /etc/opendkim/mail.txt and you will see something like the following:
mail._domainkey IN      TXT     ( "v=DKIM1; h=sha256; k=rsa; "
          "p=MIIBIjANBgkqhkiG9w0BAQEFAAOCAQ8AMIIBCgKCAQEAza068+cFAbgoJY8lRmCLPLwkEiA7VrbXdWtBpPWnRvh2SuSrTqPouTPSenXbLPwBiPPXwbvKRrXiUOO9uI3V0KsDJJWljVX3DGsZ0Vno76AFlQNdJ2BPHr8ncieZ8OvOmch6NbZC+C64QPU+IIUOGeaZHv+3iOqoUb47V8sU2+a+SMrSVghY/vBvZM2rU3YUk84RMlRdu+zdva"
          "zxjbjrVcbJ5+GEoDZLS55N2pVomOKvHDKnT/H4aKNNShfUb0CBnaiKmbaD+eGuf/qRRKlTvcHshF6eTKz5OymvHcakkEf//tGvS7Jg6HdCaCRGCOegCk6c/xota9TWzvsfuWR5bQIDAQAB" )  ; ----- DKIM key mail for mail.sparked-media.com
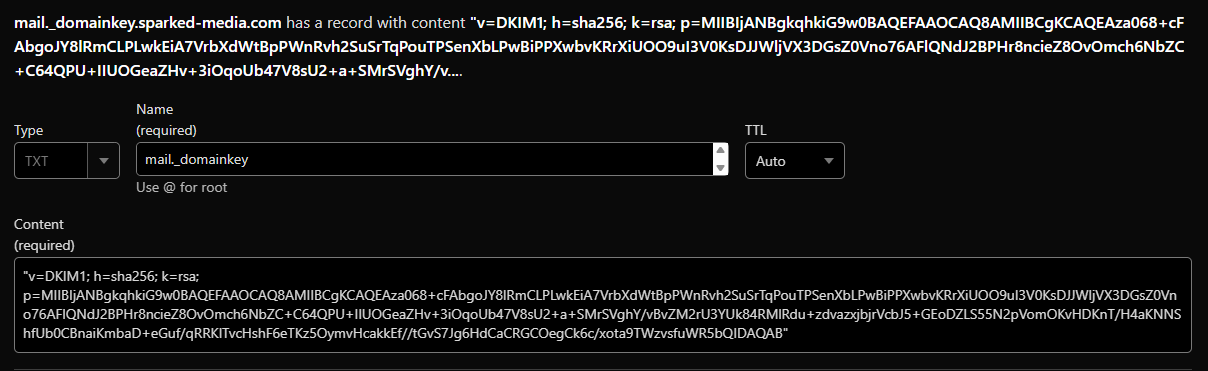
The next thing we will need to do is combine all of the values in quotes into a singular line, so we copy all of the values that are inside of the quotation marks that are outlined in the image below:

Then when you combine them, it should look like the following:
"v=DKIM1; h=sha256; k=rsa; p=MIIBIjANBgkqhkiG9w0BAQEFAAOCAQ8AMIIBCgKCAQEAza068+cFAbgoJY8lRmCLPLwkEiA7VrbXdWtBpPWnRvh2SuSrTqPouTPSenXbLPwBiPPXwbvKRrXiUOO9uI3V0KsDJJWljVX3DGsZ0Vno76AFlQNdJ2BPHr8ncieZ8OvOmch6NbZC+C64QPU+IIUOGeaZHv+3iOqoUb47V8sU2+a+SMrSVghY/vBvZM2rU3YUk84RMlRdu+zdvazxjbjrVcbJ5+GEoDZLS55N2pVomOKvHDKnT/H4aKNNShfUb0CBnaiKmbaD+eGuf/qRRKlTvcHshF6eTKz5OymvHcakkEf//tGvS7Jg6HdCaCRGCOegCk6c/xota9TWzvsfuWR5bQIDAQAB"Now you just copy that, then go back to your domain's DNS Settings, and create a new TXT record with the name mail._domainkey and paste the combined DKIM key we made earlier as the record's value.
Once, you have added the TXT Record, lets change some settings for OpenDKIM. So first, lets define who are the trusted hosts that can send messages by running the command sudo nano /etc/opendkim/TrustedHosts, then paste the following contents.
127.0.0.1
localhost
192.168.1.2
mail.<Your Domain>
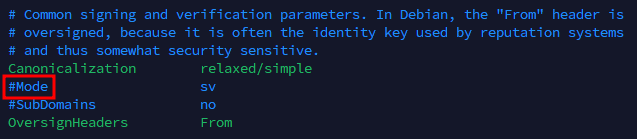
After defining the trusted hosts, go to the OpenDKIM config file by entering sudo nano /etc/opendkim.conf, and do the following changes:
- Uncomment the Mode option by removing the # symbol.
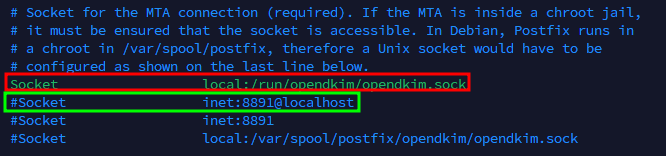
- Comment the first Socket local:/var/run/opendkim/opendkim.sock, by adding a # symbol (so it will turn to #Socket local:/var/run/opendkim/opendkim.sock), then uncomment the Socket inet:8891@localhost line.
- Lastly, paste the following at the end of the config file:
  KeyTable /etc/opendkim/KeyTable
  SigningTable /etc/opendkim/SigningTable
  ExternalIgnoreList /etc/opendkim/TrustedHosts
  InternalHosts /etc/opendkim/TrustedHosts
Next, lets reference the DKIM key we made earlier via OpenDKIM KeyTable. So first run the command sudo nano /etc/opendkim/KeyTable and paste the following content:
mail._domainkey.<Your Domain> <Your Domain>:mail:/etc/opendkim/mail.private
After that, we can specify the domain in the OpenDKIM SigningTable. To do that first run the command sudo nano /etc/opendkim/SigningTable then paste the following content:
<Your Domain> mail._domainkey.<Your Domain>
Now that we finished configuring OpenDKIM, lets configure Postfix. So first edit the Postfix config file by running the command sudo nano /etc/postfix/main.cf then add the following lines at the end of the config file:
milter_default_action = accept
milter_protocol = 2
smtpd_milters = inet:localhost:8891
non_smtpd_milters = inet:localhost:8891
Next thing we need to do is give OpenDKIM access to the DKIM private key by running the command sudo chown opendkim:opendkim /etc/opendkim /etc/opendkim/mail.private
Lastly, restart OpenDKIM and Postfix by running the following commands:
sudo systemctl restart opendkim
sudo systemctl reload postfix
sudo systemctl restart postfix
Step 5: Install and Configure Dovecot
To install Dovecot, first run the command sudo apt install dovecot-imapd dovecot-pop3d -y.
After Dovecot is installed, run the command sudo nano /etc/dovecot/conf.d/10-mail.conf then edit the mail_location setting to have the value maildir:~/Maildir.
Step 6: Issue An SSL Certificate For The Domain
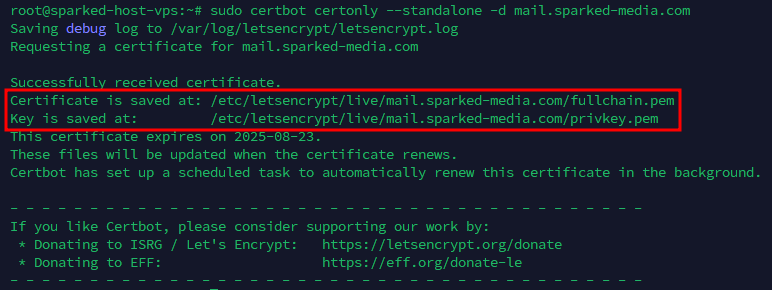
Now to ensure no one is snooping on the messages in transit, we will need to issue a SSL Certificate, we will need to use Certbot so that we can get a free SSL Certificate, which you can install by running sudo apt install cerbot -y. After installing Certbot, you can generate the certificate by running the command sudo certbot certonly --standalone -d mail.<Your Domain>.
Once you ran the command, take note where the certificate and key is saved at, as we will use this for Postfix and Dovecot.
So first lets configure Postfix by running the command sudo nano /etc/postfix/main.cf, and add/modify the following settings:
Name | Value |
|---|---|
smtpd_tls_cert_file | <Location of where the Certificate is saved> |
smtpd_tls_key_file | <Location of where the Key is saved> |
smtpd_tls_security_level | encrypt |
smtpd_sasl_auth_enable | yes |
smtpd_sasl_type | dovecot |
smtpd_sasl_path | private/auth |
smtpd_use_tls | yes |
smtpd_tls_auth_only | yes |
smtpd_sasl_security_options | noanonymous |
After modifying the Postfix config, make sure you save the file, then restart it to apply the changes by running the command sudo systemctl restart postfix.
Now, we will do the same thing for Dovecot, so first edit the Dovecot config by running the command sudo nano /etc/dovecot/conf.d/10-ssl.conf, then modify the following settings:
Name | Value |
|---|---|
ssl | required |
ssl_cert | <Location of where the Certificate is saved> |
ssl_key | <Location of where the Key is saved> |
ssl_min_protocol | TLSv1.2 |
Step 8: Create email accounts
Once we installed the certificates to make the emails from the email server secure, we can now create some email accounts. For this step, we will create the email system@sparked-media.com with the password SparkedHostEmail.
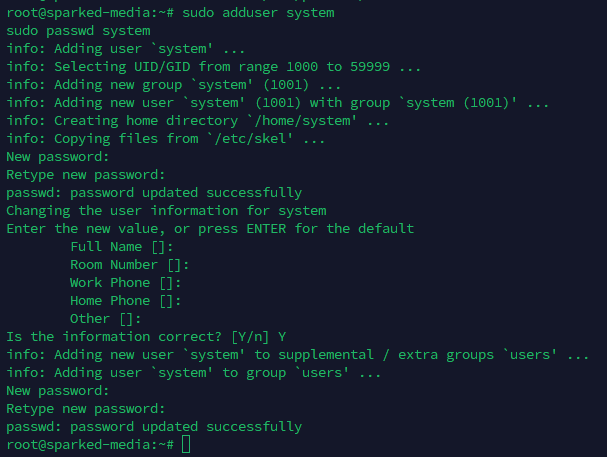
Firstly, we need to create a system user account for the email, which in this example would be system. So to add a user with a password, we will need to run the following commands:
sudo adduser <Email Username>
sudo passwd <Email Username>
After running the commands, it will first ask you to set a password then confirm that same password. So make sure you remember the password for the system account. Then, you will be asked to enter the Full Name, Room Number, Work Phone, Home Phone, and Other for the user account, you can just press Enter for each entry instead of filling the information out. Once you have entered the user information, you will then be asked to type a new password and confirm the password once again.
Next thing we will do is create the necessary directory for the storing emails, which you can do by running the following commands:
sudo mkdir -p /home/<Email Username>/Maildir
sudo chown -R <Email Username>:<Email Username> /home/<Email Username>/Maildir
Step 9: Test Your Email Server
To test out if your private email server works as expected, lets try sending an email with the system username we made earlier. But before that, we will need to convert the Email Username and Password to Base64, which you can do by doing echo -n <Email Username or Password> | base64 and it will encode it with Base64.

Make sure you take note of the encoded email username and password, as we will use this to log in for the next steps.
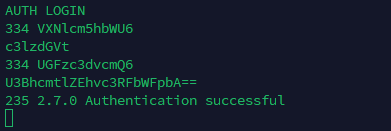
After encoding the username and password, we can now test the SMTP connection by running the command openssl s_client -starttls smtp -connect mail.<Your Domain>:25 -crlf -quiet. Once you have made the connection, proceed in logging in by entering AUTH LOGIN. After entering that, just enter first the Base64 Encoded Email Username then the Base64 Encoded Email Password, and you should see the message "Authentication Successful" when you have finished entering the username and password.
After logging in, paste the following to send an email to yourself (including the . symbol at the end):
MAIL FROM:<Email Username>@<Your Domain>
RCPT TO:<Your Email>
DATA
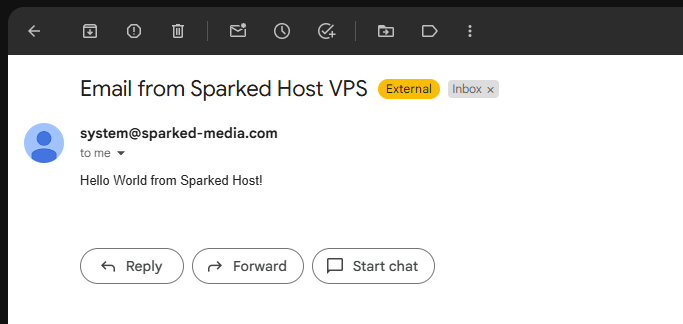
Subject: Email from Sparked Host VPS
To: <Your Email>
Hello World from Sparked Host!
.
Then in a few minutes, you should receive the email that was sent from your VPS.
Now test out if your private email server can receive incoming emails, we will need to install the Mailutils package, which you can install by running the command sudo apt install mailutils -y.
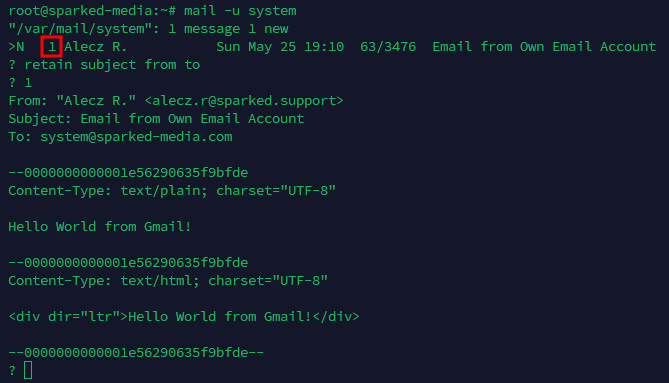
Next, send an email from your own personal email to an email thats on the email server, for this guide, I will send an email to system@sparked-media.com. Now to view the inbox of the system user, we will run the command mail -u system, and you should see something like the image below:

Before we open the email, make sure you enter retain subject from to that way we will only see the subject, email of the sender, email of the receiver and the message in the email.
Once you have done so, we just enter the number of the email that is next to the name of the sender, in this case 1, you will see the contents of the email.
Still have some questions about making an email server on a VPS?
Don't hesitate to contact our support team, we're available 24/7 to help!
Updated on: 27/05/2025
Thank you!