How to Setup a MySQL Database for Minecraft Server
When running a Bukkit server, you might want to install plugins like CoreProtect, EssentialsX. When doing this, you might run into instructions that tell you to create a MySQL Database. This guide will show you how to make a MySQL server for your Minecraft server on the same server (or Linux VPS) as your Sparked Host MC server.
Don't already host with us? 10,000+ server owners trust Sparked Host for lag-free Minecraft worlds. Claim your server savings to get higher performance at less $ per month.
Why Should I Create a Database For My Minecraft Server?
Setting up a MySQL database for your Minecraft server makes managing data a lot easier, allowing you to scale your database information and keep it in one centralized place.
The disk space on your host might be limited. This ensures that you aren't using too much precious host disk space by putting that somewhere else more manageable.
What is MySQL?
MySQL is an open-source database management system. It's commonly used by many Minecraft plugins and mods to store data in. You can do a lot of things with MySQL. It's:
- Open source
- Secure
- Scalable
- Fast
Creating Your MySQL Database
Fortunately, you don't need to install MySQL. Your SparkedHost Minecraft server will already have it installed. If you're running a SparkedHost VPS, then the process might be a little different.
For Managed Sparked Host Minecraft Server Hosting
Creating your database is super easy and super simple to do, to create a database for a Minecraft server:
- Log into your Minecraft server panel website at https://control.sparkedhost.com
- Navigate to the
Databasestab on the lefthand corner.
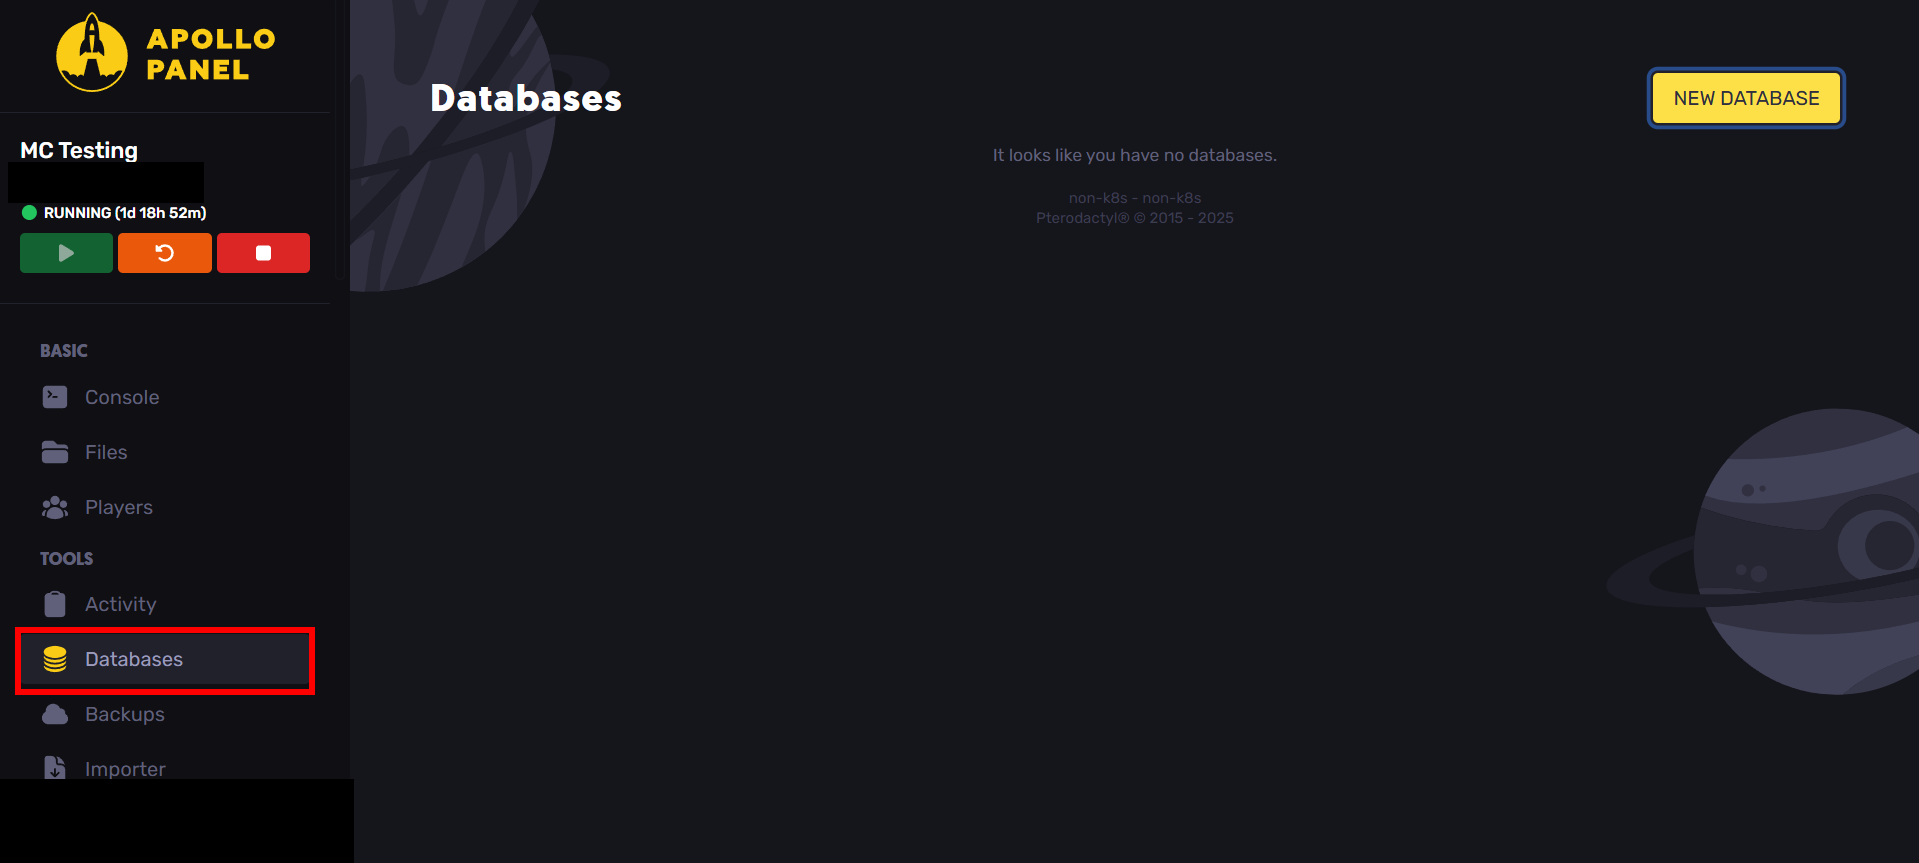
- Create a new database with the "New Database" button on the righthand corner
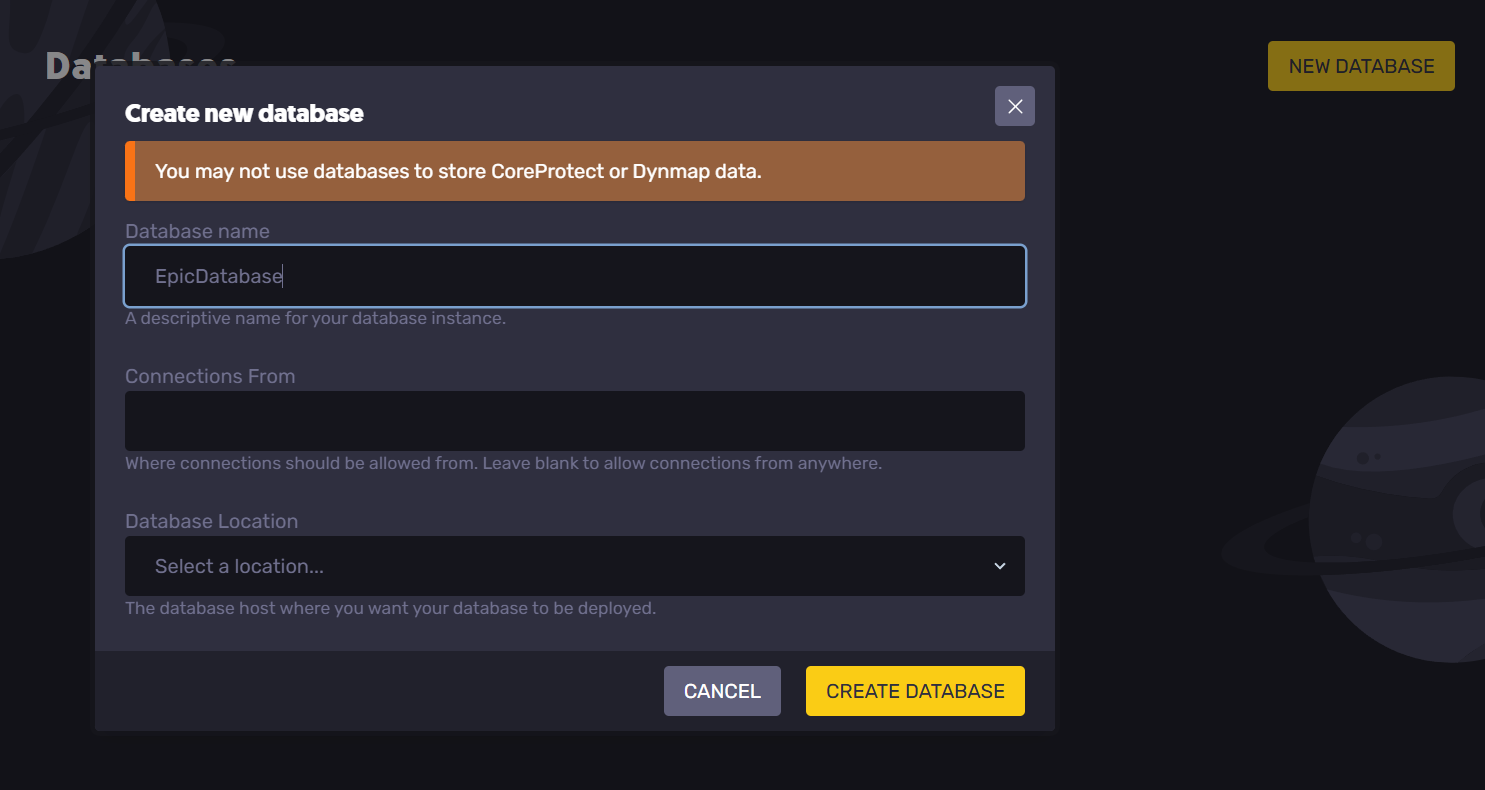
The IP that you set Connections From to will be the IP that will be able to change values on the database. You can set this to blank if you don't know what that means.
After that, the database should show up:

Congratulations! You have now created your SparkedHost database!
For a VPS
Depending on the type of VPS you are using, your setup for your database might look a little different.
For a Linux VPS
For most of this, you will need root access or sudo. Also note that while I'm using VirtualBox, this is still applicable to a VPS.
Note: We are assuming that you'll have basic Linux command knowledge. If you do not, you can contact SparkedHost support if you are confused during this setup.
For this, we'll be using MySQL for the database.
- Log into your VPS
- Open the terminal and run the command:
sudo apt install mysql-server
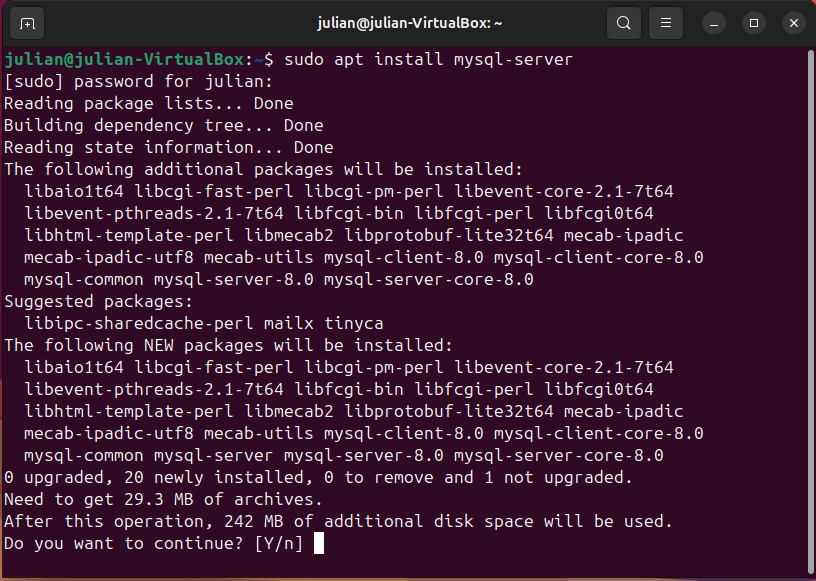
Press Y every time it prompts
- Run
sudo service mysql status
If it says "active (running)" then it worked.
- Enter:
sudo mysql -u root
Which will open MySQL as the user root
- Set the password of the root user (you need this if you want to connect a plugin)
ALTER USER 'root'@'localhost' IDENTIFIED WITH mysql_native_password BY 'beans';
Replace 'beans' with your secure password.

- Create the database with whatever name with the command:
CREATE DATABASE [database name]
Replace [database name] with the name that you want to use
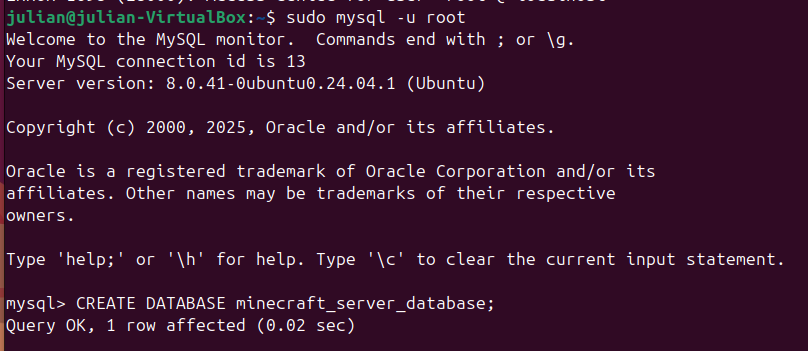
- Type exit to exit the MySQL commandline
Now you have your MySQL database set up!
Using A Database With a Plugin on a VPS
For this tutorial, I'll be using the plugin CoreProtect
The below steps will show you how to connect and store all the plugin data within the localhost database on the VPS.
- CD into your bukkit/spigot Minecraft server
- After installing the plugin, run your server once so that the plugin can create its config folders
- Once CoreProtect runs properly, you can shut down the server (control + c)
- Cd into
./plugins/CoreProtect
- Do
vim coreprotect.ymlor use any other text editor (like nano) to configure the MySQL database settings.
It should look something like:
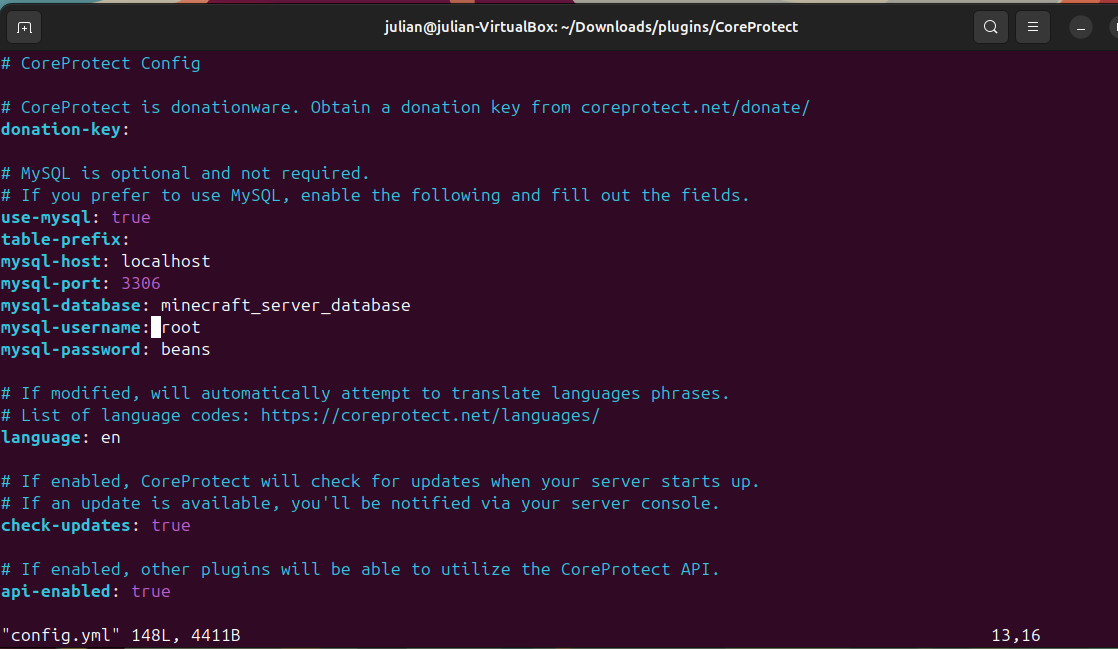
# MySQL is optional and not required.

    # If you prefer to use MySQL, enable the following and fill out the fields.

    use-mysql: true

    table-prefix:

    mysql-host: [localhost](http://localhost)

    mysql-port: 3306

    mysql-database: minecraft_server_database

    mysql-username: root

    mysql-password: beans
Ensure that use-mysql is set to true, the mysql-host (the hostname) is set to localhost, and the port is set to 3306 (which is the MySQL default port, unless you changed it), and the database is set to your database. Also, make sure that the password is somewhat secure (more than 8 characters, special characters, and a number; the password should also be the same as the password set before for the user root).
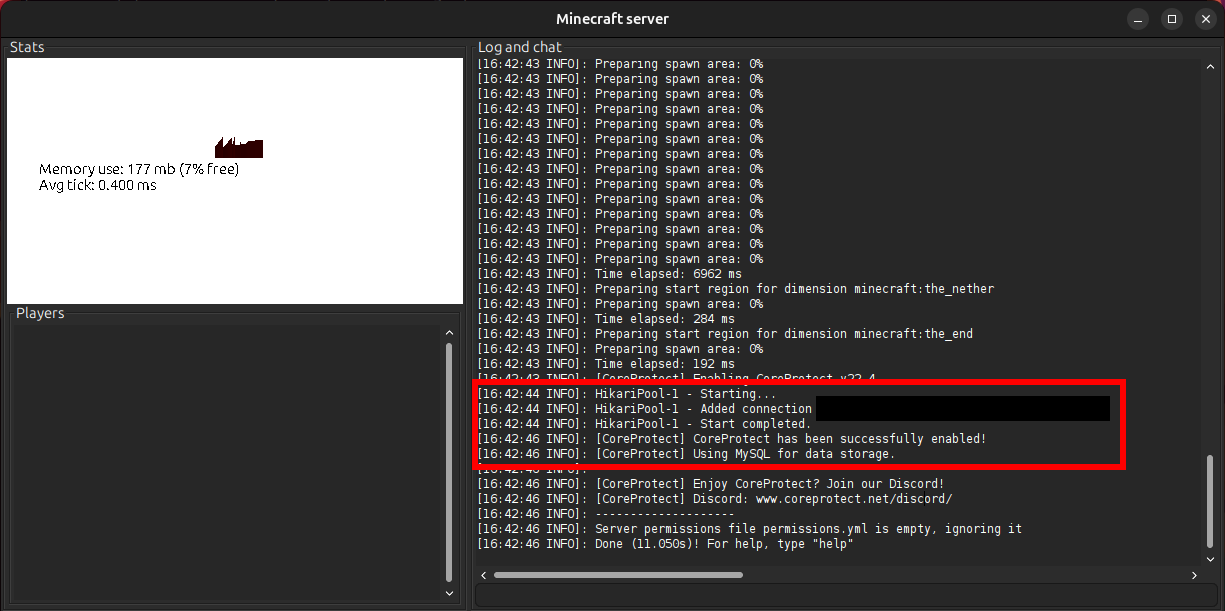
- Restart your server. If you did this properly you should get:
Using Your MySQL Database
This section is for the MySQL database that SparkedHost provides.
Logging Into Your Server
You need to get your server's credentials before managing it.
- First, go to your control panel at https://control.sparkedhost.com
- Then, go to the databases tab on the right-hand side
- From there, you want to copy the username of your server and save it somewhere

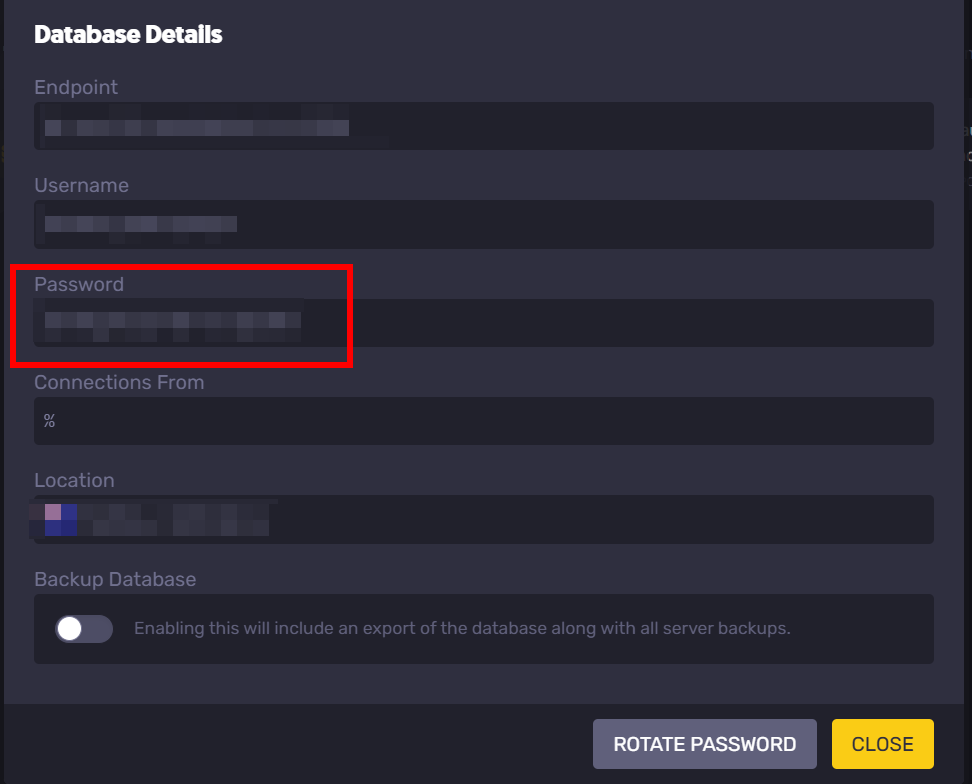
- Click the three dots and then click
Details.
- Copy your server's password and save that somewhere safe so you can login later
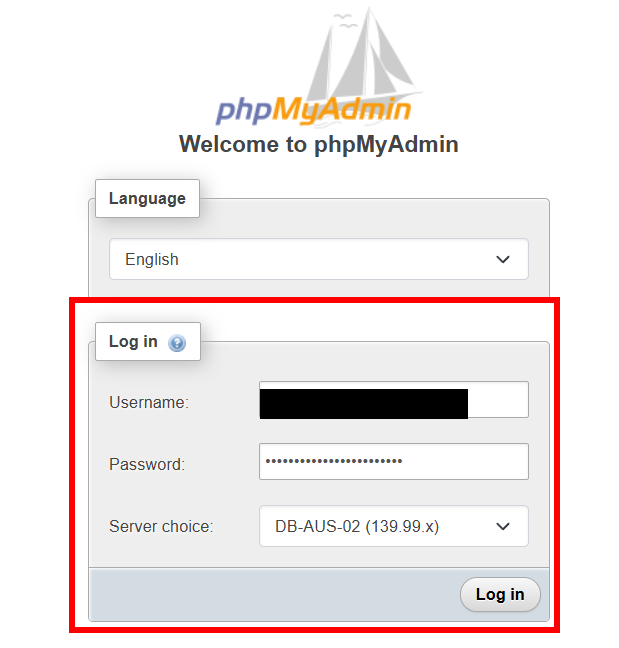
- Close, and click the three dots again and press "Visit phpMyAdmin" and log in
Using your MySQL Database with Plugins
CoreProtect
CoreProtect can be used to help defend against griefers or people who steal things in general. It can also be configured to use SQL!
To start your mysql server with CoreProtect,
- Log into your server panel
- Shut down your Minecraft server
- Navigate to
plugins/CoreProtect/config.ymland edit it.
- From here, you want to fill in the parameters below to connect to your database:
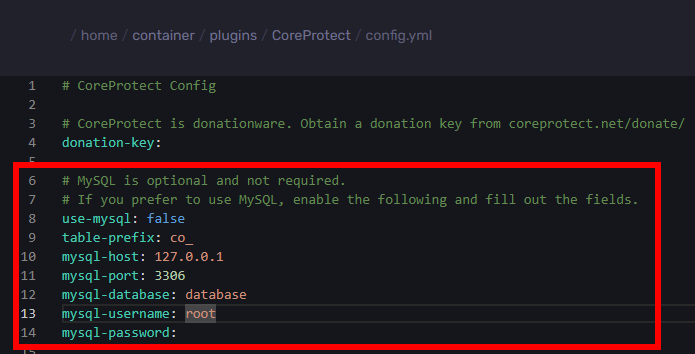
- Set:
use-mysql: true
    table-prefix: co_
    mysql-host: The host
    mysql-port: 3306 (the root port might be different though)
    mysql-database: name that you set for your database
    mysql-username: your username
    mysql-password: your root password
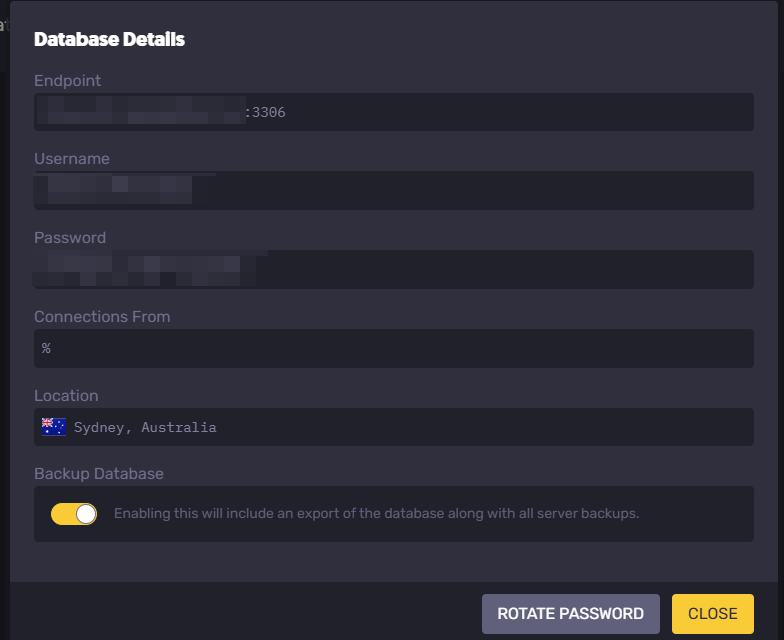
You can find these parameters on the Databases tab and database details when clicking the three dots next to a database. If you have a colon next to the endpoint (which is what you should put for mysql-host, remove it and the number after it. That's the port.
- Restart your server
If you see:
[03:43:09] [Server thread/INFO]: [CoreProtect] CoreProtect has been successfully enabled!
[03:43:09] [Server thread/INFO]: [CoreProtect] Using MySQL for data storage.
Then it worked!
Still have some questions?
You can make a ticket at https://sparkedhost.com/contact where you can provide details and get help really fast!
Updated on: 03/11/2025
Thank you!