How To Use Controller On CurseForge Minecraft
Shaders can completely change the look and feel of Minecraft, adding realistic lighting, shadows, and atmospheric effects. If you are using CurseForge to manage your Minecraft mods, the easiest way to enjoy shaders is with the Iris Shaders mod. This guide will walk you through how to install and turn on shaders in Minecraft using CurseForge.
Don't already host with us? 10,000+ server owners trust Sparked Host for lag-free Minecraft worlds. Claim your server savings to get higher performance at less $ per month.
Step 1: Install CurseForge
If you do not already have it, download and install the CurseForge launcher from the official website. The CurseForge launcher is a convenient way to manage Minecraft mods, modpacks, and profiles in one place.

Step 2: Install Iris Shaders
- Launch the CurseForge Launcher.
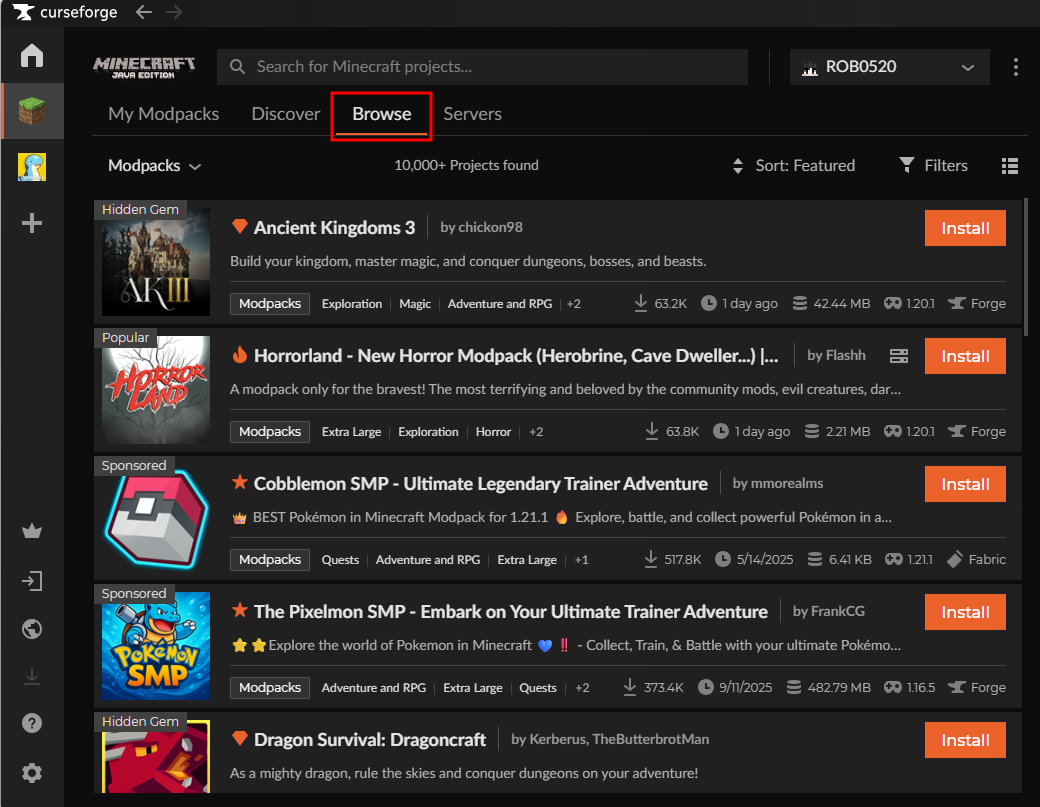
- Under the Minecraft section, navigate to the "Browse" tab.
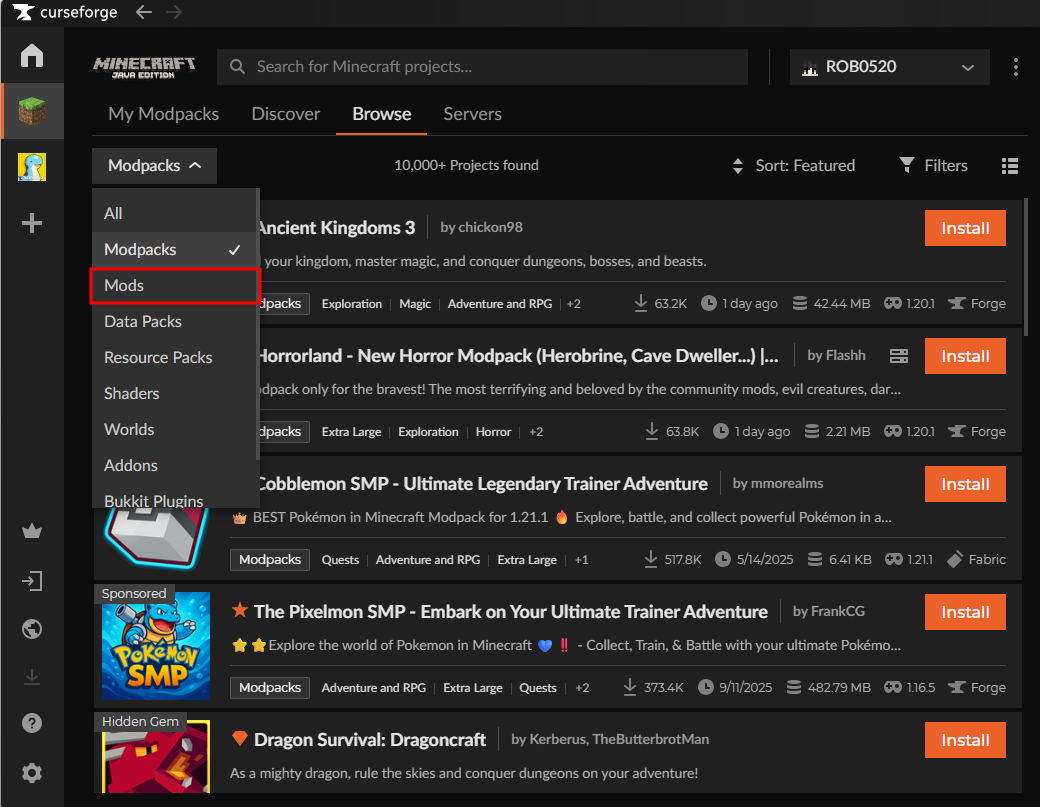
- Change the search filter from Modpacks to Mods.
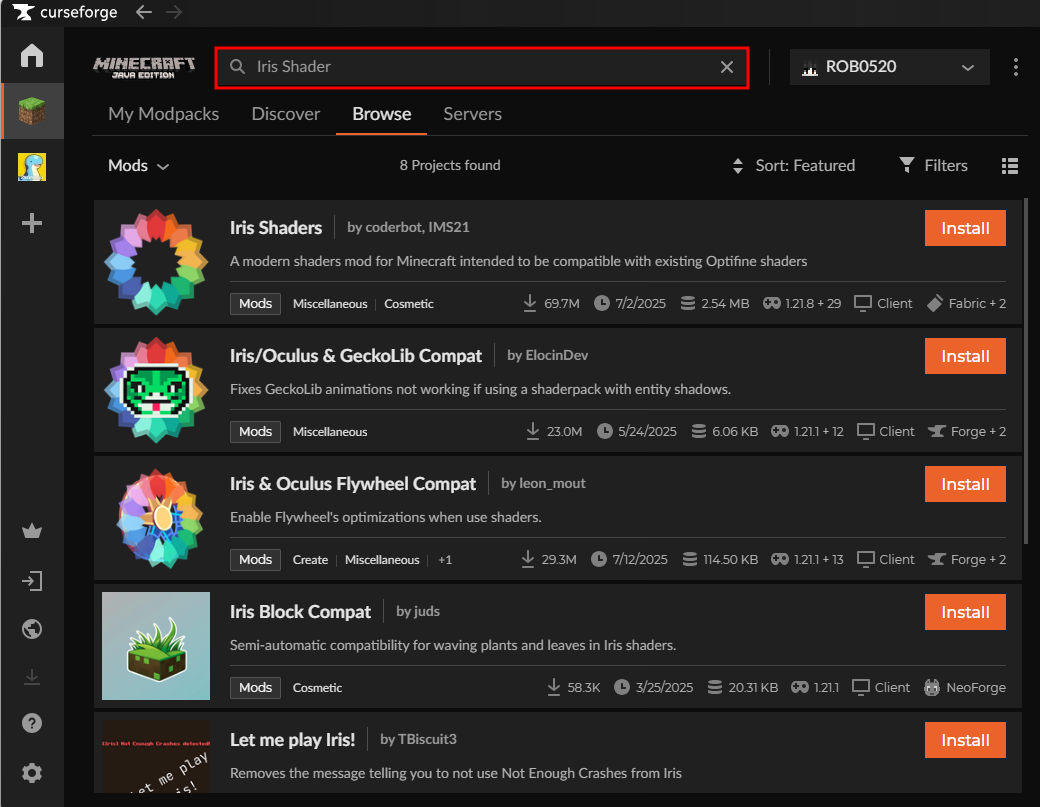
- In the search bar, look up the "Iris Shader" mod.
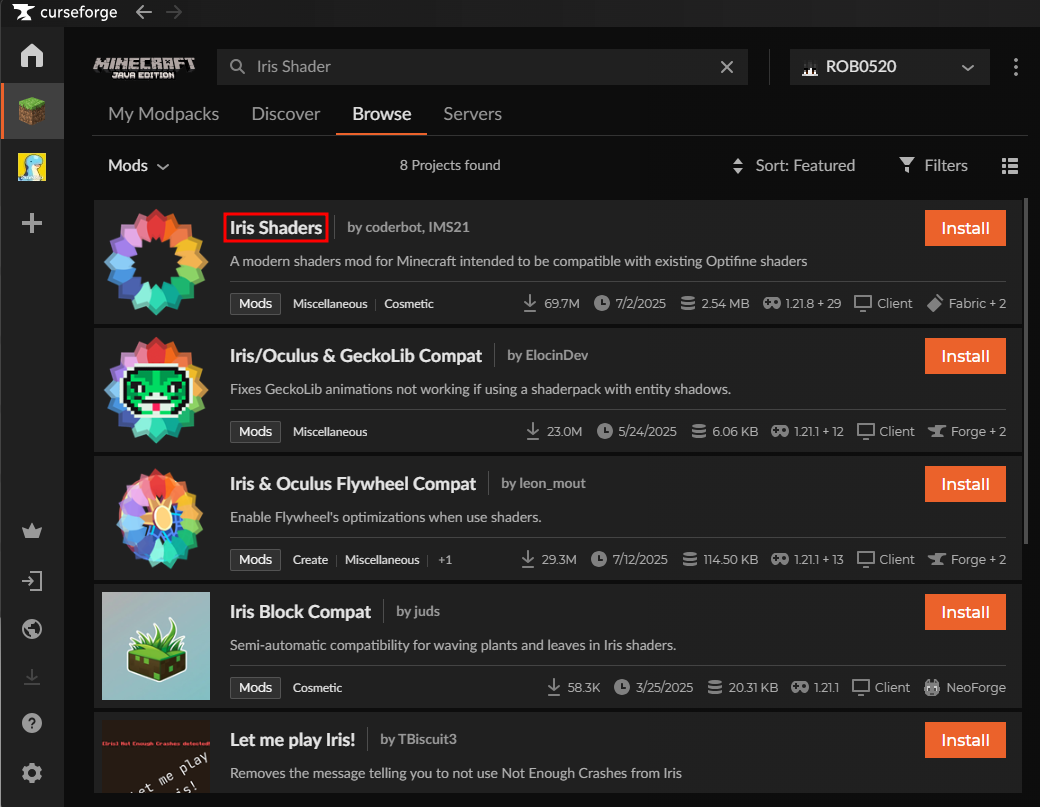
- Click on the name of the mod.
- Go to the "Versions" tab, and you should see a list of different versions of the mod, as well as the mod loaders and Minecraft versions they use.
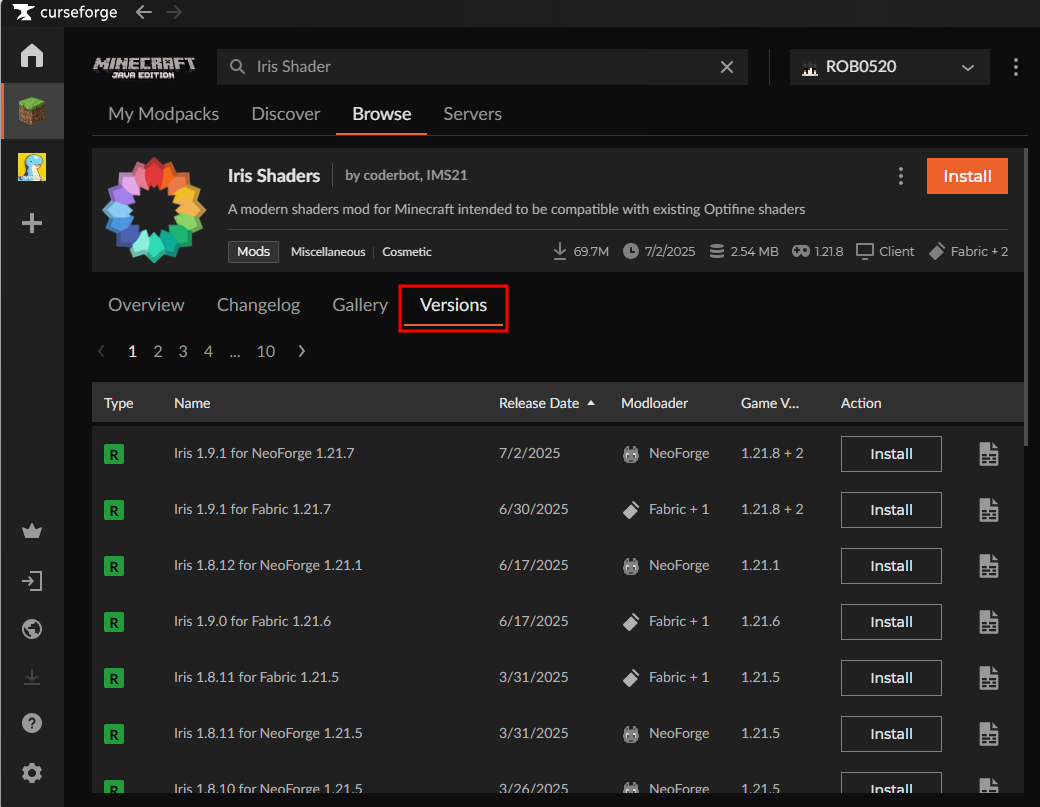
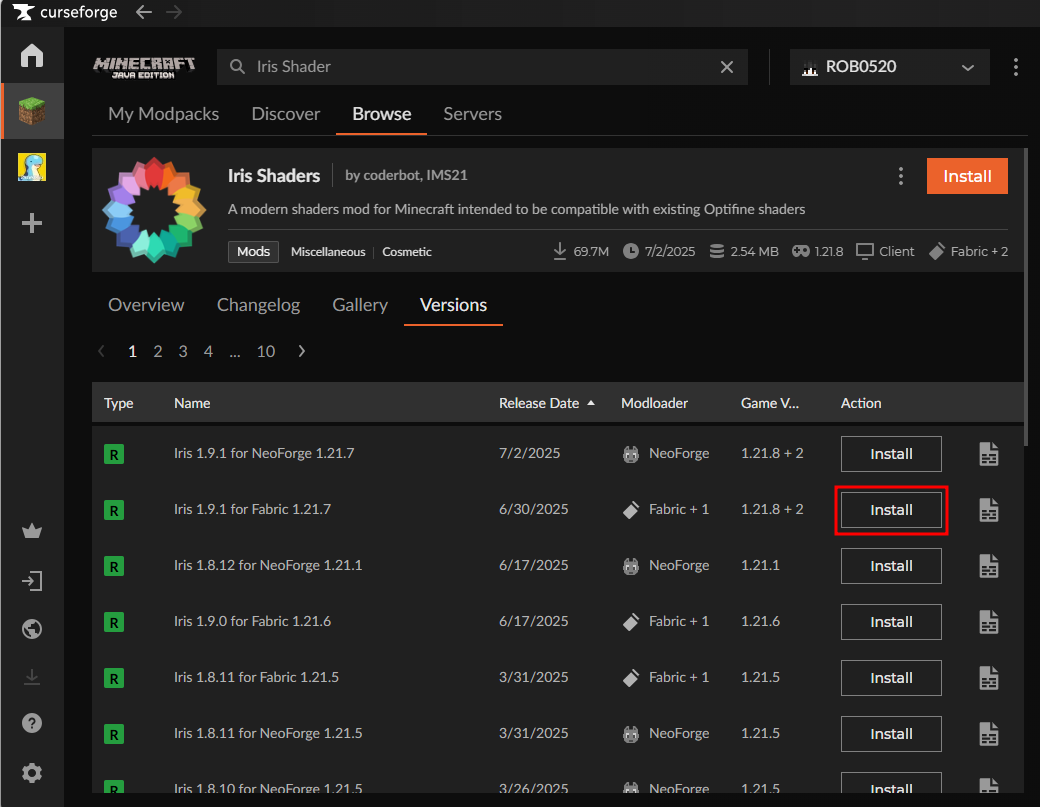
- Look for the version of the mod that you want to use that also matches the Minecraft version and mod loader you want to use. For this guide, we will install the version of the mod that is available for Fabric 1.21.8.

- Once you have found the version of the mod you want to install, click on the "Install" button for that version of the mod.
- Select either if you want to install the mod to a new profile or a profile that you already have installed. If you don't have a modpack profile, click on the "Create a new Profile" button.

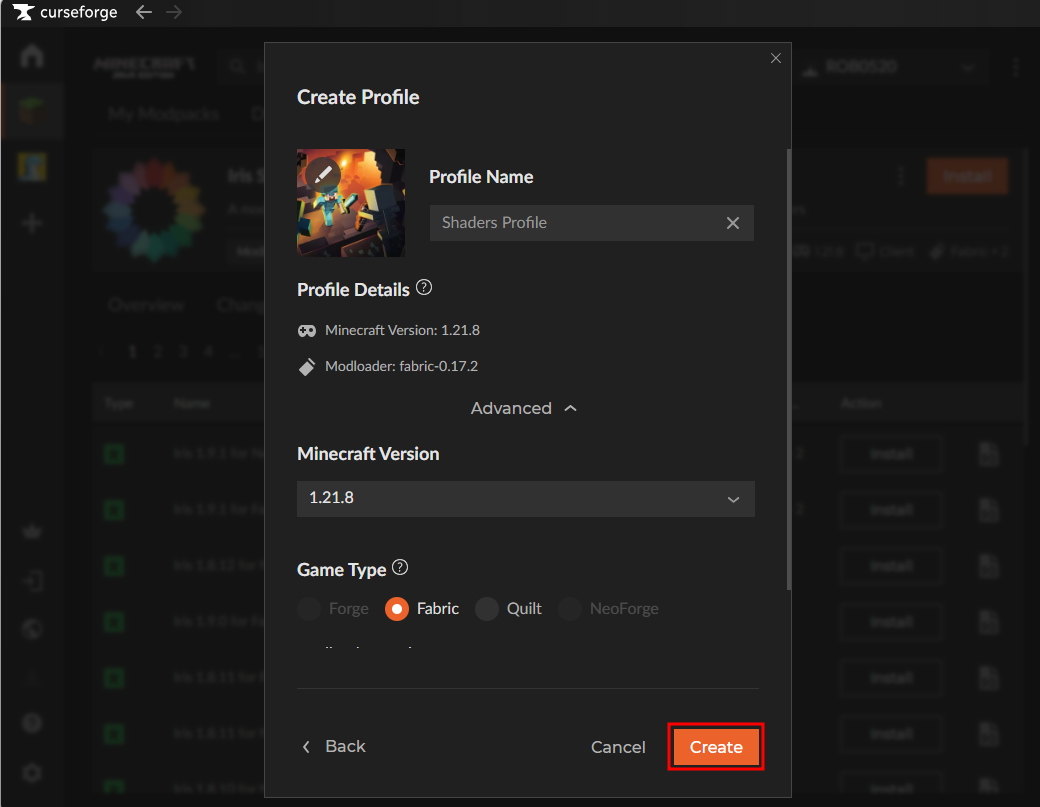
- Set a name for the profile, and optionally, you can click on "Advanced" to set a specific Minecraft Version if the version of the mod you selected is compatible with other Minecraft versions.

- Once you are done configuring your profile, click on the "Create" button.
- After creating the profile, the launcher will start installing the mod and its dependencies.
Step 3: Download Shader Packs
Iris Shaders itself does not come with shaders; you need to install shader packs. Popular packs include BSL Shaders, Complementary Shaders, and Sildur’s Vibrant Shaders. With the CurseForge launcher, we can also install shader packs. Here's how you can install shader packs:
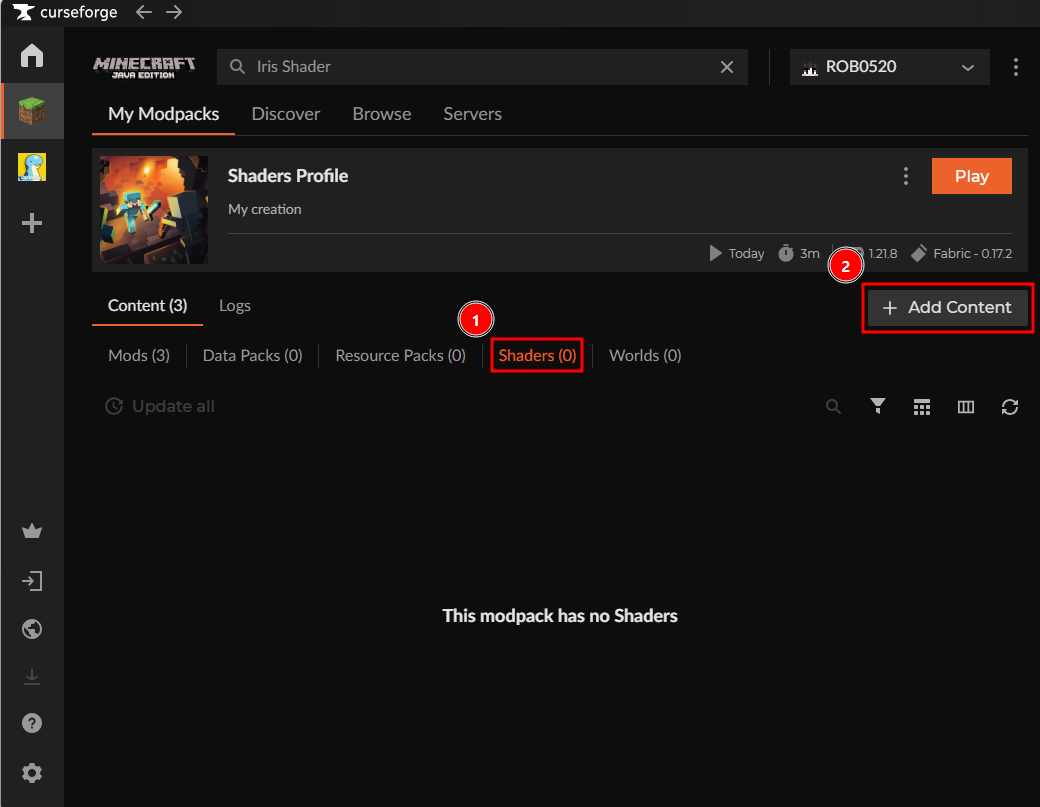
- From the "My Modapcks" tab, click on the profile where you want to add shaders.

- Next, click on the "Shaders" tab, then the "Add Content" button.
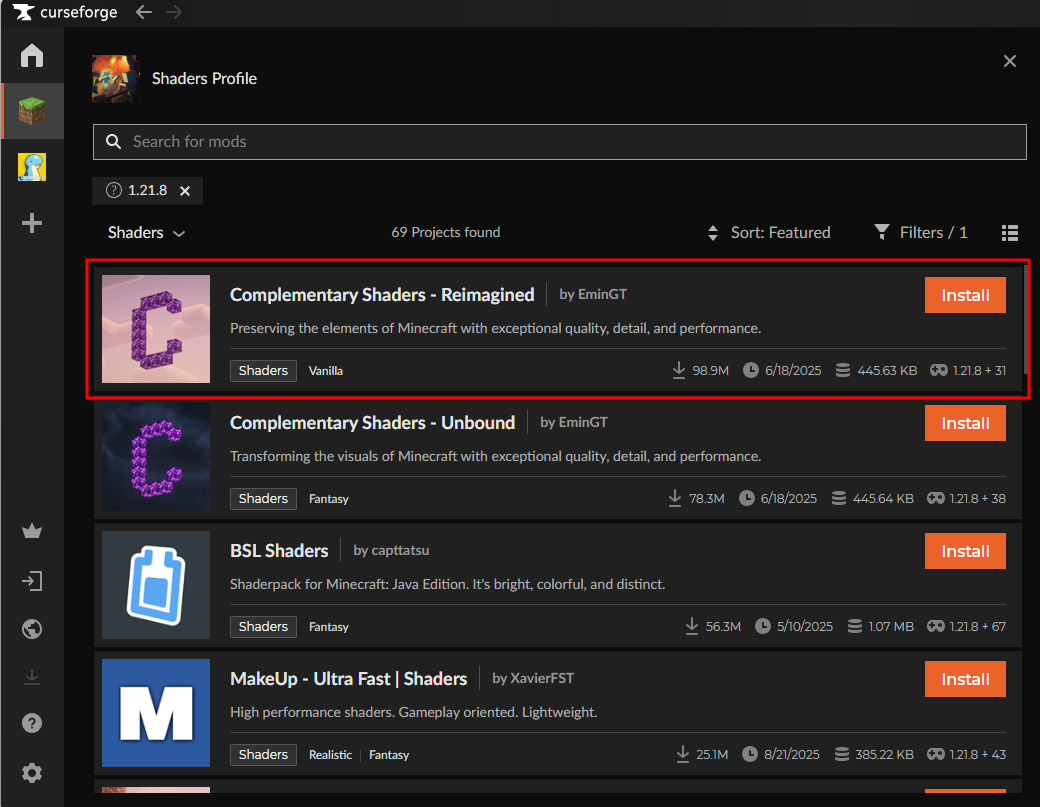
- Look for the Minecraft shader pack that you want to install. For this guide, we will be installing the Complementary Shaders - Reimagined Shader Pack.
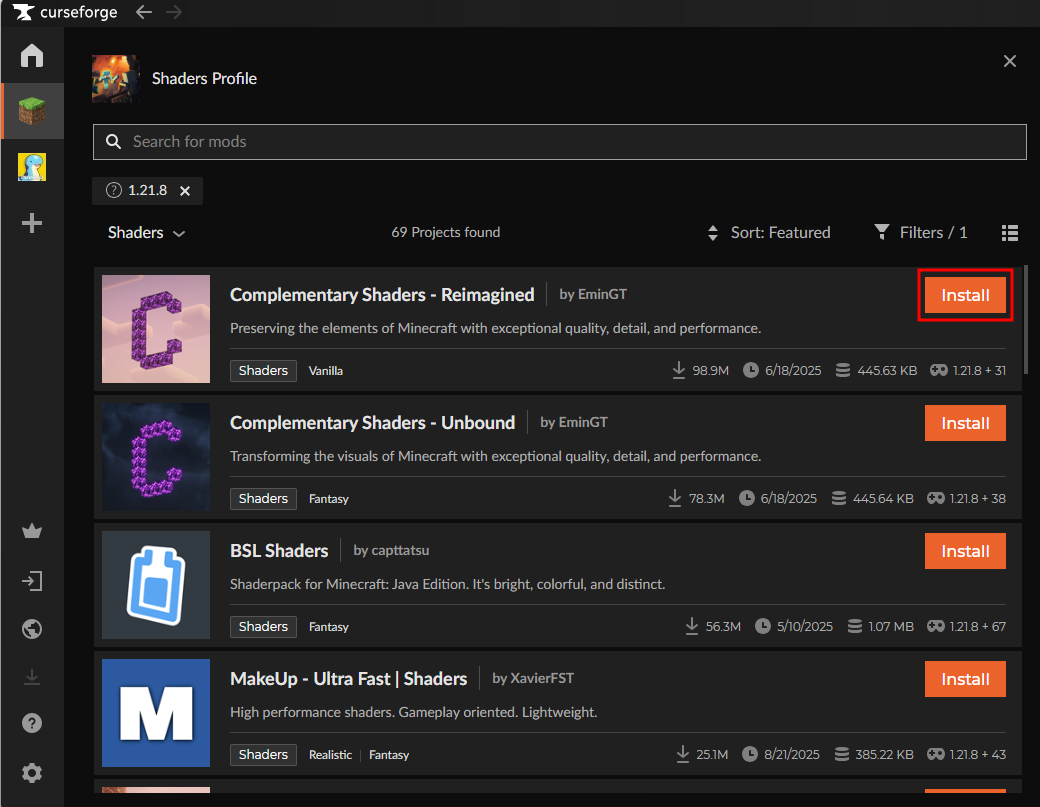
- Click on the "Install" button for the shader that you want to install.
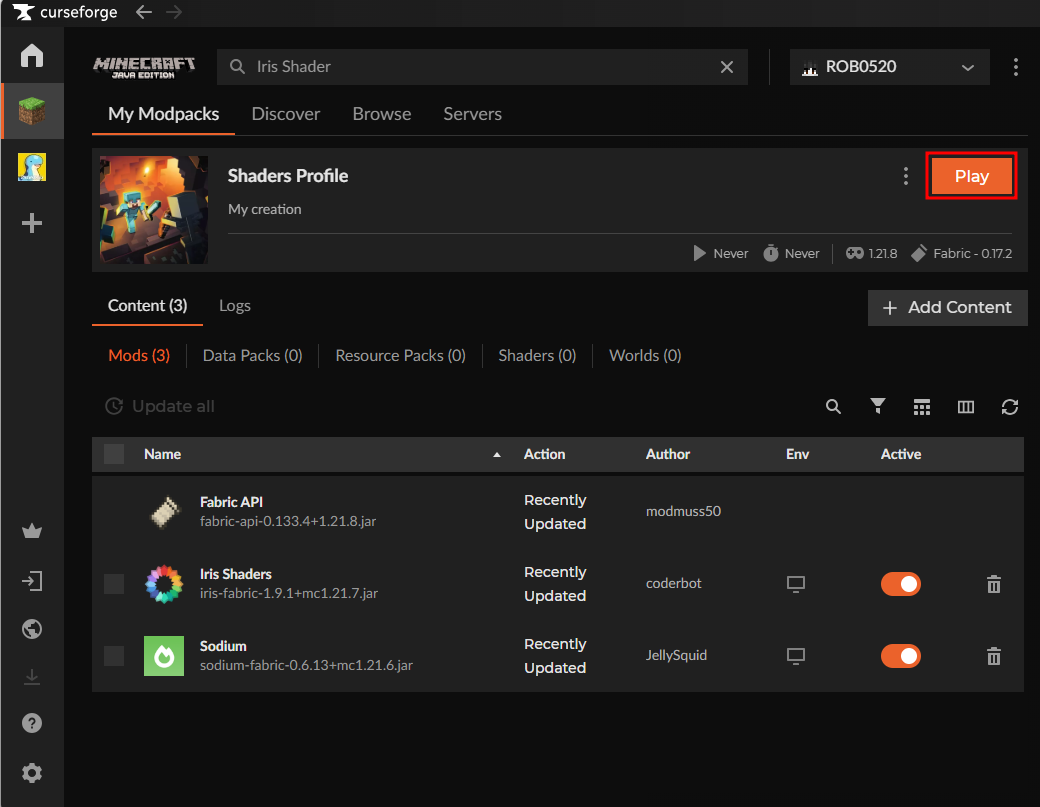
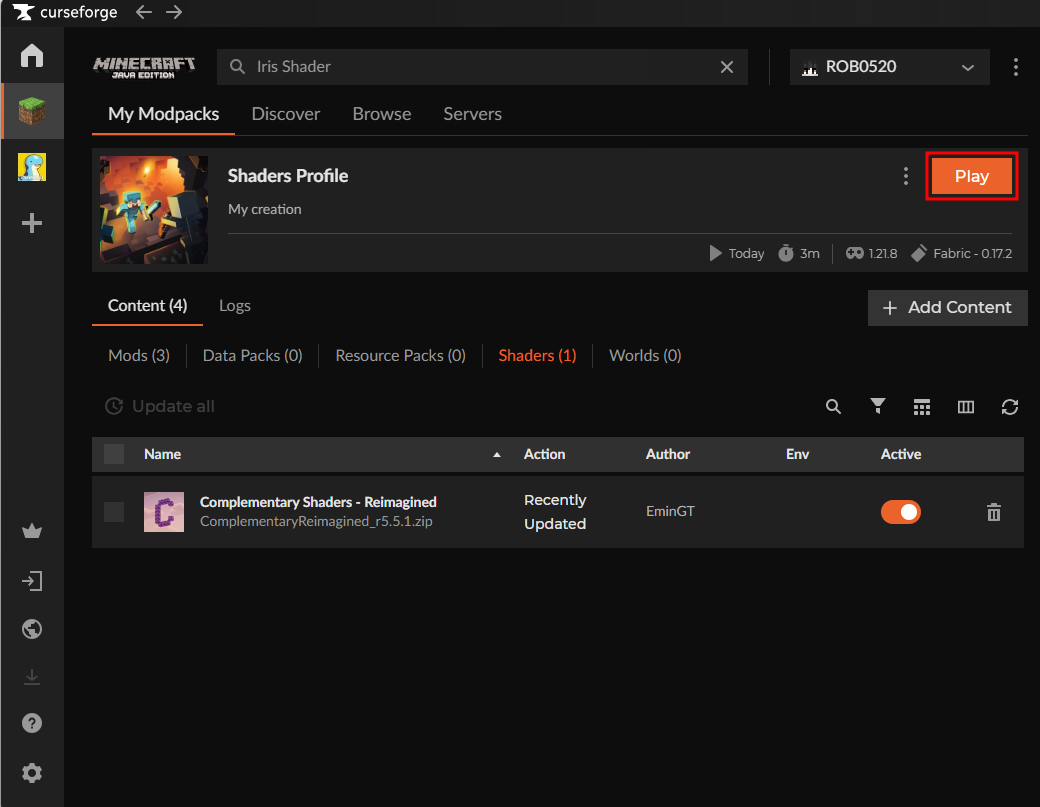
- Once you have installed the shader packs that you want to use, you can close the menu and click on the "Play" button.
Step 4: Use The Shader Packs
Now that you have installed the shaders that you want to use, you can proceed to use them in-game. Here is how you can use them inside the game.
- Launch the game with your profile that has Iris Shaders installed.
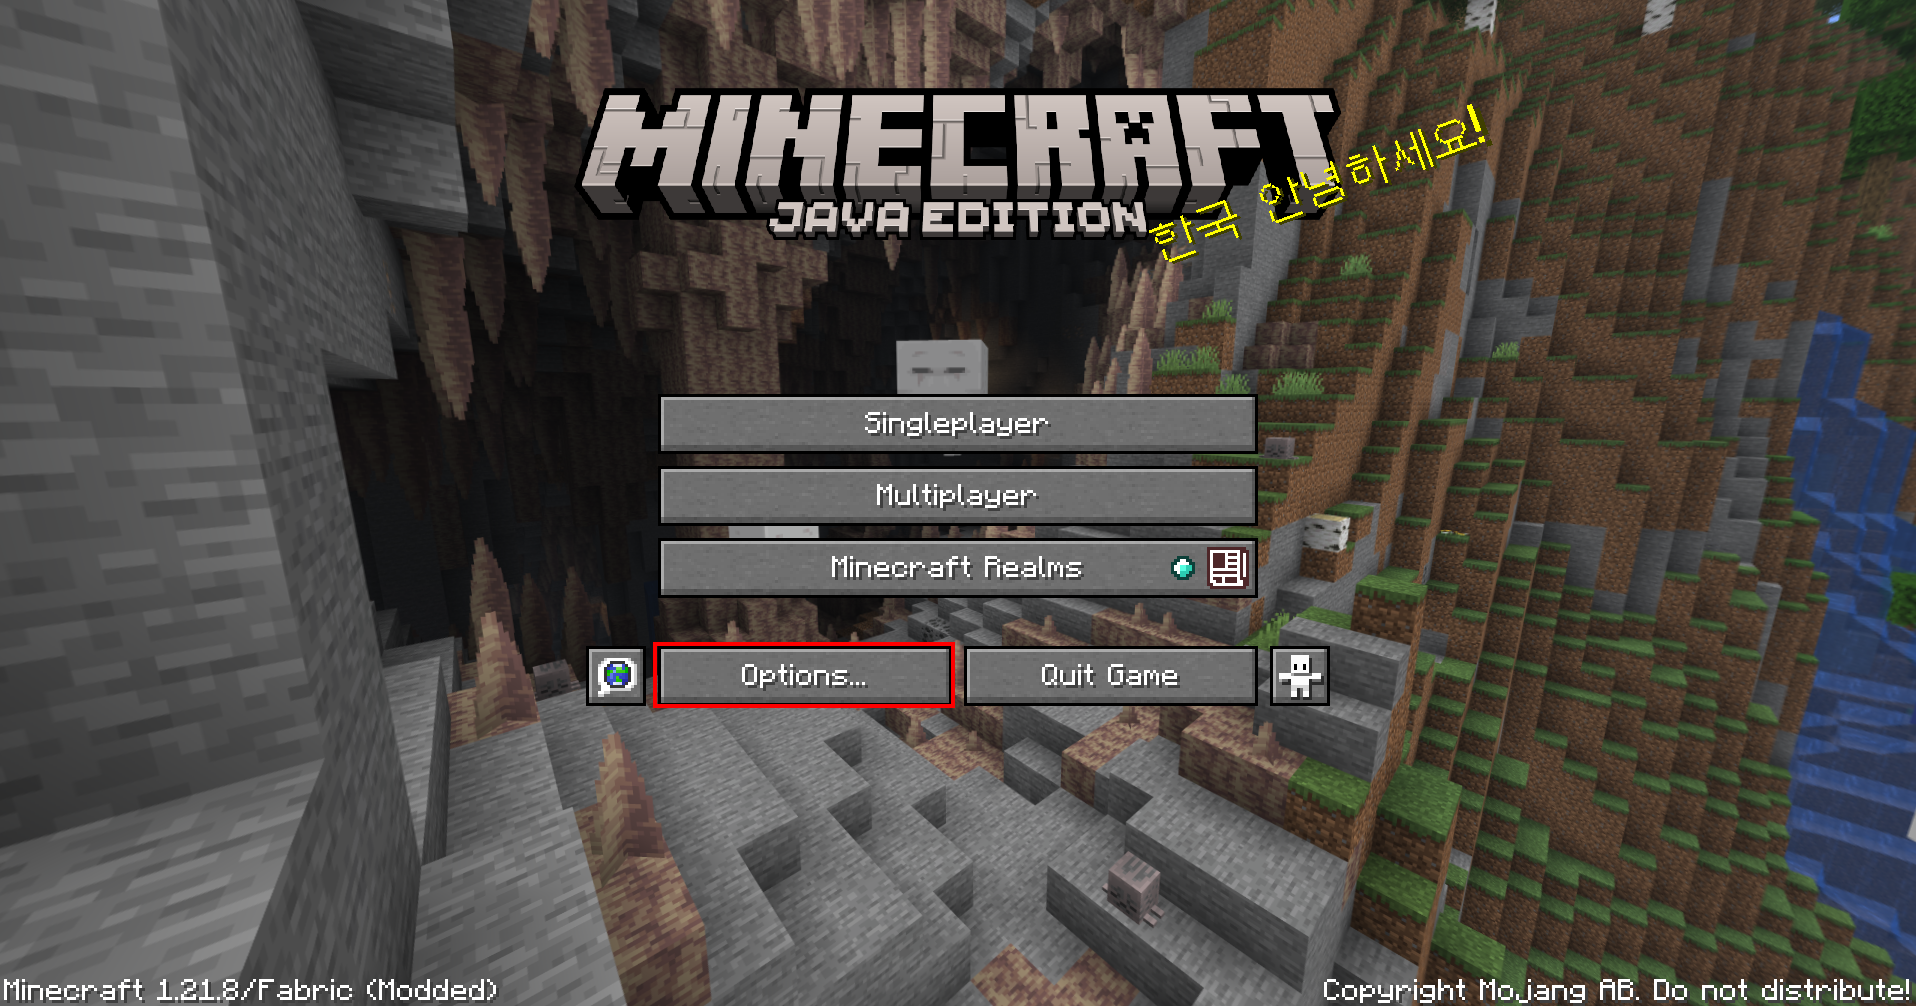
- Click on the "Options" button.
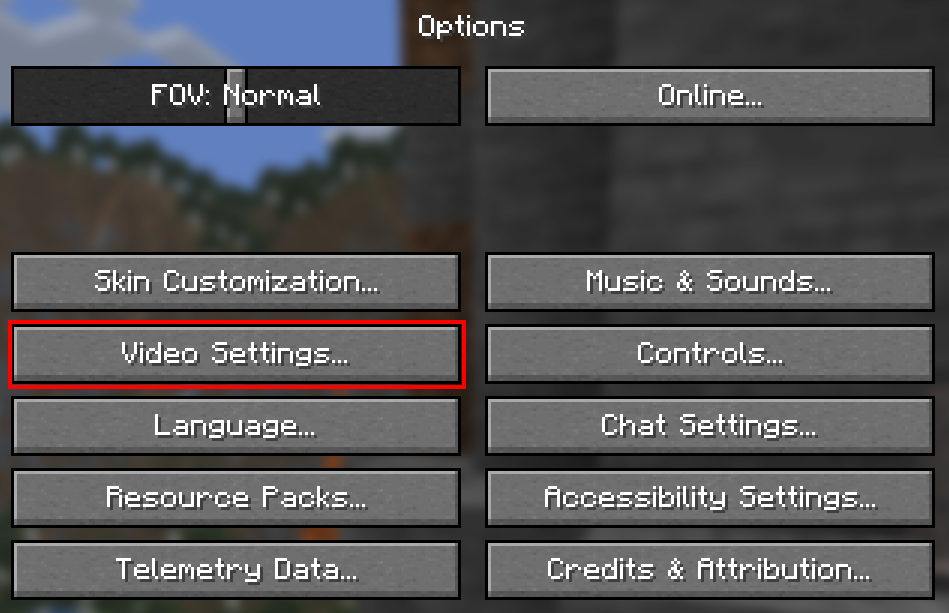
- From the options menu, enter the "Video Settings".
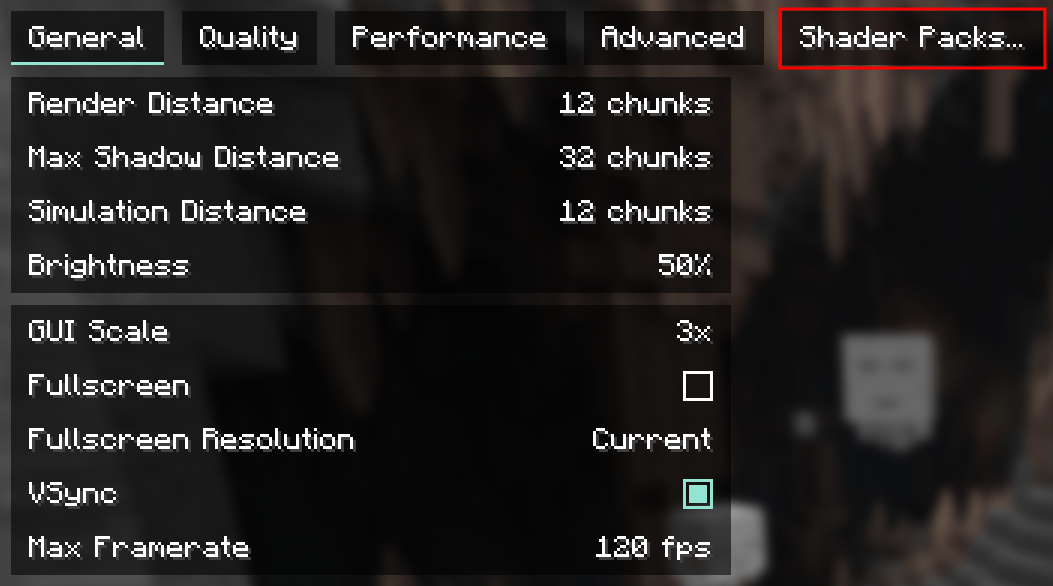
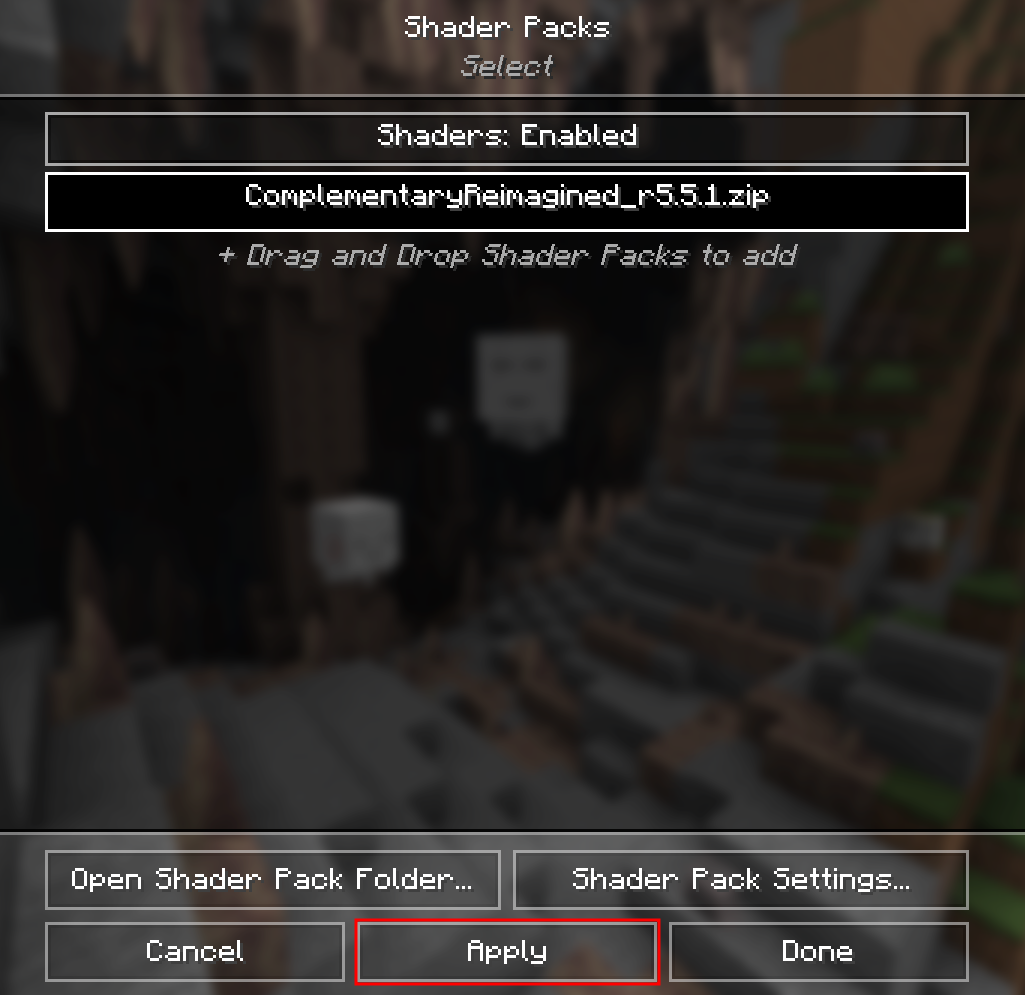
- Click on "Shader Packs" to navigate to the shader packs menu.
- Select the shader that you want to apply, since we want to use the Complementary Shaders - Reimagined shader, we select the file that resembles the name of the shader.
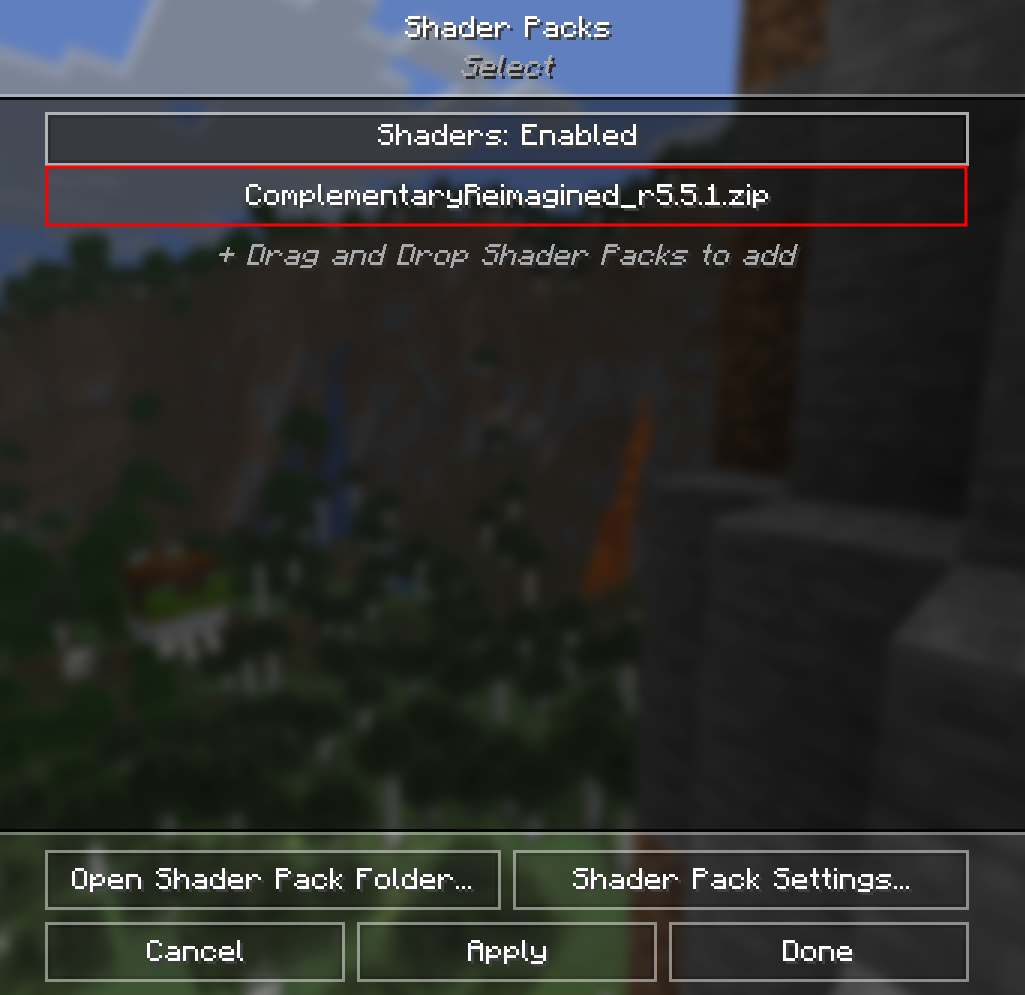
- Once selected, you can then click on "Apply" to use the shader in your game. After doing so, you will be able to go into your world and enjoy a new level of graphics and immersion.
Still have some questions about turning on shaders in Curseforge?
Don't hesitate to reach out to our support team! We're available 24/7 to assist!
By: Alecz R
Updated on: 03/11/2025
Thank you!