How to Use Dynmap
Dynmap is a powerful tool that brings your Minecraft server to life by providing an interactive, real-time map of your world. In this guide, you'll learn how to install and configure Dynmap so that you can easily track player activity on your Minecraft server.
Don't already host with us? 10,000+ server owners trust Sparked Host for lag-free Minecraft worlds. Claim your server savings to get higher performance at less $ per month.
How to Install Dynmap
To install Dynmap on a Minecraft server:
- Install Dynmap
- Add Dynmap to your plugins folder
- Drag and drop or upload the plugin into your plugins folder

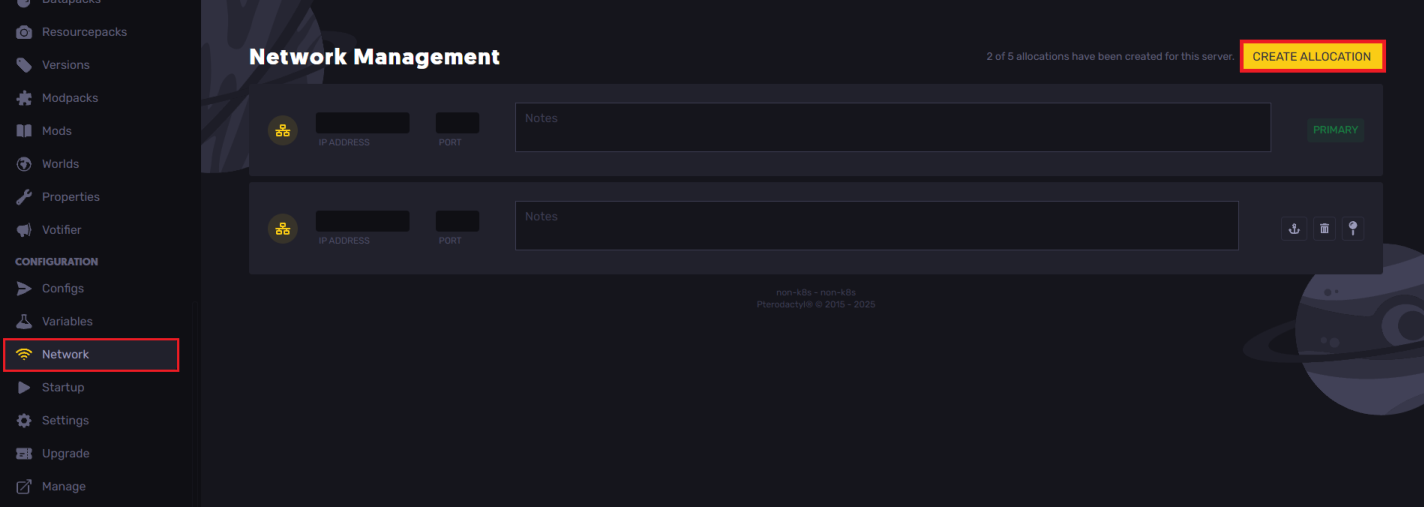
Reserving A New Port
- Open your Apollo Panel
- Open the Network tab and click on Create Allocation to create an additional port number. This additional port will be used for Dynmap.
Do not use the default server IP port, since the default port is only used for joining your server, only use the new port
Configuring Dynmap
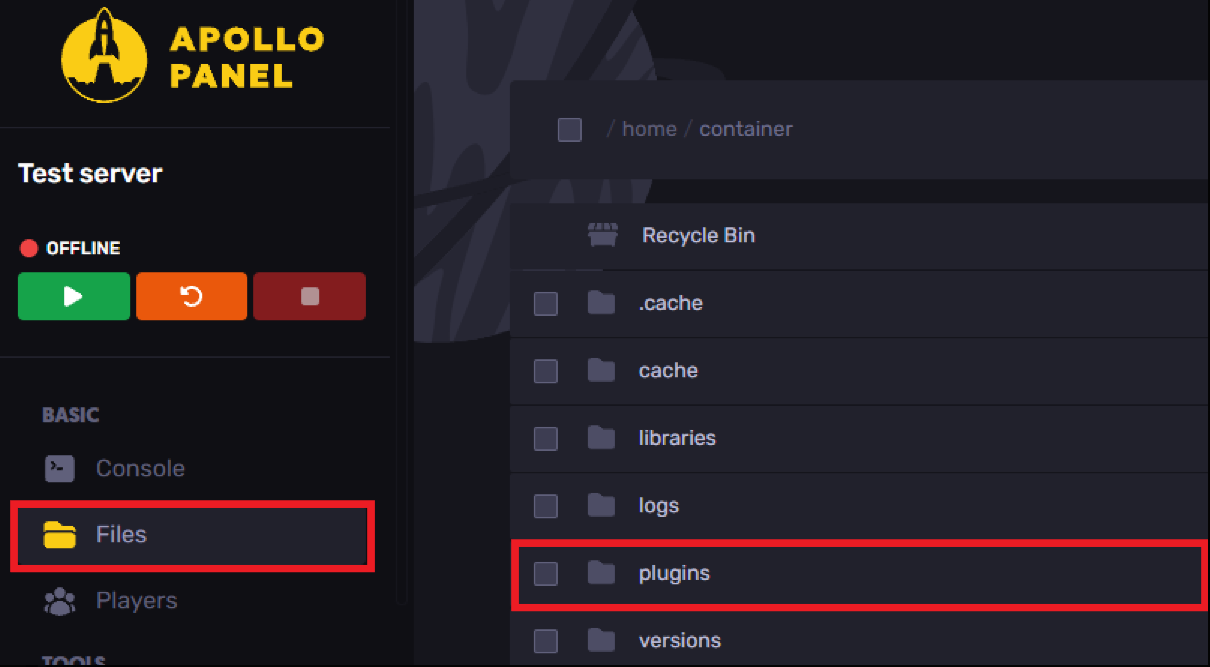
- Log into your Apollo Panel
- Open your Files tab on the left-hand side of your console and open the plugins folder
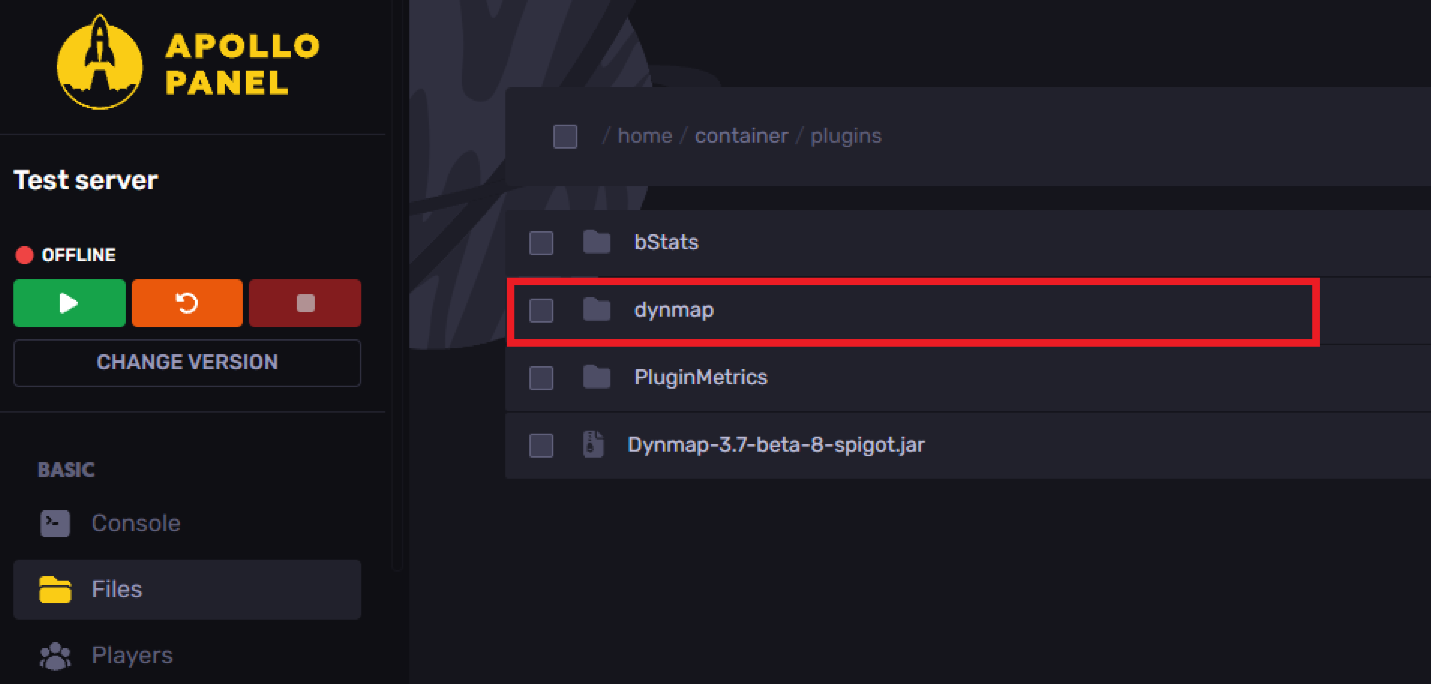
- Open the dynmap folder
- Open the configuration.txt folder
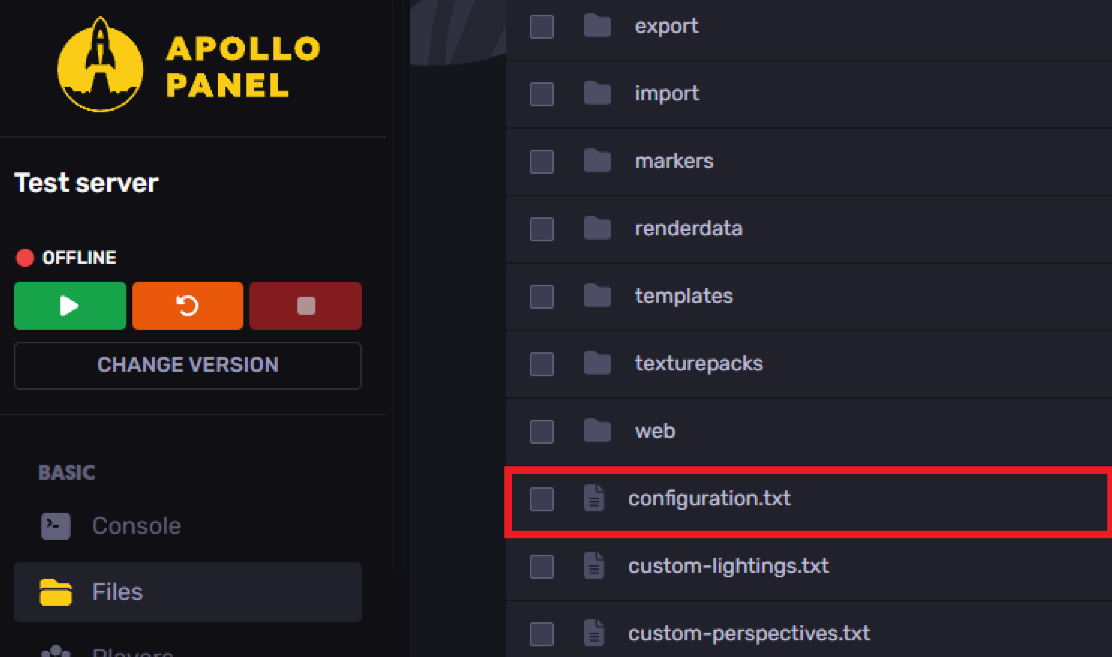
- Locate the line
webserver-port: 8123and change the8123to the new port you've created. Do not use your server IP port.
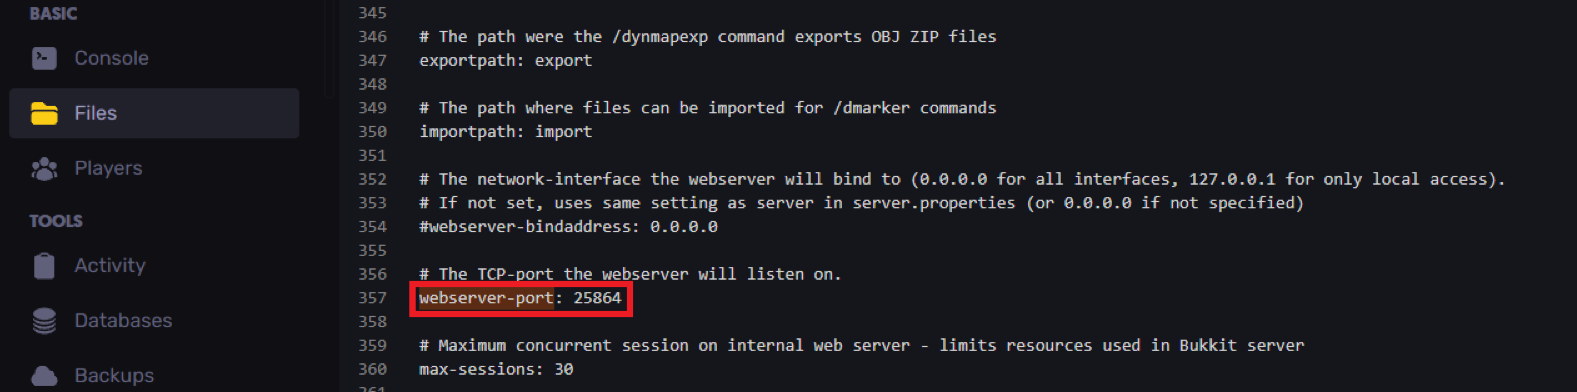
Now save your config file and start or restart your server to start the connection
You can now connect to your Minecraft world through your web browser by searching http://IP:PORT: for example http://1.1.1.1:20000/
Still have some questions?
If you need any help, open a ticket here, we're available 24/7 to assist!
Updated on: 03/11/2025
Thank you!