How To Add Maps To Project Zomboid Server
Adding custom maps to your Project Zomboid server is a great way to keep gameplay fresh and exciting. Whether you're expanding beyond Knox County or diving into player-made cities, new maps can transform your world and bring in fresh challenges.
This guide will show you the easy step by step process to add maps to your Project Zomboid Server.
Find The Workshop Mod ID For The Project Zomboid Map
To find a Workshop ID for a Project Zomboid map:
- Head to the Project Zomboid Steam Workshop.
- Ensure that the map that you want to install is available for the build of the game that you're currently using. For this guide, we are using Build 42. You can determine if a map is compatible with the build you are using by checking if it has the build tag or is mentioned in the map's description. For this guide, we will be adding the Constown Map.
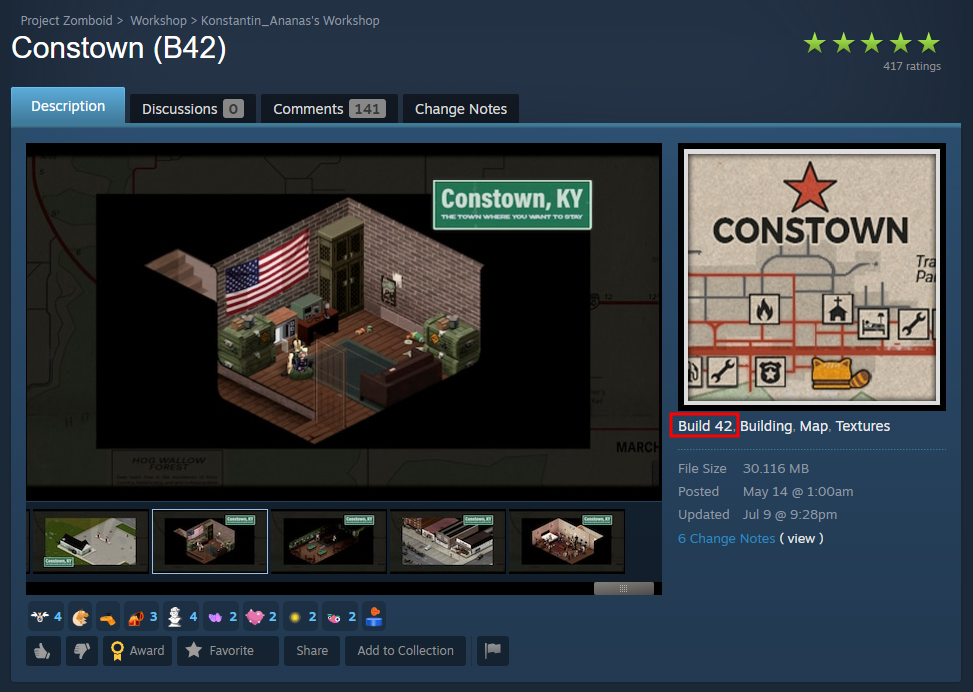
- Download the Workshop Map to your computer by subscribing to it, as we will need to copy the files to the server later on.
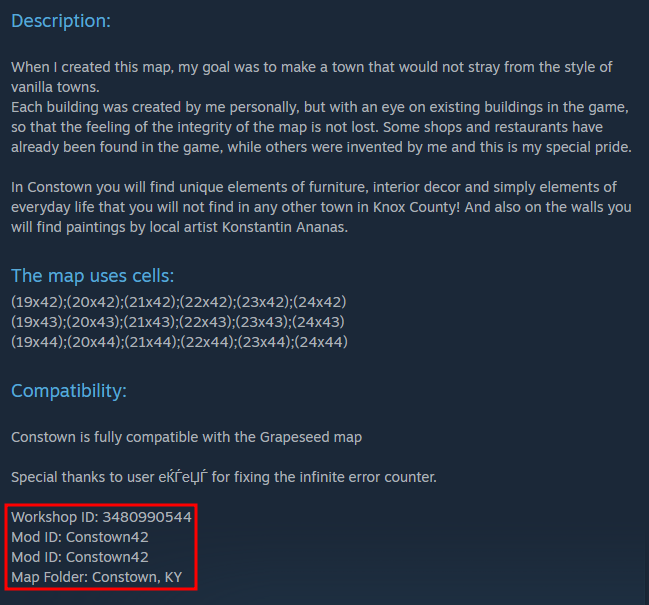
- Take note of the Workshop ID, Mod ID, and the name of the Map Folder, as we will need to add them to the server's config.
Add The Workshop Mod ID To Your Config
To add a map's workshop ID to your Project Zomboid server:
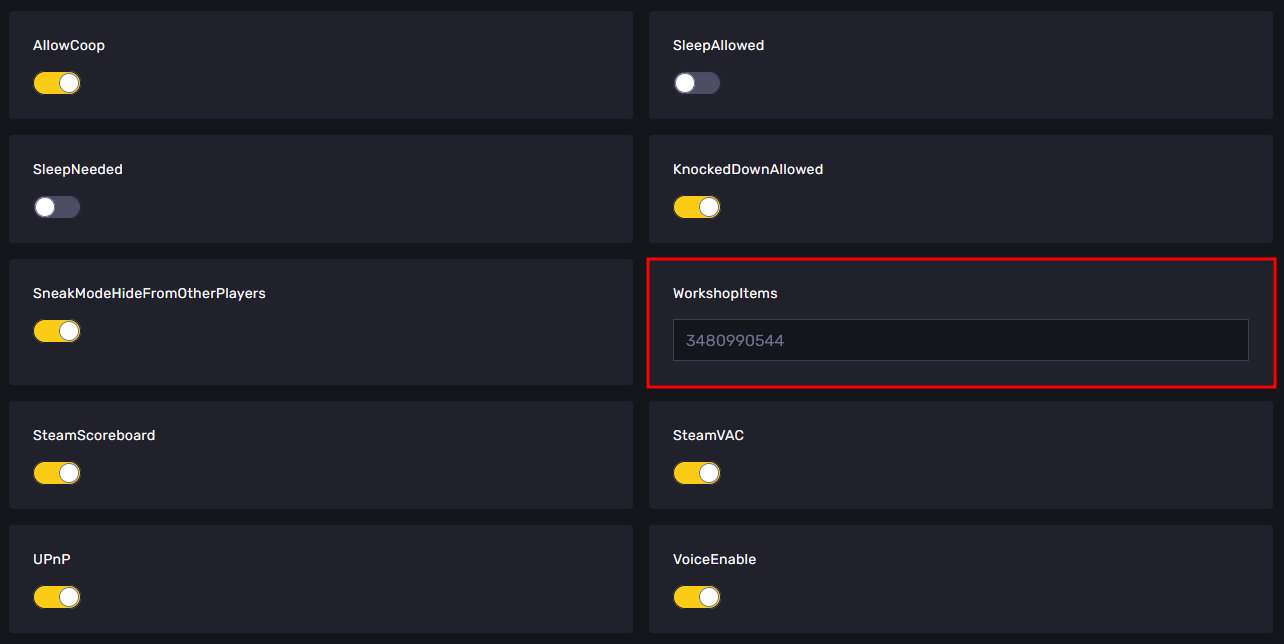
- In the Apollo Panel, go to the Properties Tab.
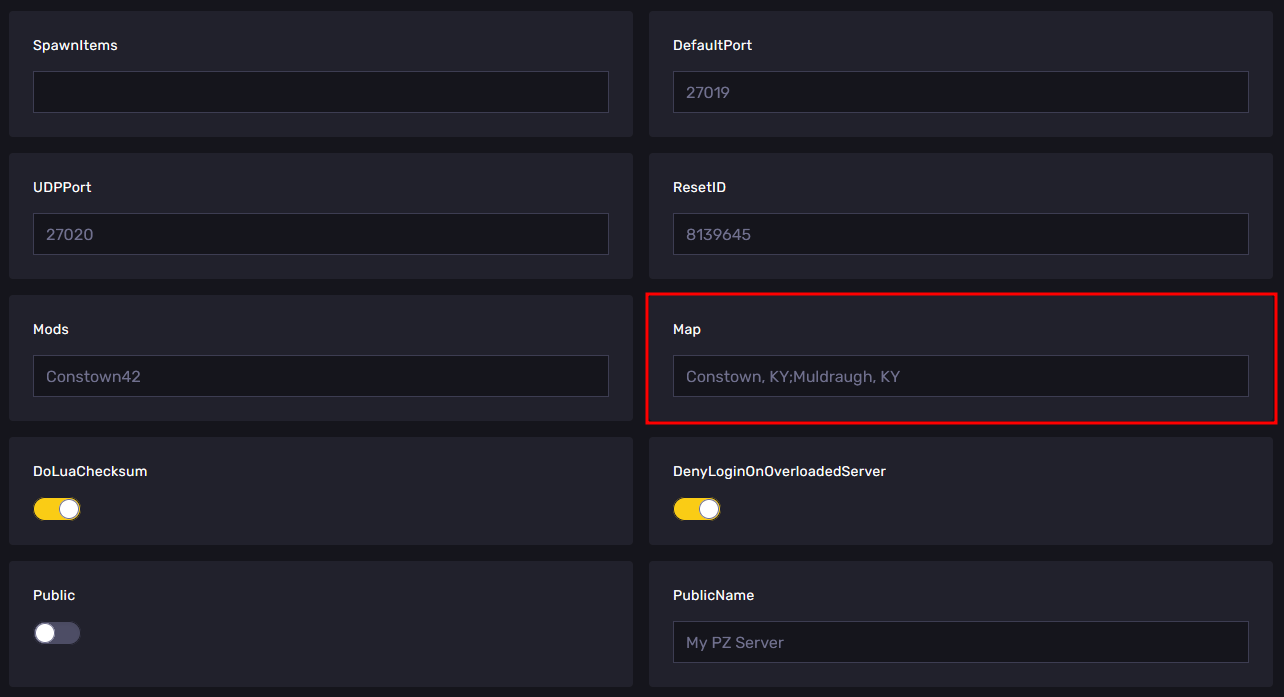
- Paste the Workshop ID in the "WorkshopItems" option.
- Next, paste the Mod ID of the map you want to install under the "Mods" setting.
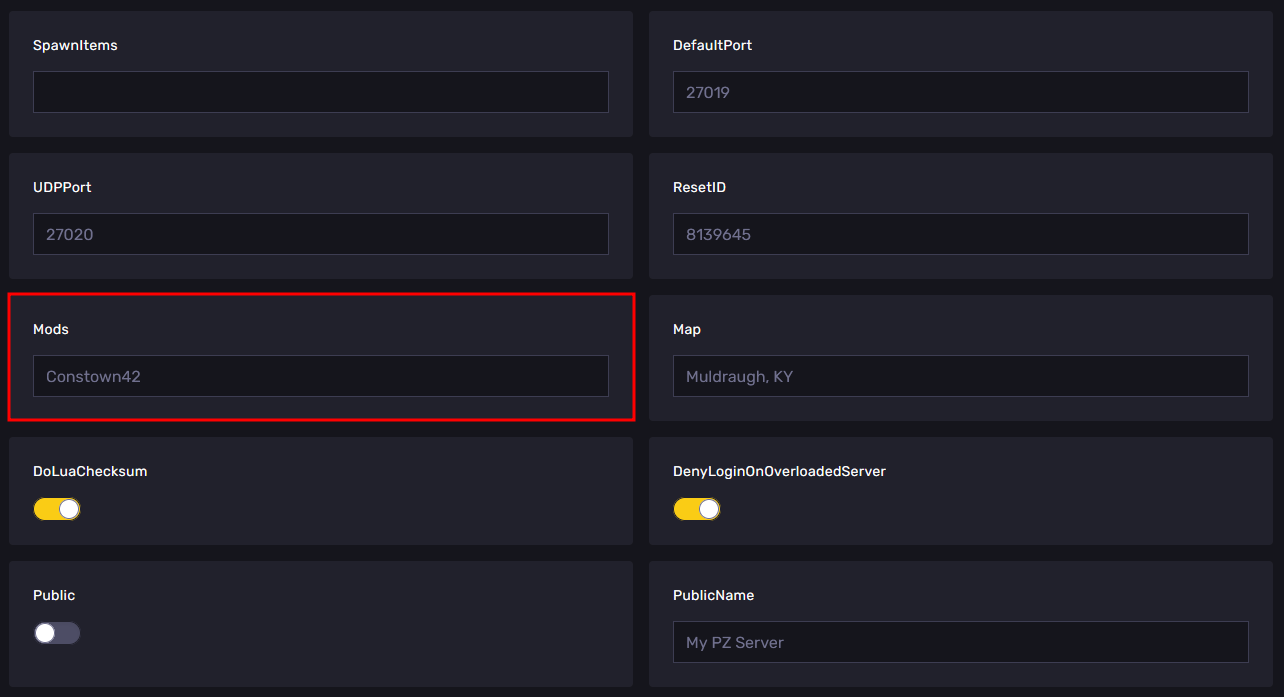
- Afterwards, paste the Map Folder Name in the "Map" setting before "Muldraugh, KY" and separated with a semicolon ";". Ensure you paste the map you want to add before "Muldraugh, KY", not elsewhere.
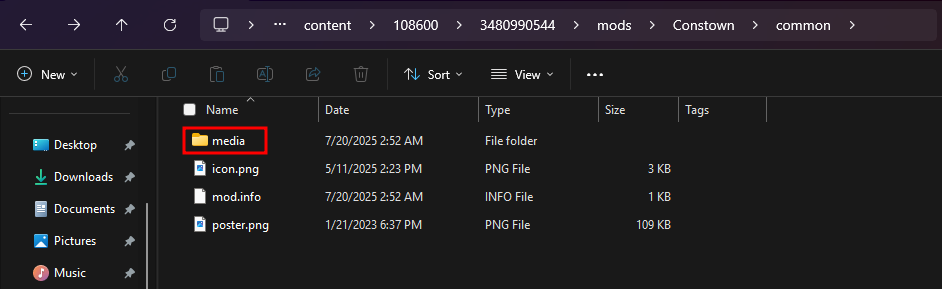
- Locate the map you downloaded on your computer. They are located in the game's workshop folder inside your Steam installation directory, and the most common path for this is:
C:\Program Files (x86)\Steam\steamapps\workshop\content\108600
- You should see a folder for every Workshop Mod/Map that you have installed on your computer. Now, locate the folder named after the map's Workshop ID.
- From there, navigate to "mods/<Map Folder Name>" and you should see a "media" folder (If you can't find it, it might be nested further inside of other folders, for the case of Constown, it is inside the common folder). This is the folder that we need to copy over to your server.
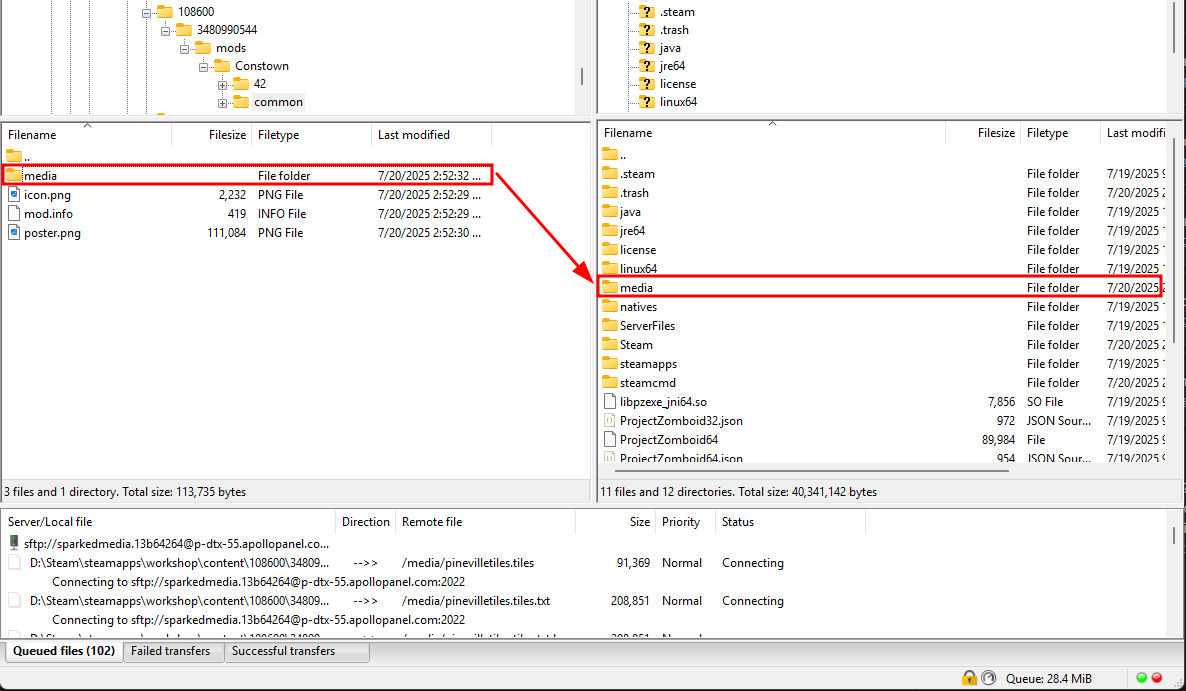
- Connect to your server via SFTP. You can follow this FileZilla guide on how to use FileZilla to connect to your server using SFTP.
- Upload the Workshop Map's "media" folder to the "media" folder on the server. Make sure that there are no Failed Transfers, which you can see in the bottom-left area of FileZilla.
Add Spawn Points To Your New Project Zomboid Server's Map
To add new spawn points to a custom Project Zomboid map:
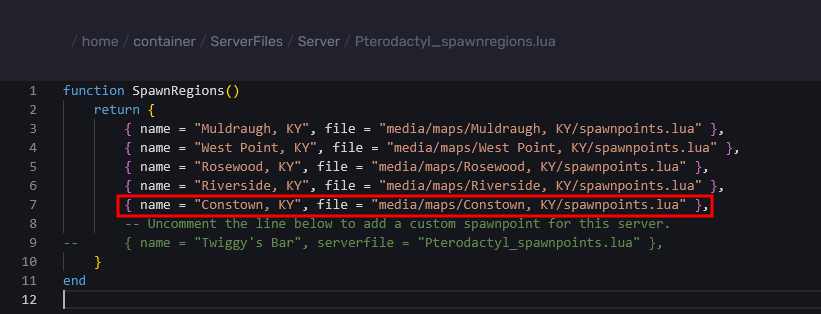
- In the Files Tab, navigate to the "ServerFiles/Server" folder, then open the "Pterodactyl_spawnregions.lua" file.
| Tip: Sometimes, the file may not start with "Pterodactyl" as its name, as it depends on the value entered in the "Server Name" field in the Startup Tab.
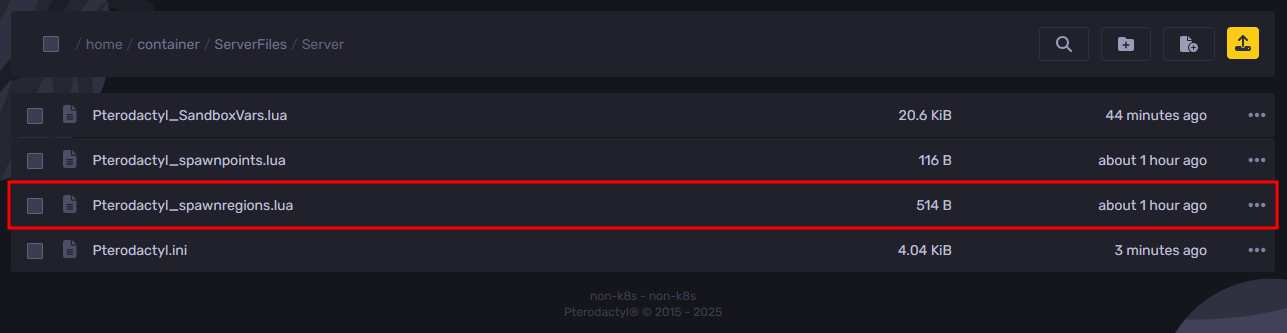
- The spawn regions file should contain all the maps that are currently in use. From here, add the following line after the "Riverside, KY" spawn region entry.
{ name = "<Workshop Map Name>", file = "media/maps/<Map Folder Name>/spawnpoints.lua" },
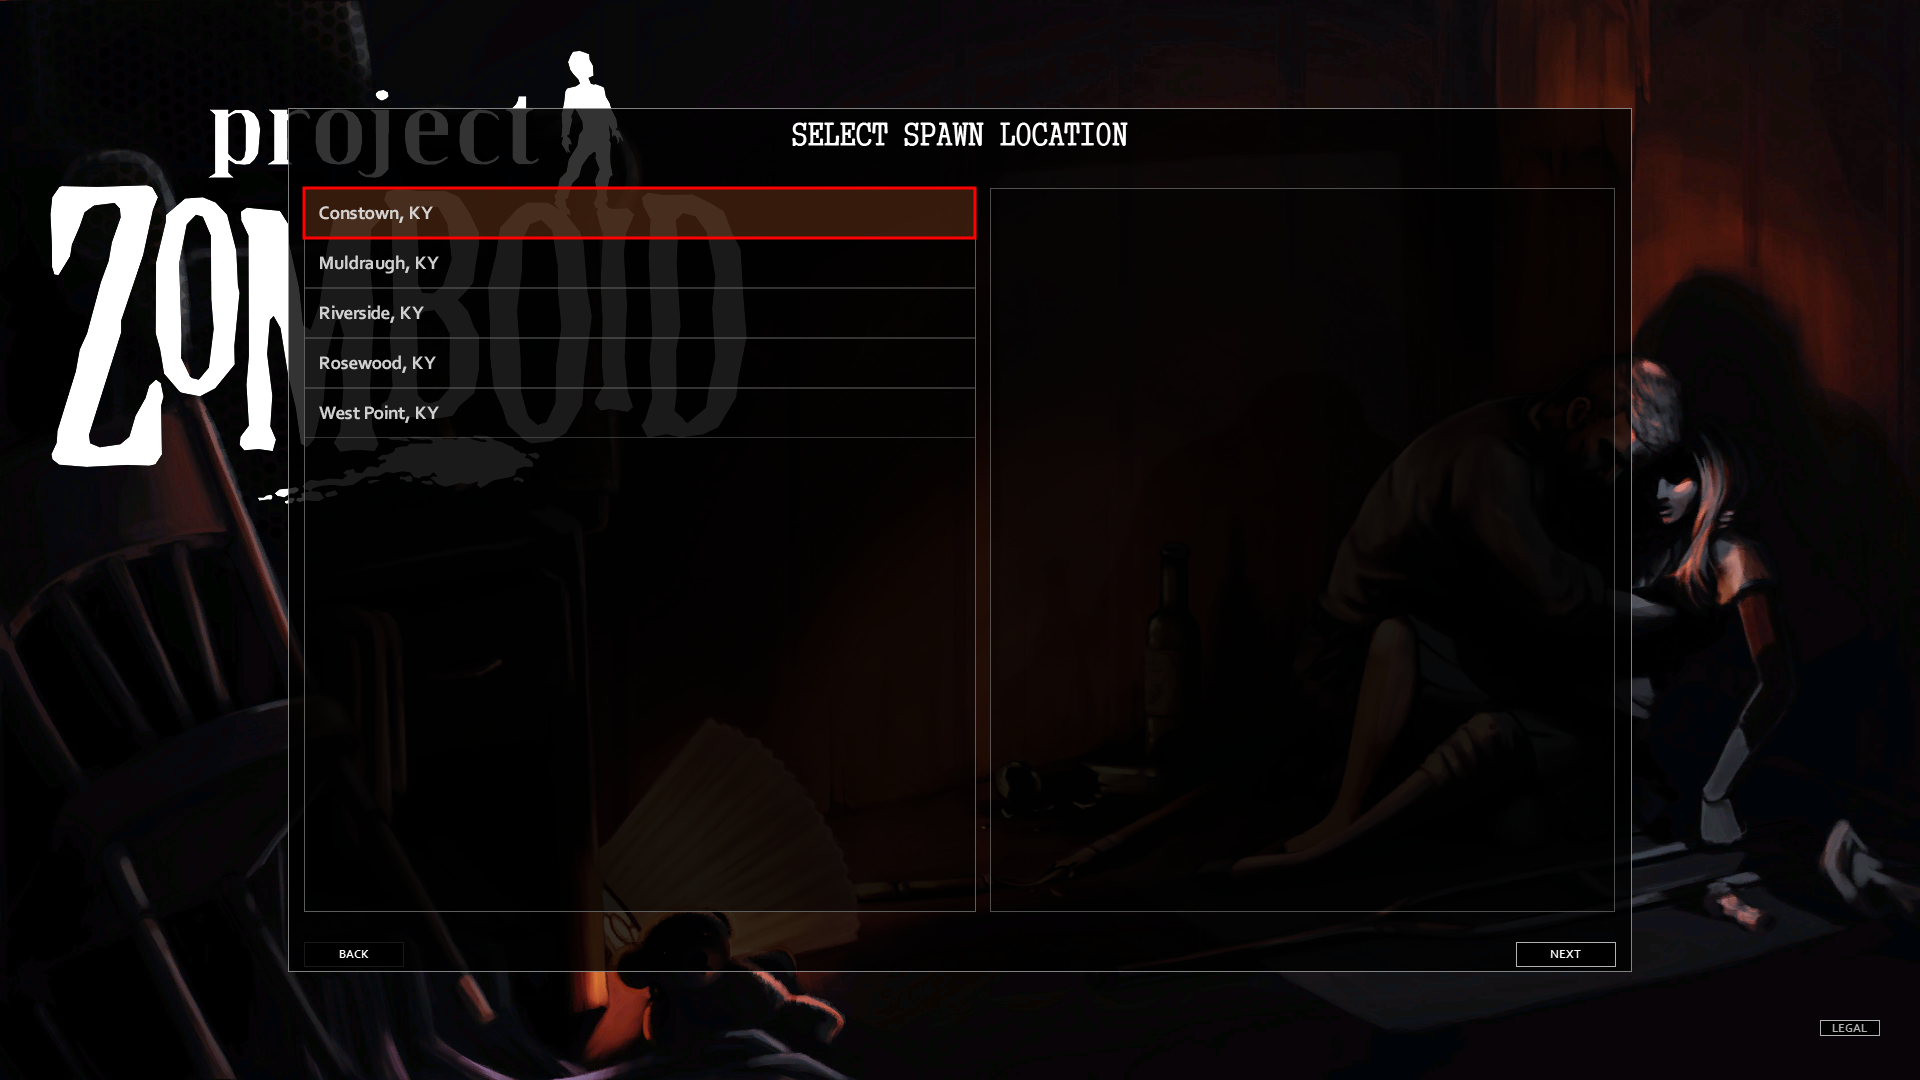
- Restart the server, and you should now be able to see the map in-game.
Still have some questions about adding maps to a Project Zomboid server?
Don't hesitate to reach out to our support team! We're available 24/7 to assist!
By: Alecz R.
Updated on: 21/07/2025
Thank you!