How To Install Cloudflare SSL In cPanel
Securing your website with Cloudflare SSL through cPanel is a great way to protect your users and boost trust. By routing your site’s traffic through Cloudflare and enabling SSL, you can enjoy faster speeds and improved security. This guide walks you through the essential steps to getting and installing a Cloudflare SSL certificate working properly in cPanel.
Here’s what you’ll do:
- Set up Cloudflare and update your domain’s nameservers to Cloudflare nameservers
- Enable Proxy Status for your DNS Records
- Generate a Cloudflare Origin Certificate
- Install the SSL certificate in cPanel under SSL/TLS
- Change the Cloudflare Encryption Mode to Full (Strict) for best results
Generating The SSL Certificate
To generate the Cloudflare SSL Certificate:
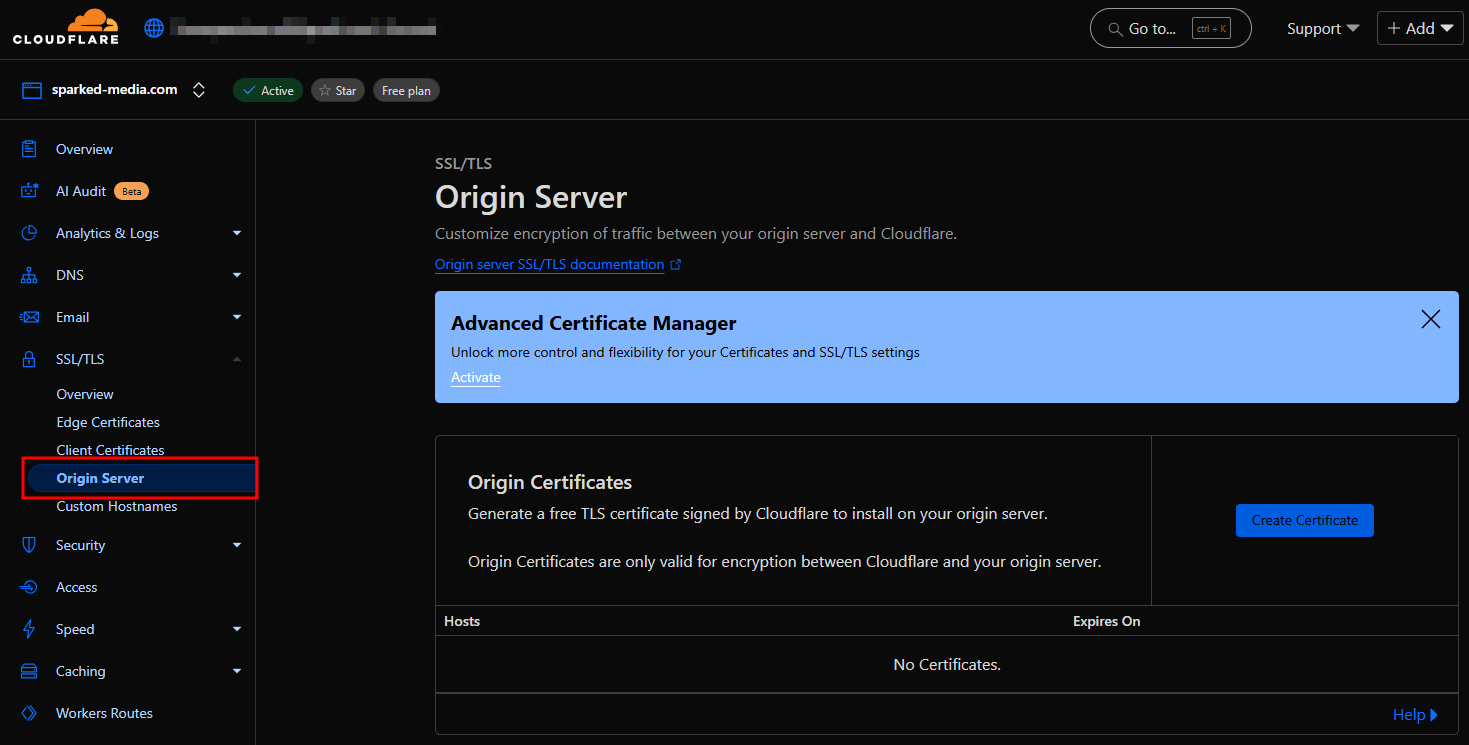
- First, go to your Cloudflare dashboard and click the “SSL/TLS” tab, then the "Origin Server" sub-tab.
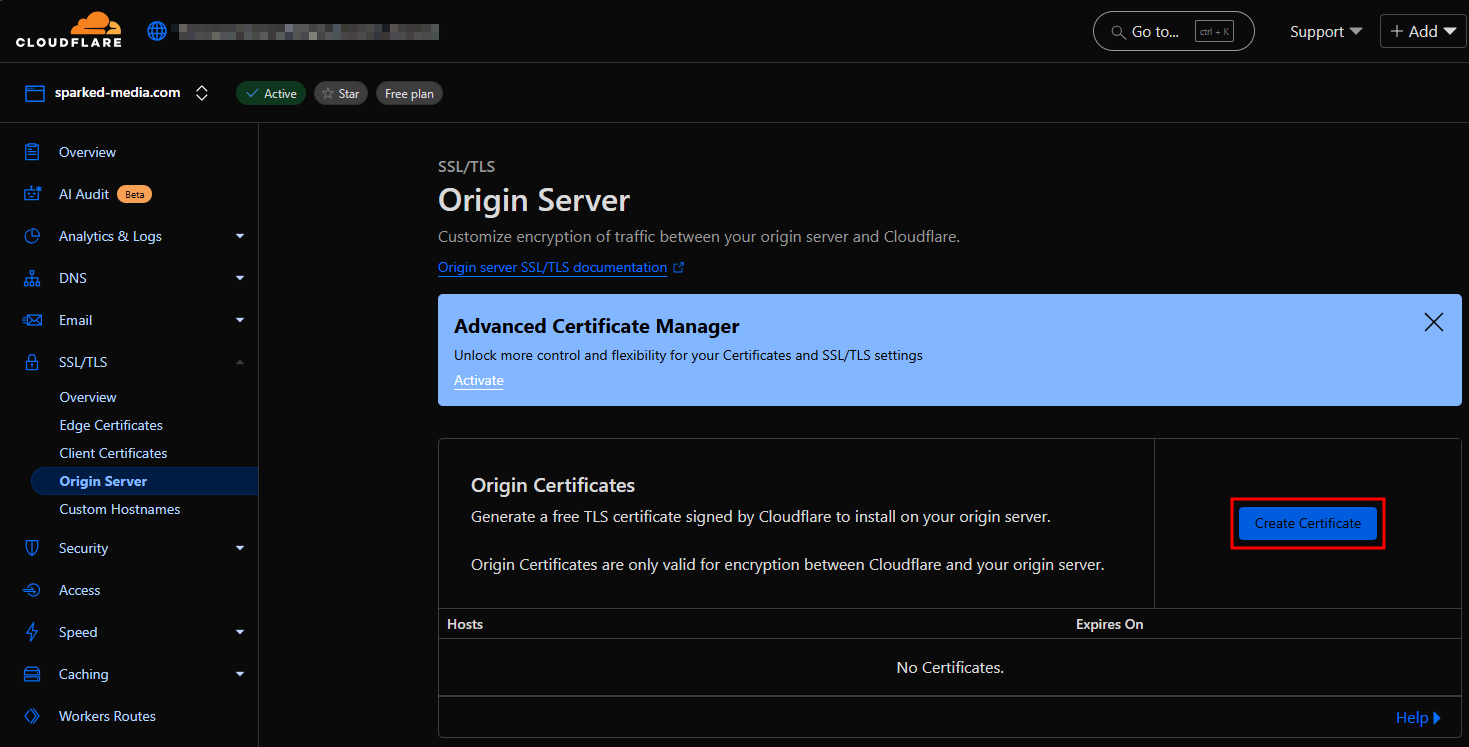
- Click the "Create Certificate" button.
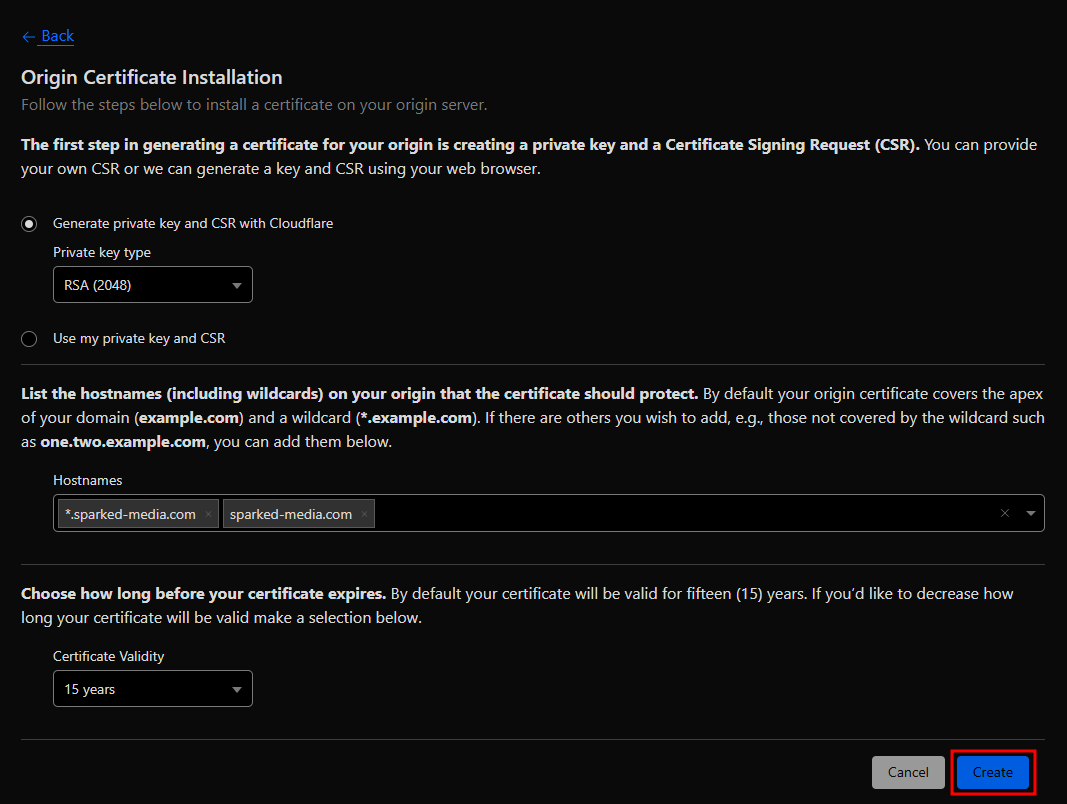
- By default, the Origin Server SSL certificate covers the root domain (`example.com`) and a wildcard (`*.example.com`), and the certificate will be valid for 15 years. You can optionally add more hostnames to the list that the SSL Certificate should also secure, and how long the origin certificate should be valid. Once the settings are configured, click the "Create" button to generate the Origin Server SSL Certificate.
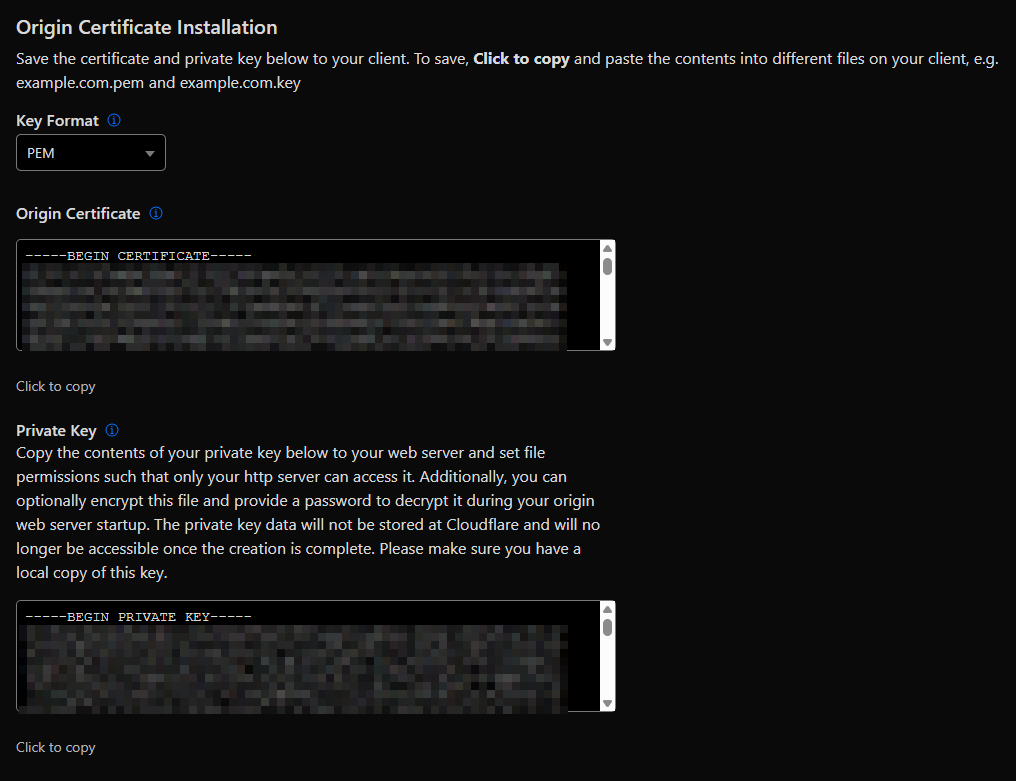
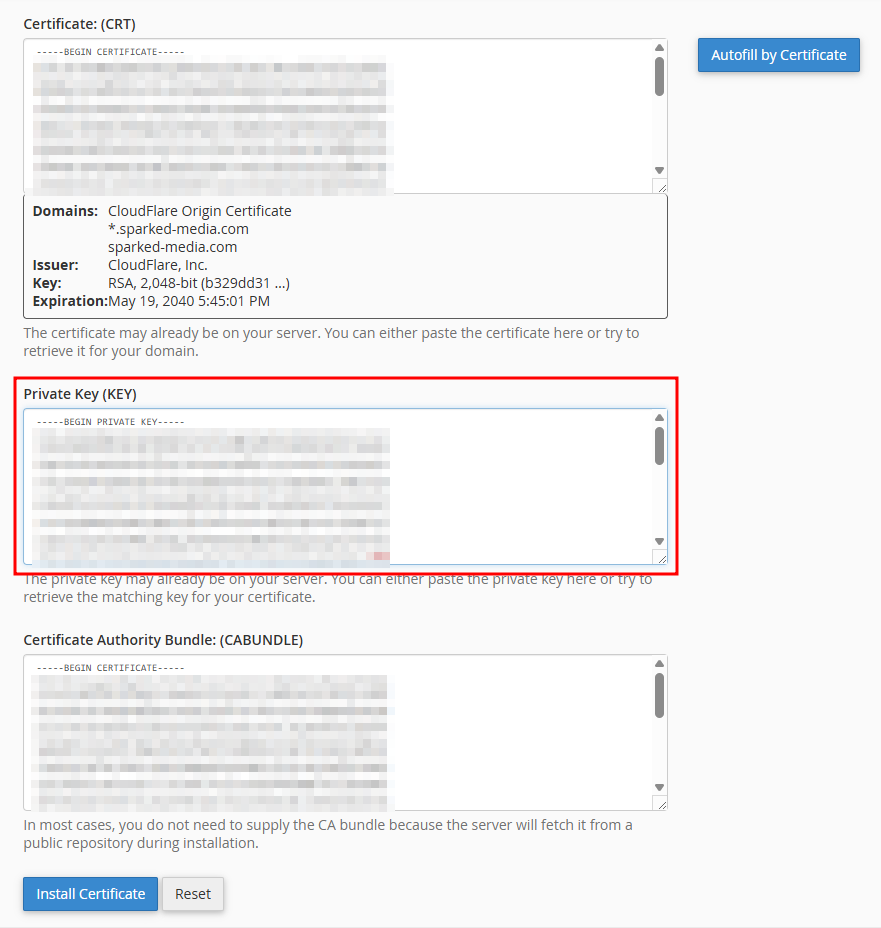
- Afterward, you will see two text boxes: the first one contains the Cloudflare Origin Certificate, and the second one holds the Private Key. Copy each of these and save them in two separate text files. In particular, store the Private Key in a location where no one else can access it. This key can be used to decrypt communications between your web host server and Cloudflare. So keep it safe!
Installing Your Cloudflare SSL Certificate On cPanel
To install the free SSL certificate we made on Cloudflare to your Web Hosting server on cPanel:
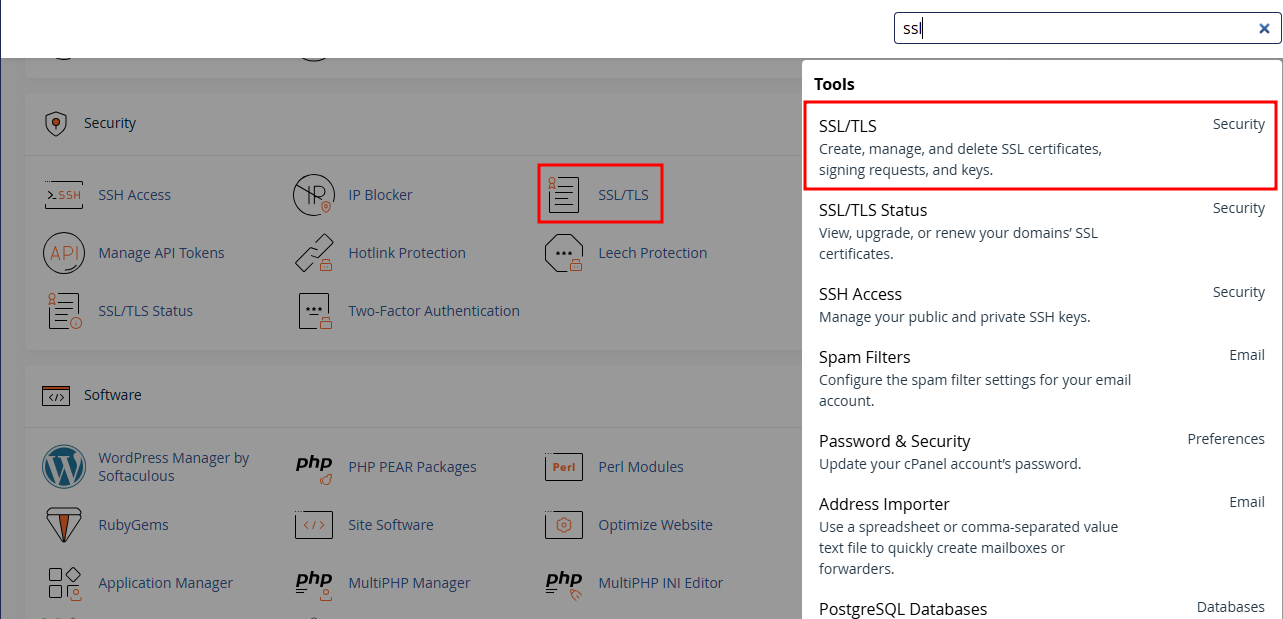
- Use the search bar to find the "SSL/TLS" tool or scroll down to the Security section and click on the "SSL/TLS" tool.
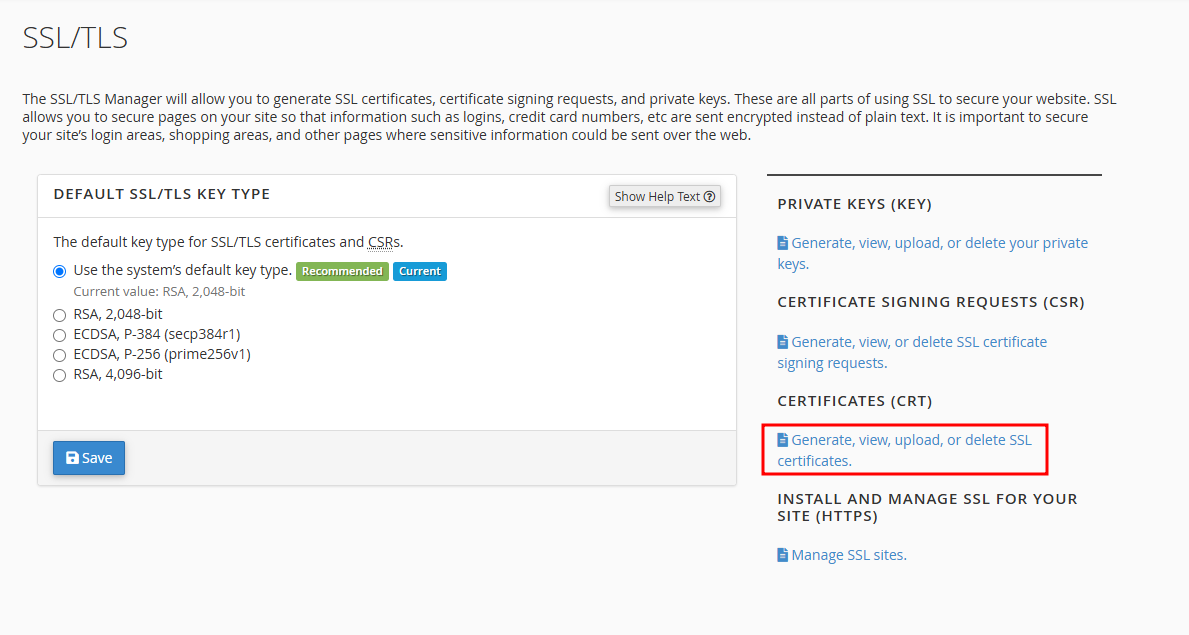
- Click on the "Generate, view, upload, or delete SSL certificates" button.
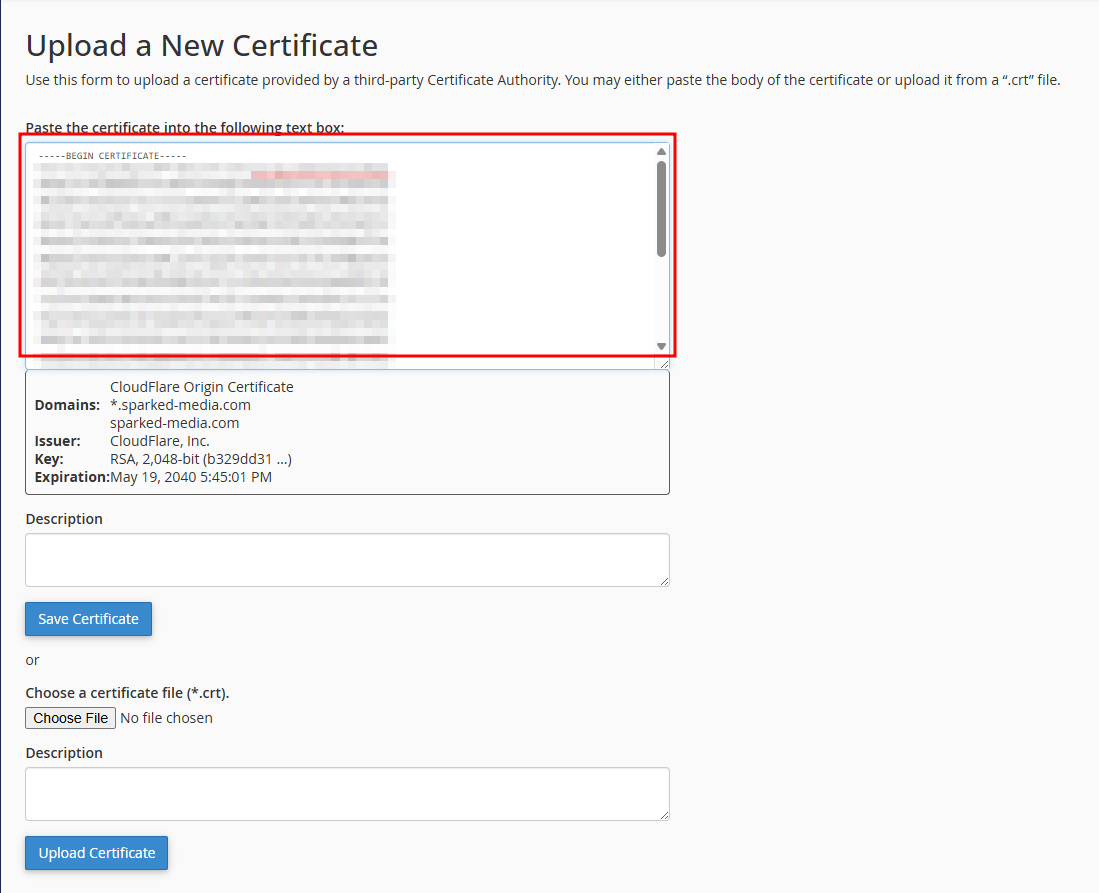
- Paste the contents of the Cloudflare Origin Certificate we made earlier for the service (not the Private Key) into the text area, then save the certificate.
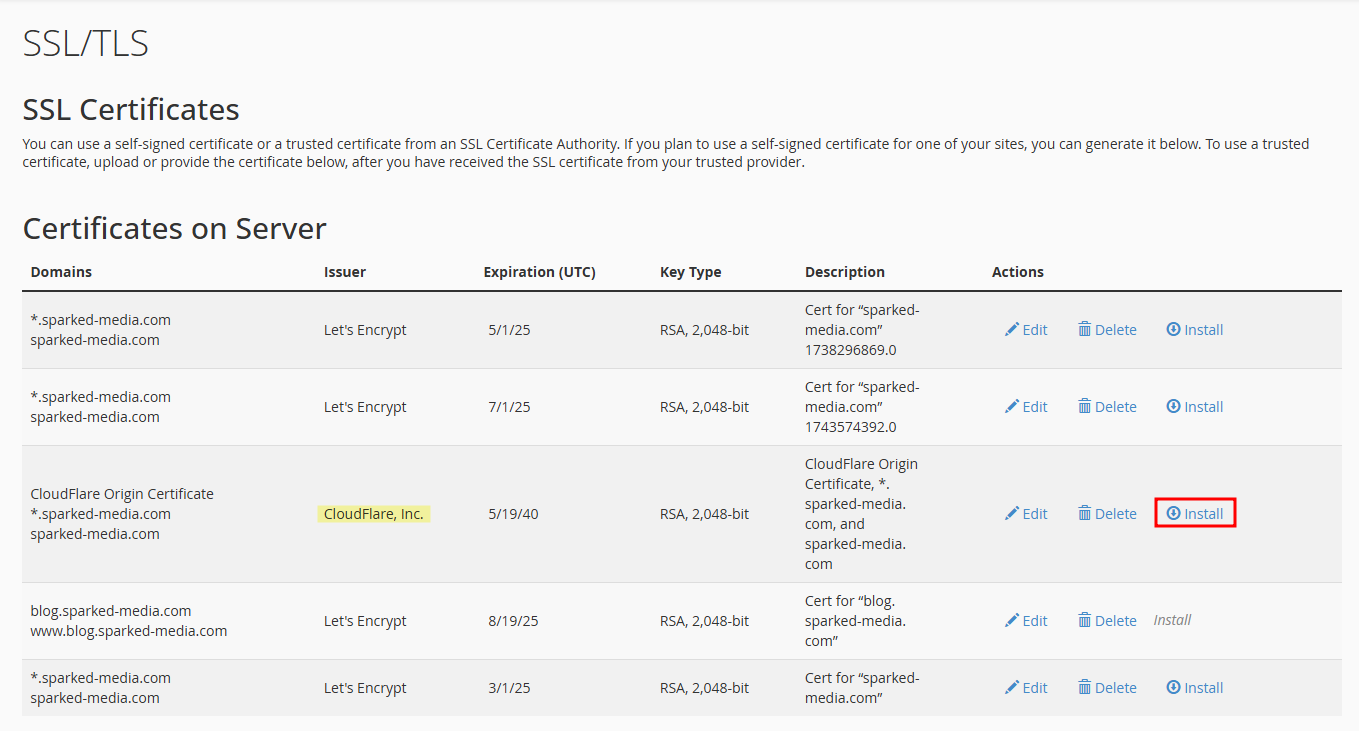
- After saving the certificate, scroll up to the top to see if it’s been added to the list. You can see here that the list of SSL certificates now contains the one from Cloudflare that we just uploaded. So now, for installing Cloudflare SSL, we just click the "Install" button for the Cloudflare Origin Certificate we installed earlier.
- In the following SSL Installation process, paste the Private key from the Cloudflare Origin Certificate we made on Cloudflare, then click the "Install Certificate" button.
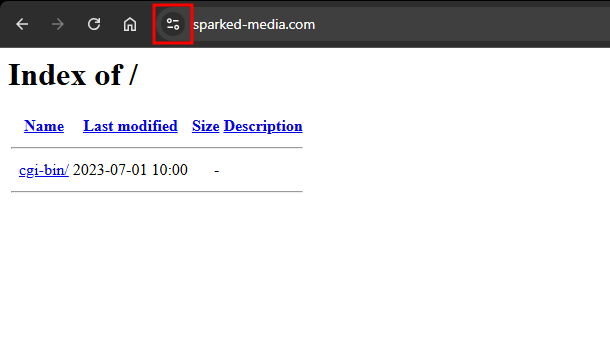
Verifying Your Cloudflare SSL Installation
To verify if the SSL installation is now securing connections with Cloudflare SSL. Simply visit your website, which should be secured with SSL, and check in your browser whether the connection details button, usually found near the left side of the URL, indicates that the site is "Not Secure" or secure.
Still have some questions about installing Cloudflare SSL in cPanel?
Don't hesitate to reach out to our support team, we're available 24/7 to assist!
By: Alecz R.
Updated on: 28/05/2025
Thank you!