How to Update Minecraft Server Modpack Manually
Keeping your Minecraft server’s modpack up to date ensures compatibility, bug fixes, and access to new features—all while keeping your players happy. Whether you're running a custom setup or using a launcher like CurseForge or Technic, updating a modpack involves careful steps to avoid breaking your world or losing progress.
You can copy your world folder into any local folder. In that case, you may miss other customizations you've made to a server and move it somewhere safe
Don't already host with us? 10,000+ server owners trust Sparked Host for lag-free Minecraft worlds. Claim your server savings to get higher performance at less $ per month.
Downloading the Updated Modpack
Before manually updating any mod pack, create a backup to prevent any loss in case of any errors.
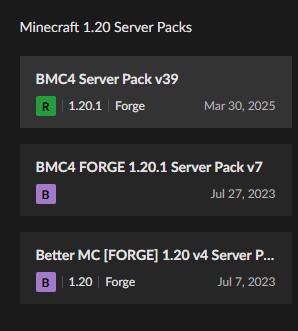
- Find the modpack Minecraft server download you want to update here or on any other website
- Scroll down in the modpack and install the server pack
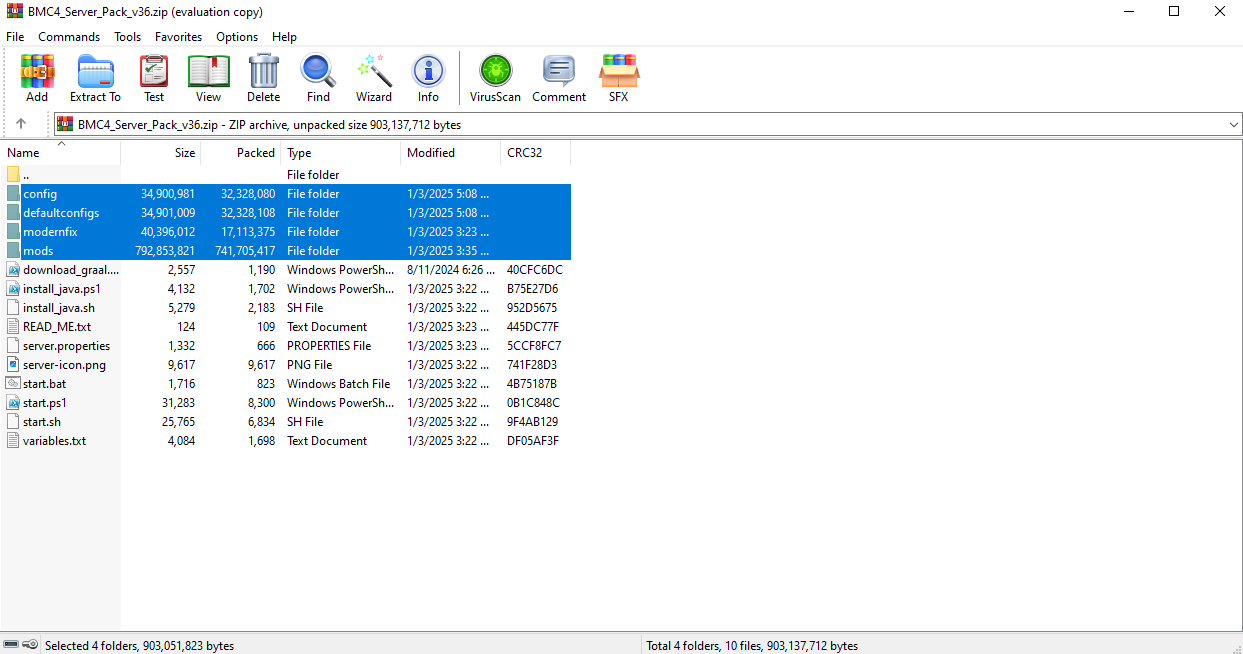
- After installing, open the server pack zip file, and copy all the folders inside
- Now, log in to your Apollo Panel
- Open the Files tab
- Find the same folders in the server as the ones in the server files zip file installed and delete them
For this step, you are required to transfer files. You can check out this guide on how to use an FTP client.
- Now, using an FTP client, copy the new folders inside the server pack file to your Minecraft server.
- Once done, you've now updated server pack, and your server should be running with no issues on the latest version.
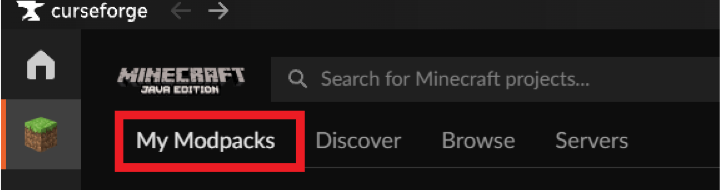
Curseforge
Check out our guide on how to set up a modded Minecraft server using CurseForge for this method.
- In the "My Modpacks" tab, find the modpack you want to update
- Click on "Change Version" next to the "Play" button
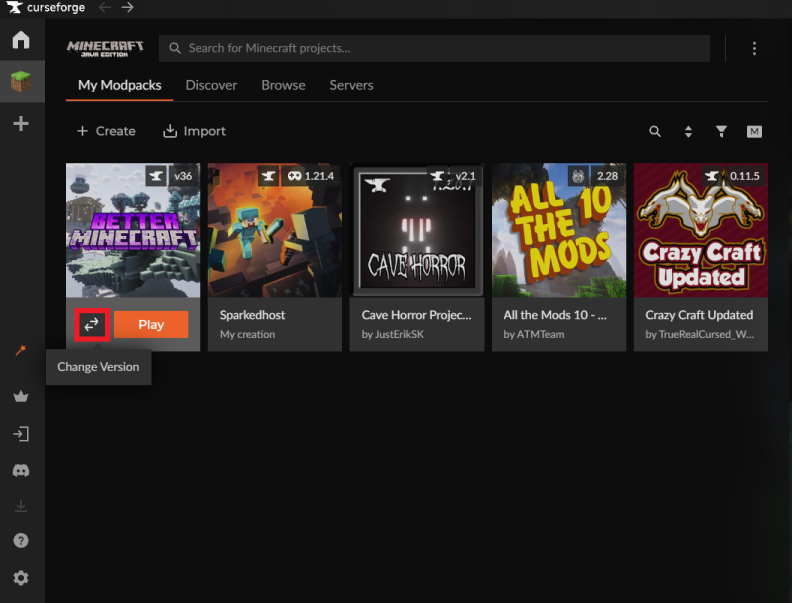
- Now, check the version you are using and update your modpack to the updated version.
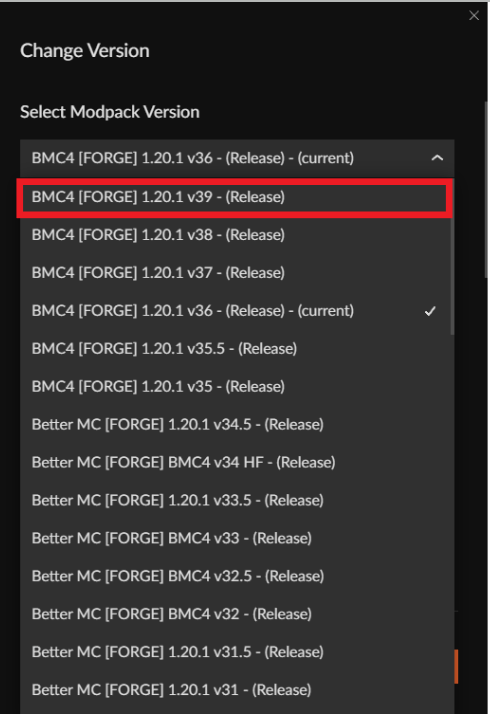
Once installed, you've now updated the modpack on CurseForge!
Modrinth
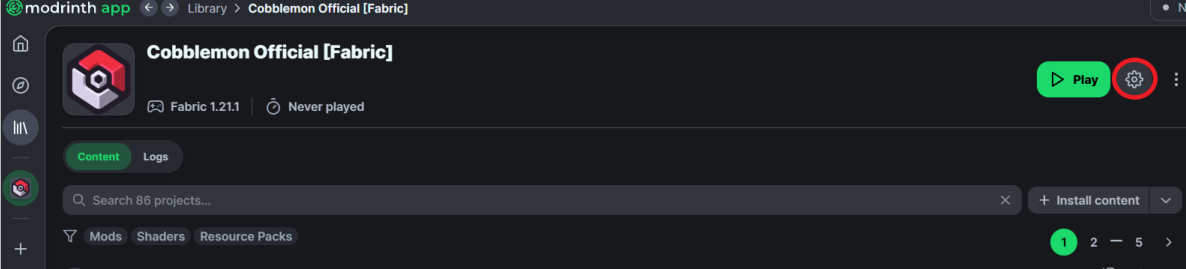
- Open your Modrith app
- Open the "Library" tab and open the desired modpack

- Click on the settings icon in the modpack
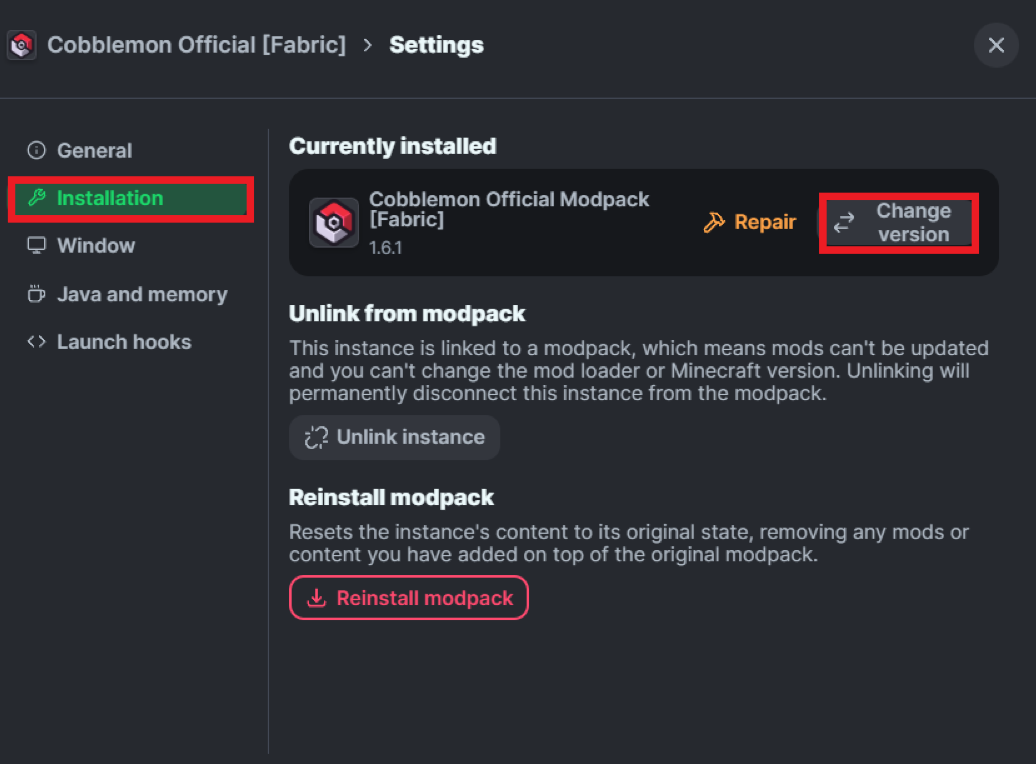
- Open the "Installation" tab and click on "Change version"
- Now, switch to the latest version desired
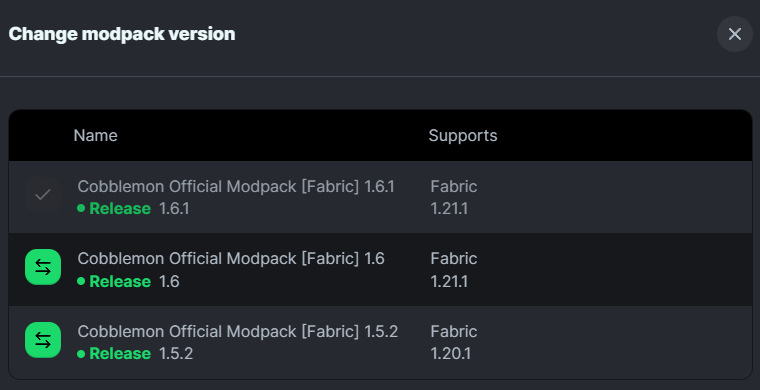
Once done, you've now installed your updated modpack
Feed The Beast
- Open your Feed The Beast app
- Open the "Library" tab and hover over the modpack you'd like to update
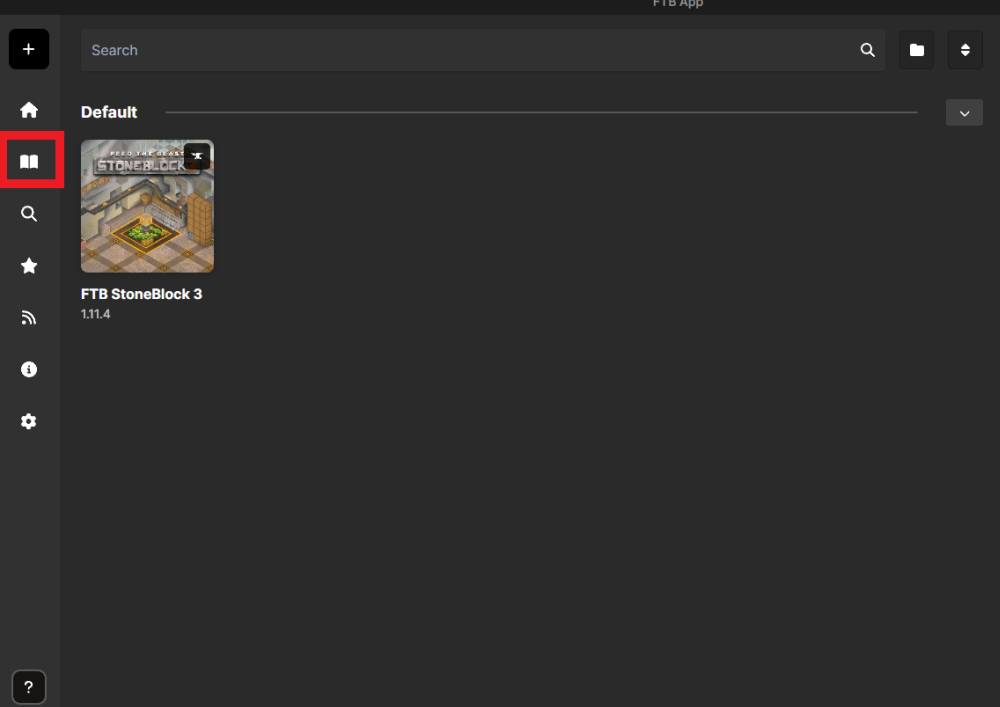
- Click on "Versions"
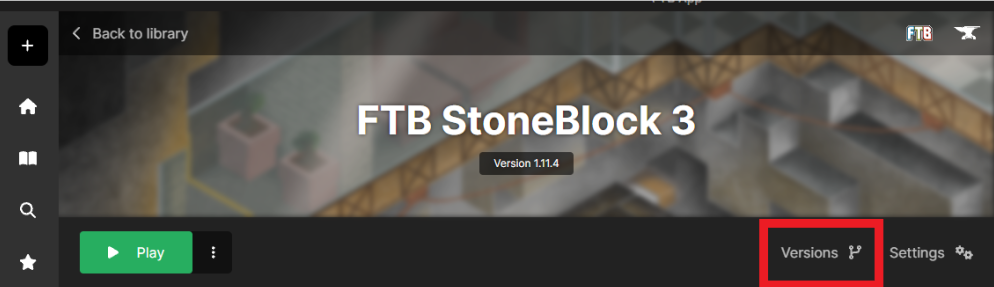
- Choose the correct version you'd like to update to and install
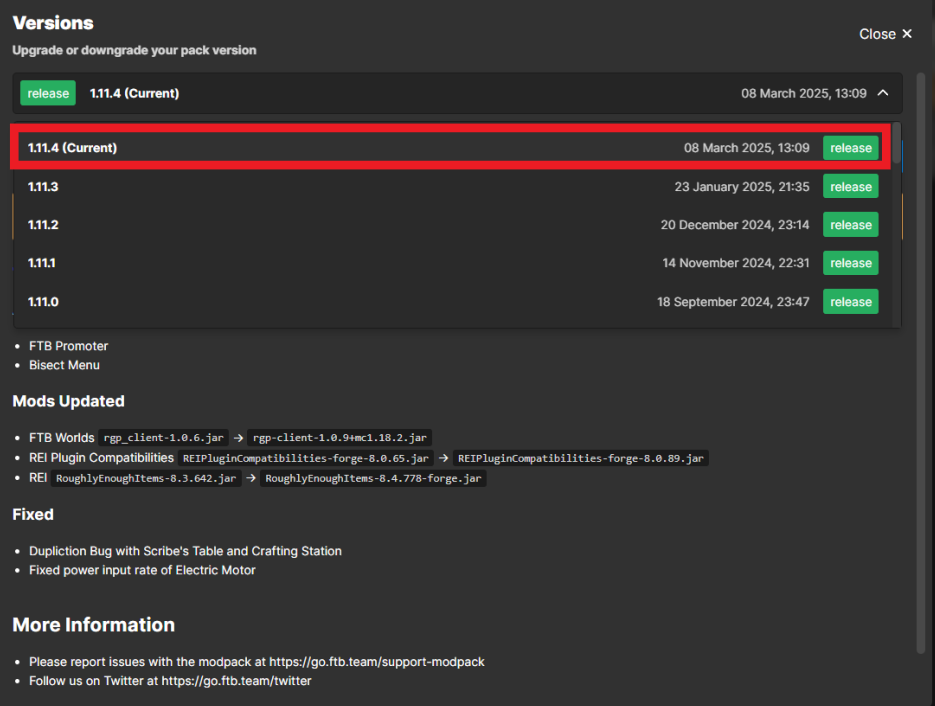
You've now updated the modpack on your Feed The Beast app
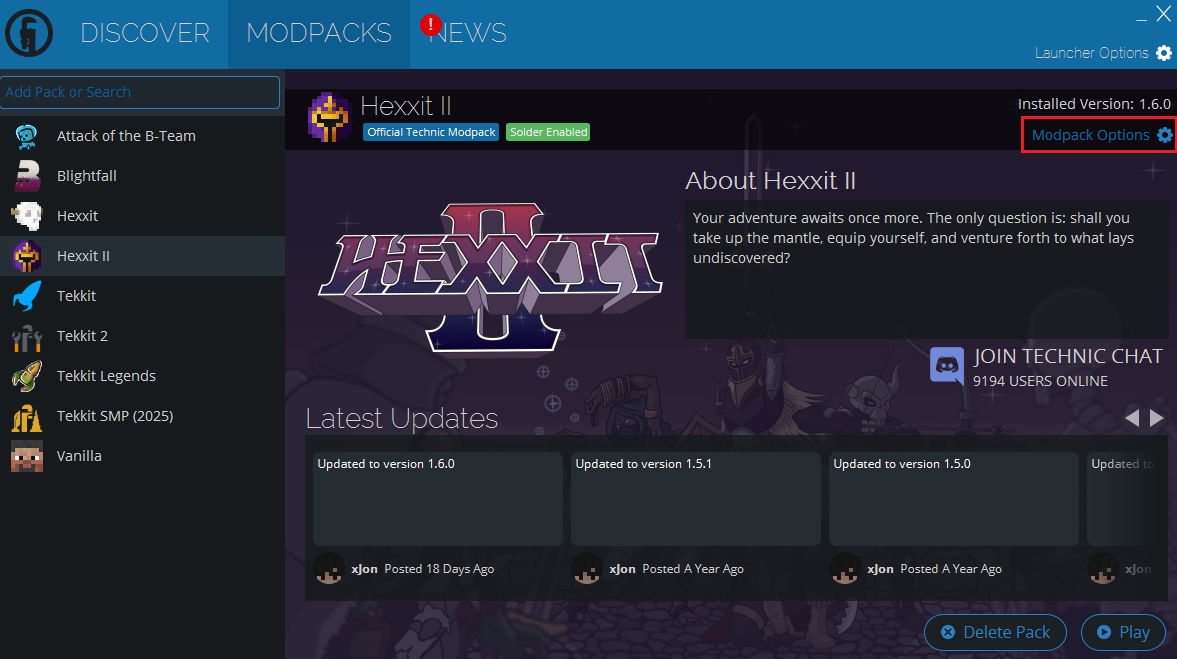
Technic
- Open your Technic Launcher
- Open the "Modpacks" tab
- Click on the "Modpack Options" settings icon
- Now, choose the "Latest version" and hit "Reinstall Pack"
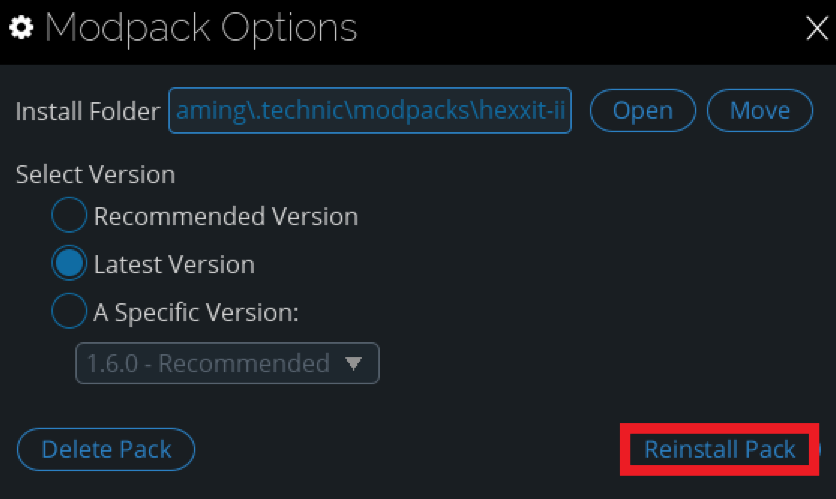
Your mod pack should be on the latest updated server pack now!
Deleting and Adding a Modpack
Make sure to create a backup before deleting any files. Also, make sure you are using the compatible server version with your modpack before installing.
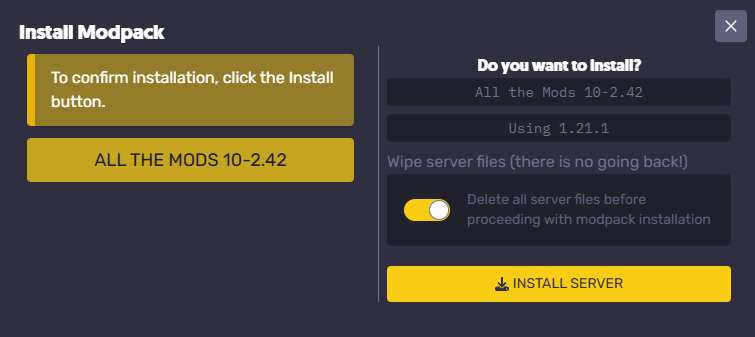
- Open your Apollo Panel
- Open the "Launchpad" tab
- Find the modpack desired and click on "Install"
- Turn on "Delete all server files before proceeding with modpack installation" and click on "Install Server"
Larger modpacks may take some time to install due to the number of plugins and the world files.
If your server isn't starting or you are facing errors, make sure you have installed the correct server version, which can be found on the mod packs website.
Still have questions about updating your Minecraft server's modpack?
Still need some help? Open a ticket with our support team here.
By: Ali A.
Updated on: 06/12/2025
Thank you!